Summit Wagon FWD L4-1795cc 1.8L SOHC (1994)

Control Arm: Service and Repair
Front
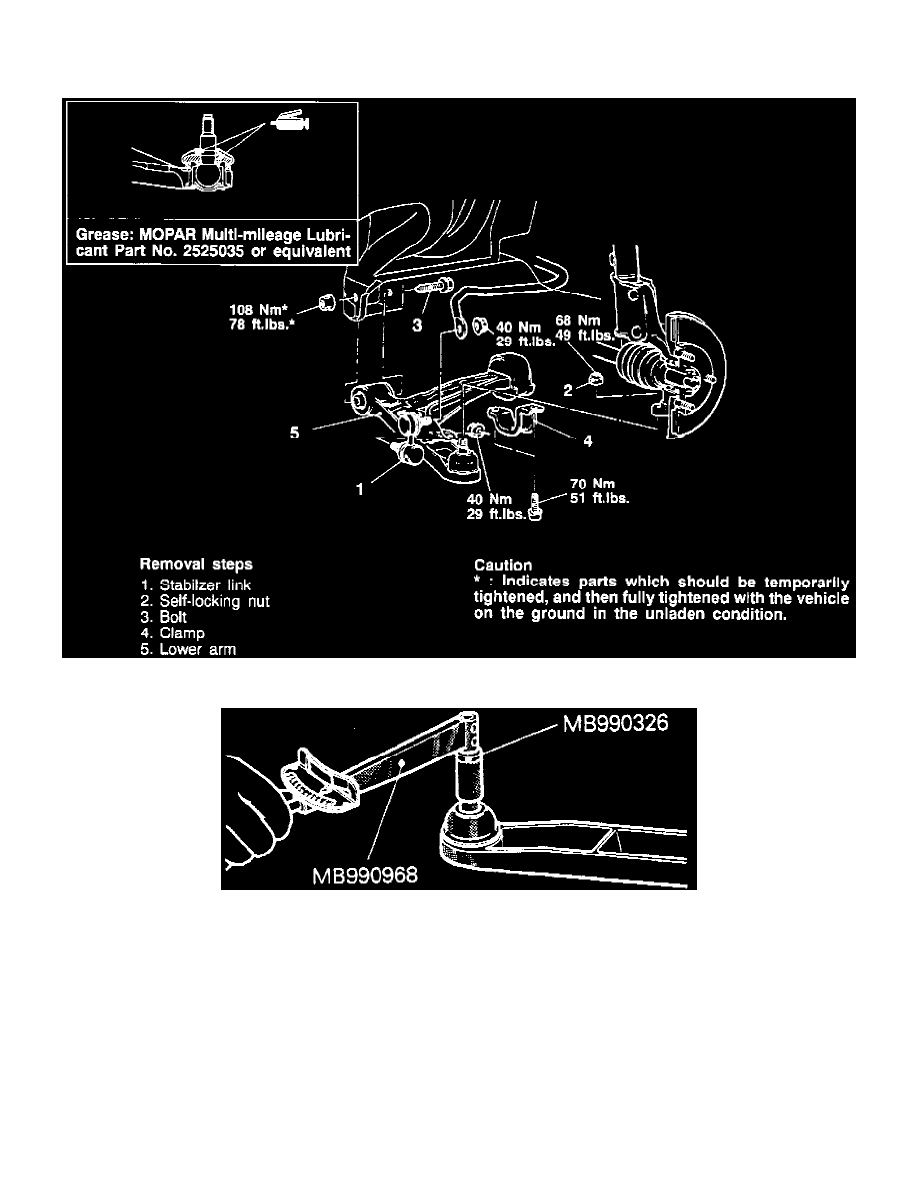
Fig. 11 Lower Arm Removal
Fig. 12 Lower Arm Ball Joint Starting Torque Inspection
CONTROL ARM REPLACE
1. Remove lower arm in sequence as shown, noting following:
a. Using tool No. MB991113, or equivalent, disconnect knuckle from lower arm ball joint. Tie cord of tool to nearby part, then loosen (but do
not remove) nut.
2. Check ball joint starting torque as shown. Starting torque should be 17-78 inch lbs.
3. If not within specifications, replace ball joint.
4. Reverse procedure to install.
