
Summit Wagon FWD L4-1795cc 1.8L SOHC (1994)
Separating Plate
Lower Valve Body
4. Part 10 - Install the special tool, MD998266, to the intermediate plate. Install the separating plate. After securing the lower valve body by the
installation bolts, remove the special tool. Torque lower valve body mounting bolts to 5.0 Nm (3.5 ft.lbs.).
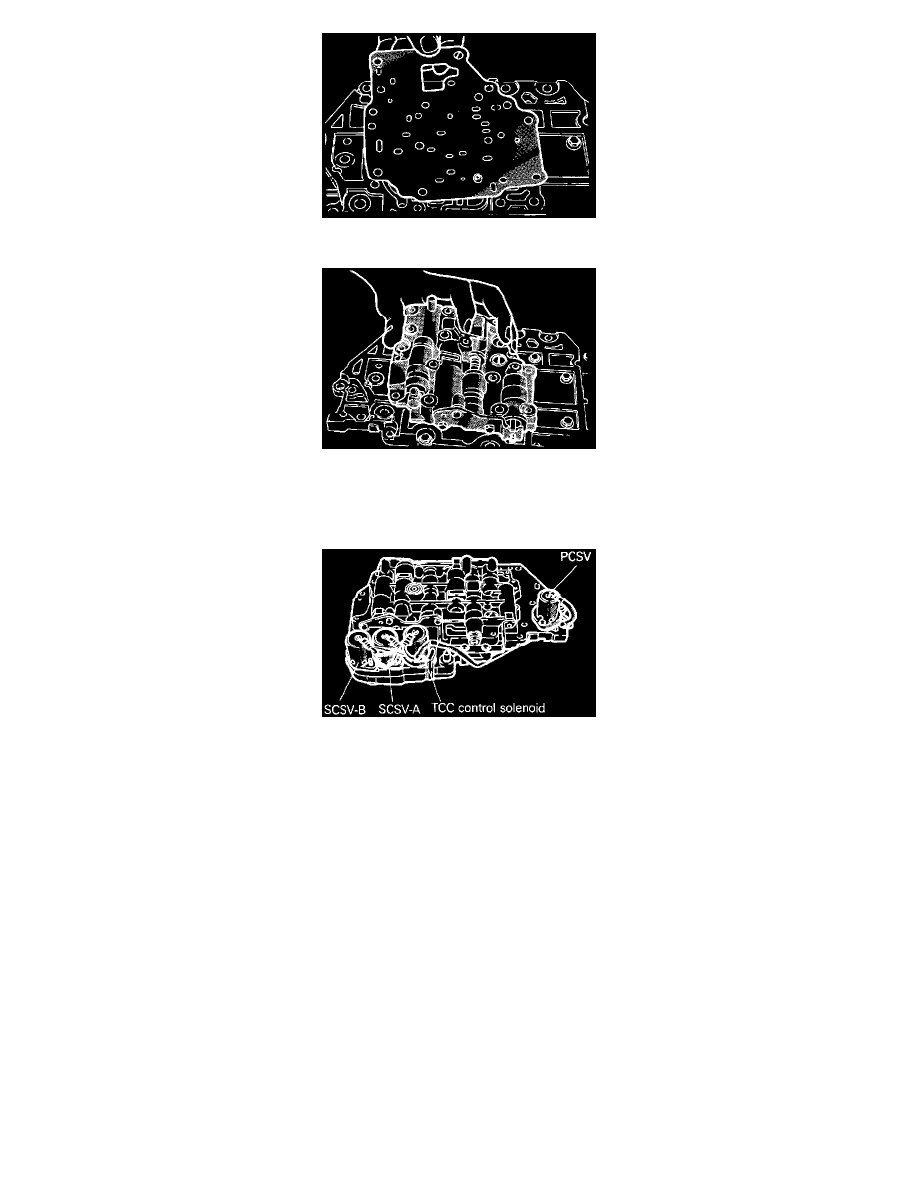
Solenoid Valve
5. Parts 5,4,3,2 - Install each solenoid valve in the position shown. Torque solenoid valve assembly mounting bolts to 5.0 Nm (3.5 ft.lbs.).
6. Check to be sure the O-ring is installed on the upper surface of the valve body.
7. Replace the solenoid valve harness O-ring with a new one.
8. Tilt the solenoid valve harness over from the inner side of the transaxle case, to the harness grommet installation hole, and install the harness
grommet securely.
9. Install the harness grommet so that the lead wire of the solenoid valve harness faces upward.
10. Temporarily install the valve body while inserting the detent pin in the manual valve groove. Then install the oil temperature sensor and holder,
and tighten the bolts to 11 Nm (8.0 ft.lbs.).
11. Install the oil filter.
12. Install a new oil pan gasket and the oil pan.
13. Fill transaxle with the proper amount of ATF.