
Summit Wagon FWD L4-2350cc 2.4L SOHC (1995)
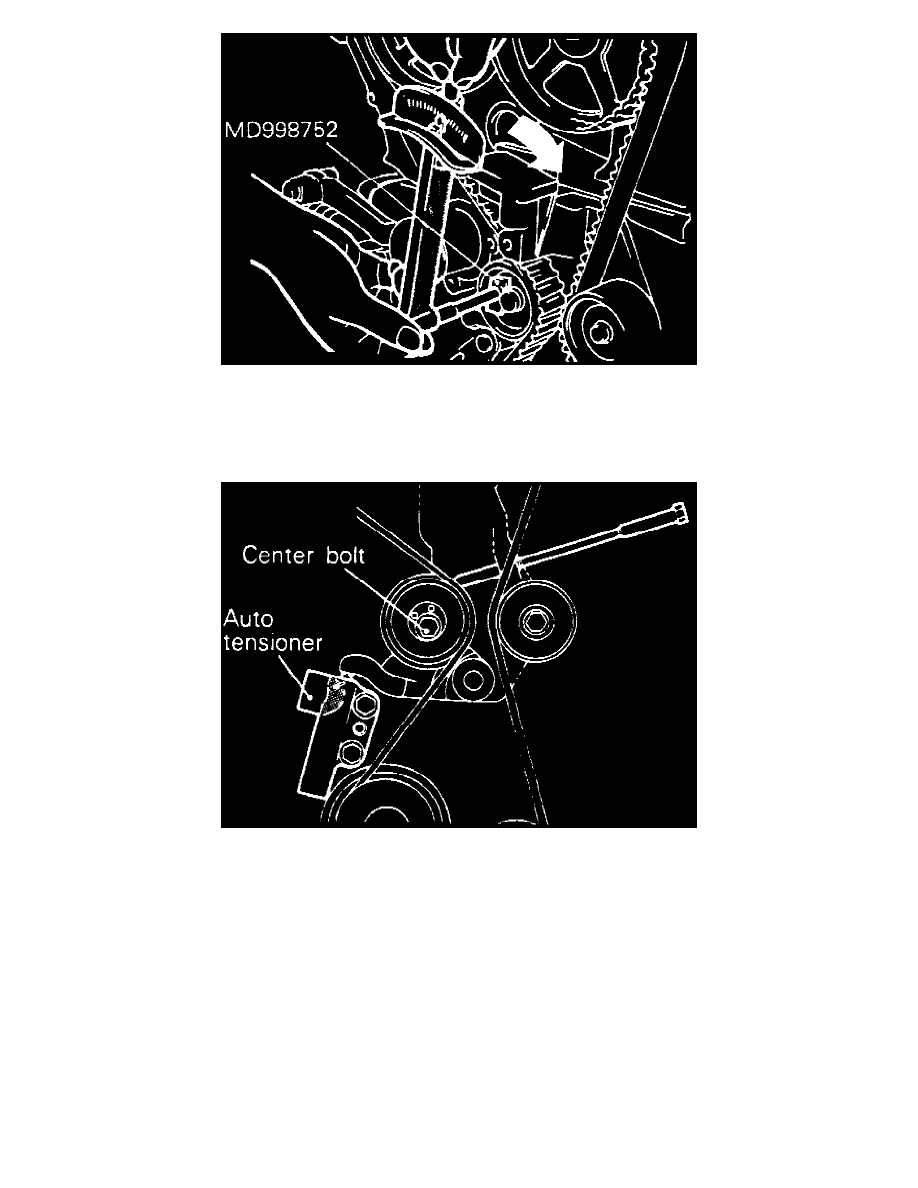
Fig. 38 Timing Belt Tension Adjustment
d. Loosen tensioner pulley center bolt, then attach socket wrench tool No. MD998752, or equivalent, and a torque wrench and apply a torque of
1.88-2.03 ft. lbs., Fig. 38.
e. Holding tensioner pulley with special tool, tighten center bolt to specification.
Fig. 39 Setscrew Tool Installation
f.
Install setscrew tool No. MD998738, or equivalent, into engine left support bracket until its end makes contact with tensioner arm, Fig. 39.
g. Turn setscrew tool to increase pressure on tensioner arm then remove wire from tensioner set holes.
h. Rotate crankshaft two complete turns clockwise and allow to sit for 15 minutes.
i.
After 15 minutes, measure auto tensioner rod protrusion, and verify that it is within 0.15-0.18 inch specification. If not as specified, repeat
steps a through h.
j.
Install rubber plug to timing belt rear cover.