
Talon AWD L4-1997cc 2.0L DOHC Turbo (1991)
Control Arm: Service and Repair
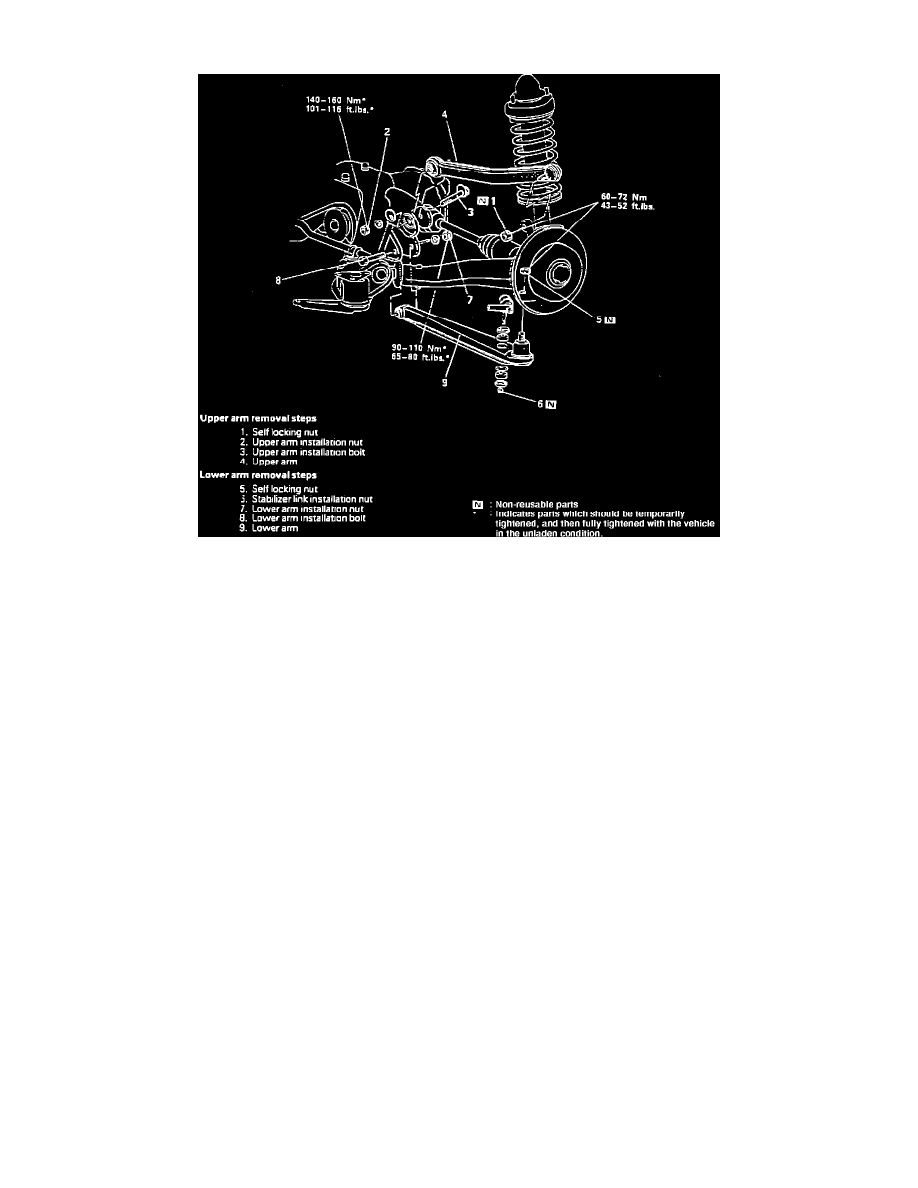
Fig. 9 Replacing Upper And Lower Arm
NOTE: Remove upper and lower arm in numbered sequence, noting the following:
1. Loosen, but do not remove self-locking nut
2. Press fit lower arm bushing until outer edge is flush with lower arm edge.
3. Reverse procedure to install.