
Talon AWD L4-1997cc 2.0L DOHC Turbo VIN F SMFI (1997)
Parking Brake Lever: Adjustments
1.
Remove the inner compartment mat of the floor console.
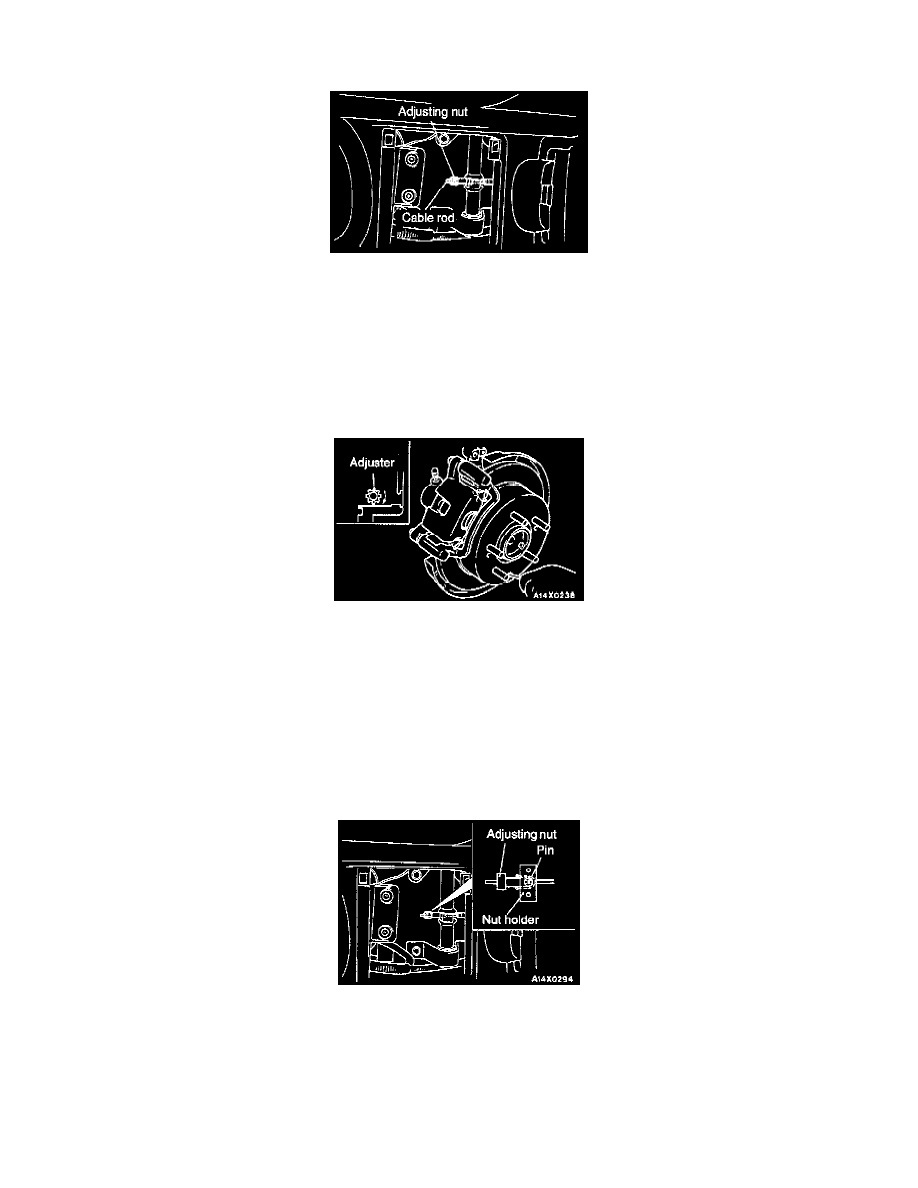
Loosening Adjusting Nut
2.
Loosen the adjusting nut to the end of the cable rod, thus freeing the parking brake cable.
DRUM BRAKE
a. With the engine idling, forcefully depress the brake pedal five or six times and confirm that the pedal stroke stops changing.
NOTE: If the pedal stroke stops changing, the automatic-adjustment mechanism is functioning normally, and the clearance between the shoe and
drum is correct.
Turning Adjuster
DRUM-IN-DISC BRAKE
a. Remove the adjustment hole plug, and then use a flat-tip screwdriver to turn the adjuster in the direction of the arrow (the direction which expands
the shoe) so that the disc will not rotate.
b. Return the adjuster five notches in the direction opposite to the direction of the arrow.
3.
Turn the adjusting nut to adjust the parking brake lever stroke to within the standard value range.
CAUTION: If the number of brake lever notches engaged is less than the standard value, the cable has been pulled excessively. Be sure to adjust it to
within the standard value.
Turning Adjusting Nut
4.
After making the adjustment, check to be sure that there is no play between the adjusting nut and the pin. Also check that the adjusting nut is
securely held at the nut holder.
5.
After adjusting the lever stroke, jack up the rear of the vehicle.
6.
With the parking brake lever in the released position, turn the rear wheel to confirm that the rear brakes are not dragging.