Talon AWD L4-1997cc 2.0L DOHC Turbo VIN F SMFI (1997)

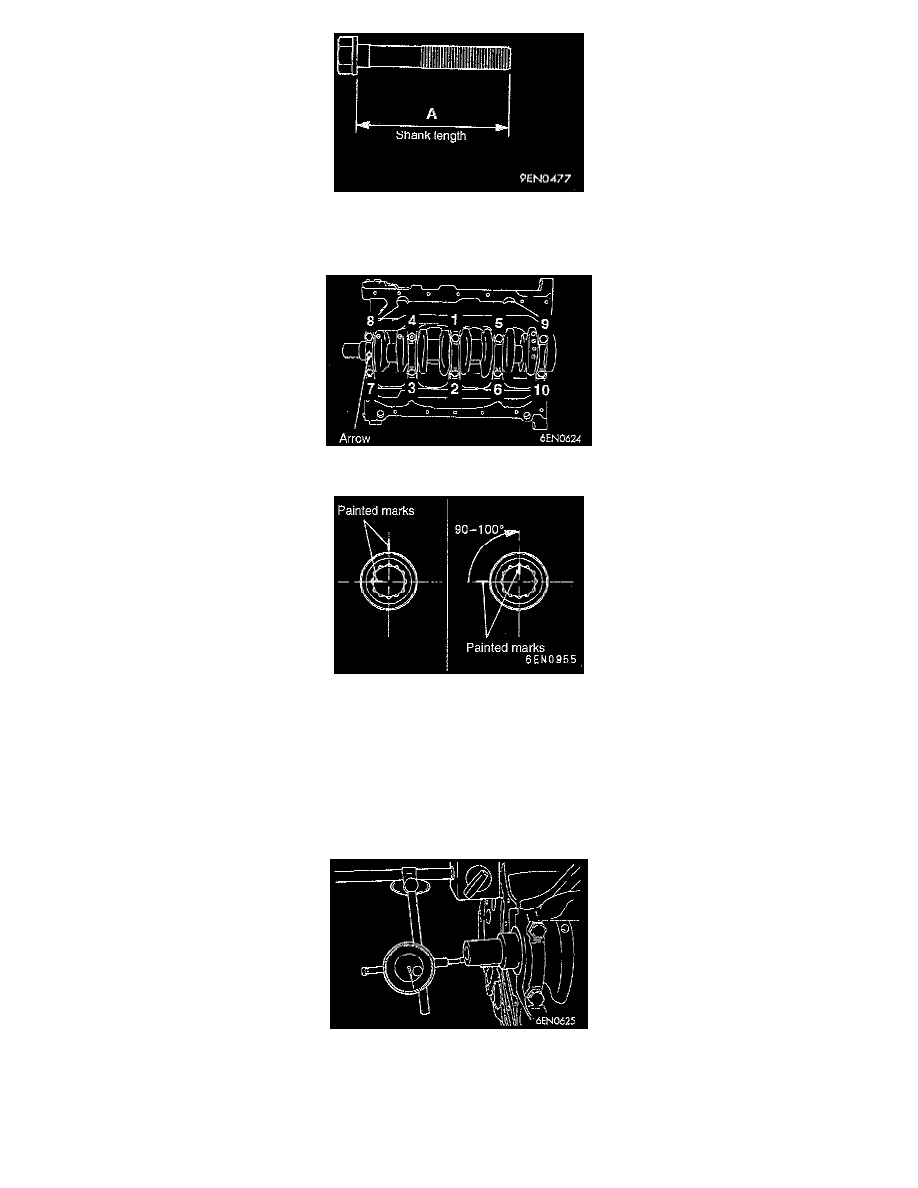
5. When installing the bearing cap bolts, check that the shank length of each bolt meets the limit (A): max. 71.1 mm (2.79 inch). If the limit (A):
max. 71.1 mm (2.79 inch) is exceeded, replace the bolt.
6. Apply engine oil to the bolt thread and contact surface.
7. Tighten the bolts to the specified torque 25 Nm (18 ft. lbs.) according to the tightening sequence.
8. Mark the bolt head by paint.
CAUTION:
a. If the tightening angle is less than 90°, the bolt will be loosened. Be careful to observe the tightening angle.
b. If the tightening angle is more than 100°, remove the bolt and repeat the procedure from step 5.
9. Use the painted marks on the bolts as a reference, make a painted mark at the base of the washer in a position 90 - 100° in the direction of
tightening from the painted mark on the bolt.
10. Tighten the bearing cap bolts 90 - 100° in the correct tightening sequence, and then check that the painted marks are aligned.
11. After installing the bearing cap, make sure that the crankshaft turns smoothly and the end play is correct. If the end play exceeds 0.05 - 0.18 mm
(0.0020 - 0.0071 inch), replace No.3 crankshaft bearing. The wear limit is 0.25 mm (0.0098 inch).
