
Talon AWD L4-1997cc 2.0L DOHC Turbo VIN F SMFI (1997)
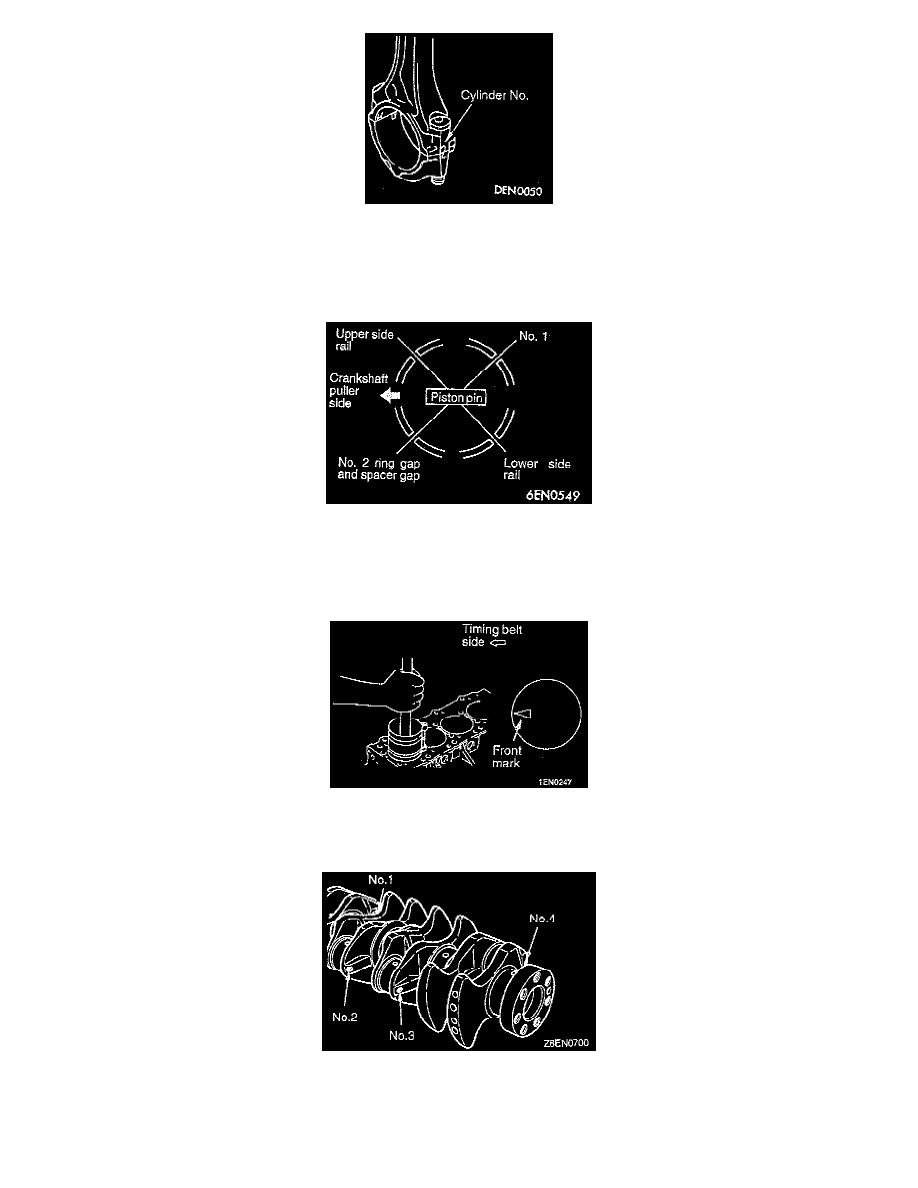
2. Mark the large end of the connecting rod with the cylinder number for further reassembly.
INSTALLATION
1. Follow the removal procedure in reverse order, noting the following.
2. Coat a large amount of engine oil on the circumference of the piston, piston ring, and oil ring.
3. Arrange the piston ring and oil ring gaps (side rail and spacer) as shown in the figure.
4. Rotate crankshaft so that crank pin is on center of cylinder bore.
5. Use suitable thread protectors on connecting rod bolts before inserting piston and connecting rod assembly into cylinder block. Do not nick crank
pin.
6. Use a suitable piston ring compressor tool to install piston and connecting rod assembly into cylinder block.
CAUTION: Insert the front mark (arrow) on the top of the piston so it faces the engine front (timing belt side).
7. When replacing the bearing, choose a bearing as follows.