
Talon AWD L4-1997cc 2.0L DOHC Turbo VIN F SMFI (1997)
9. Check if the thrust clearance is 0.10 - 0.25 mm (0.0039 - 0.0098 inch) in the connecting rod big end is correct. The wear limit is 0.4 mm (0.016
inch).
NOTE: Remove the cylinder head or spark plug to loosen the connecting rod nuts.
10. Since the connecting rod bolts and nuts are torqued using a new procedure, examine them BEFORE reuse. If the bolt threads are "necked down",
replace the bolts. Necking can be checked by running a nut with fingers to the full length of the bolt's thread. If the nut does not run down
smoothly, replace the bolt.
11. Before installing the nuts, the threads should be oiled with engine oil.
12. Install both nuts on each bolt finger tight, then alternately torque each nut to assemble the cap properly.
13. Tighten the nuts to 20 Nm (14.5 ft. lbs.).
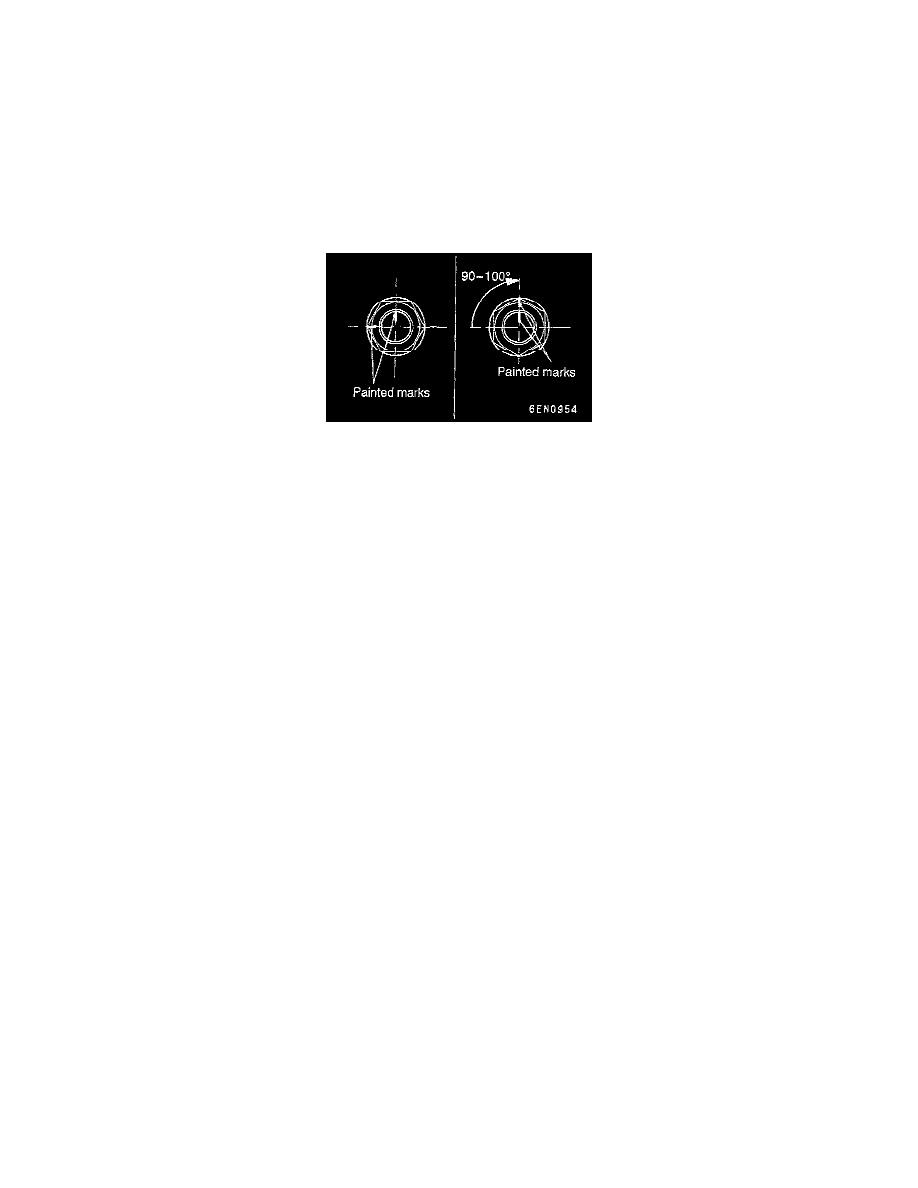
14. Paint a mark on the nut head.
15. Use the painted mark as a reference to paint a mark on the bolt in a position 90° - 100° in the tightening direction of the nut.
CAUTION:
a. If the tightening angle is less than 90°, the bolt will be loosened. Be careful to observe the tightening angle.
b. If the tightening angle is more than 100°, remove the nut and repeat the procedure from step 10.
16. Tighten the nuts 90° - 100° and then check that the painted mark on the nuts is aligned with that on the bolts.