
Talon AWD L4-1997cc 2.0L DOHC Turbo VIN F SMFI (1997)
INSTALLATION
1. Follow the removal procedure in reverse order, noting the following for installation.
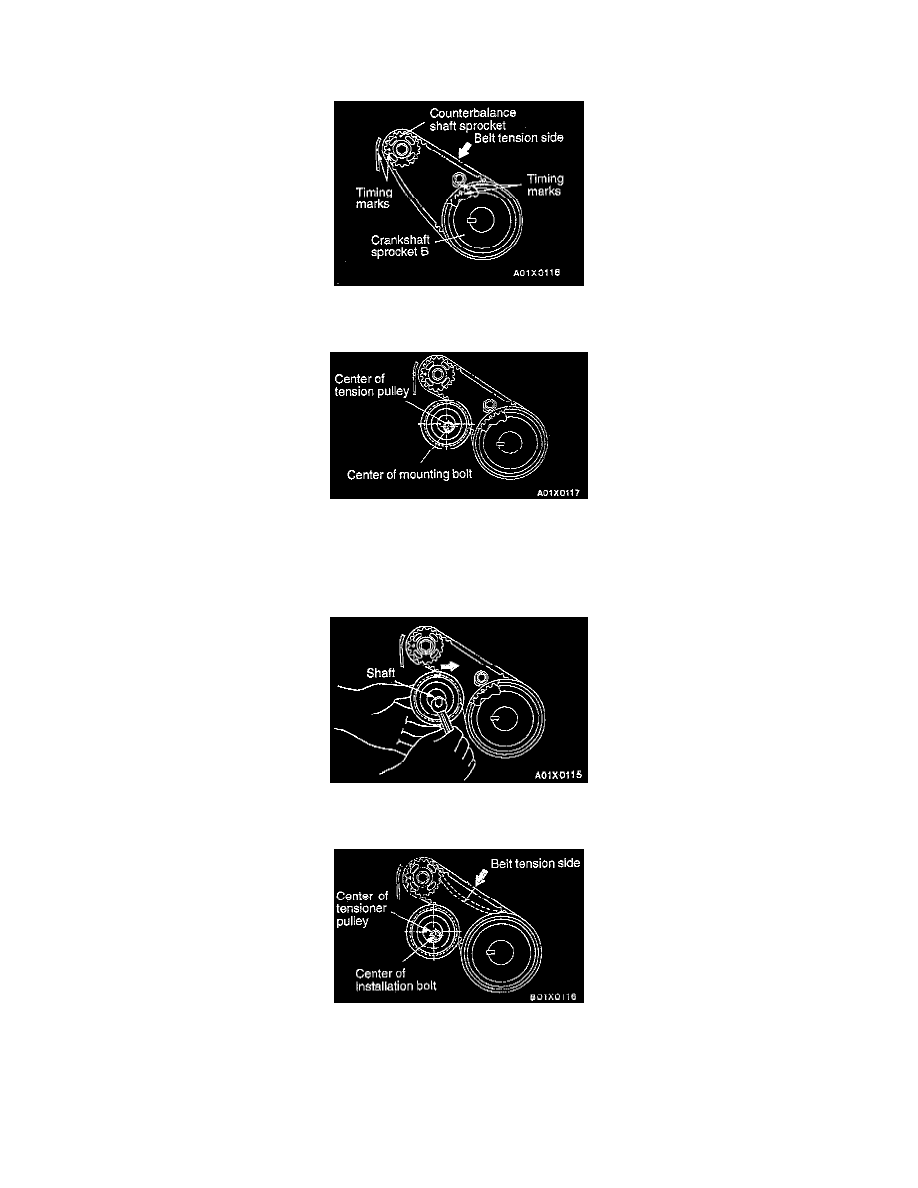
2. Ensure that crankshaft sprocket "B" timing mark and the counterbalance shaft sprocket timing mark are aligned.
3. Fit timing belt "B" over crankshaft sprocket "B" and the silent shaft sprocket. Ensure that there is no slack in the belt.
4. Temporarily fix the timing belt "B" tensioner such that the center of the tensioner pulley is to the left and above the center of the installation bolt,
and temporarily attach the tensioner pulley so that the flange is toward the front of the engine.
CAUTION: When tightening the bolt, ensure that the tensioner pulley shaft does not rotate with the bolt. Allowing it to rotate with the bolt can
cause excessive tension on the belt.
5. Holding the timing belt "B" tensioner up with your finger in the direction of the arrow, place pressure on the timing belt so that the tension side of
the belt is taut. Now tighten the bolt to fix the tensioner.
6. Press the belt at the shown point by a finger to check belt tension. If not within 5 - 7 mm (0.20 - 0.28 inch), adjust.