
Talon FWD L4-1997cc Brake Caliper Removal and Installation
Brake Caliper: Service and Repair
Disassembly and Assembly
Produced From May 1, 1989
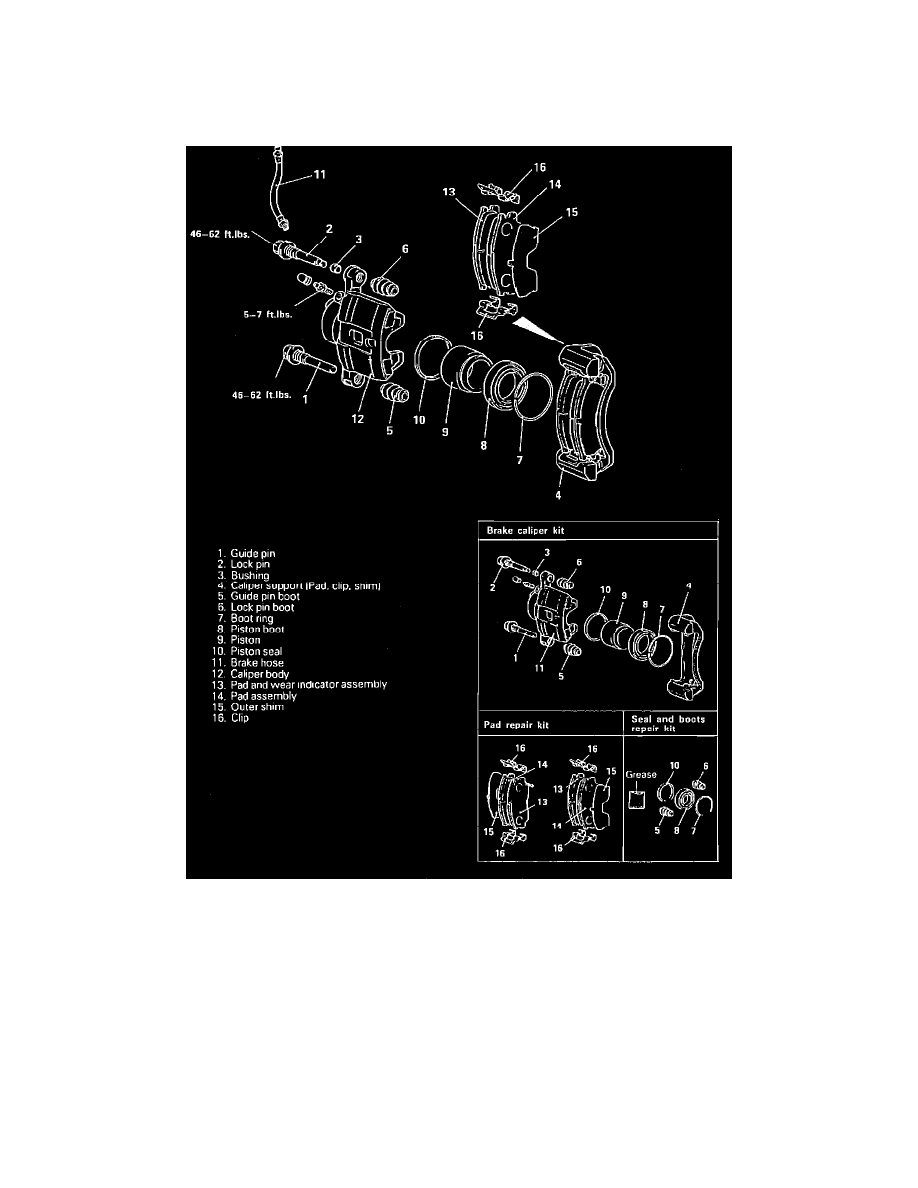
Fig. 2 MR34V, MR44V & MR46V Dual Pin Floating Caliper Disc Brake Assembly
1.
Remove caliper assembly, refer to Removal/Installation.
2.
Remove lock pin, bushing, caliper support, guide pin and lock pin boots.
3.
Remove boot ring using a suitable flat blade screwdriver.
4.
Position a shop towel in caliper body, then apply compressed air through the caliper inlet hole, to remove piston and dust boot. Apply air gently.
5.
Remove piston seal using finger tips. Do not use screwdriver or other tool to prevent damage to inner cylinder.
6.
Reverse procedure to assemble, noting the following:
a. Inspect cylinder and piston for wear or damage and/or corrosion. Inspect caliper body and sleeve for wear.
b. Apply suitable brake fluid to inner cylinder, then install piston seal into cylinder groove. Do not wipe grease from seal and boot repair kit
on piston seal.
c. Apply suitable brake fluid to piston and insert into cylinder without twisting.
d. Fill piston edge with grease from seal and boot repair kit, then install piston boot.
e. Lubricate sliding surface of lock pin and guide pin boots, caliper support and bushing with grease from seal and boot repair kit.
f.
Install guide and lock pins with their head marks matched with identification marks on caliper body.