
Talon FWD L4-1997cc 2.0L DOHC (1990)
equivalent, press bearings in until they are flush with caliper body. Insert bearings so that depressed marks on bearings face outward.
b. Coat piston seal and inside surface of cylinder with suitable brake fluid, then install piston seal into cylinder.
c. Gently install piston assembly into cylinder by hand, being careful not to twist piston assembly.
d. Apply grease supplied with seal and boot kit to dust boot, then fit dust boot groove in caliper body.
e. Coat spindle seal with brake fluid, then install spring washers on spindle as shown.
f.
Coat contact surface of caliper body and spring washers with grease supplied in seal and boot kit, then carefully screw spindle into caliper
body until it rotates freely.
g. Using connecting link installer MB990666 or equivalent, compress spring washers and screw spindle into caliper.
h. Position connecting link and return spring onto spindle and install lever cap to parking lever assembly, then install assembly into caliper body.
Hold parking lever assembly with retaining ring.
i.
Apply grease supplied in seal and boot kit to lever cap and lip, then install lever cap to caliper body.
j.
Coat contact point of caliper support guide pin and inside of lock pin boot with grease supplied in seal and boot kit.
k. Adjust parking brake cable.
AD30P & AD35P
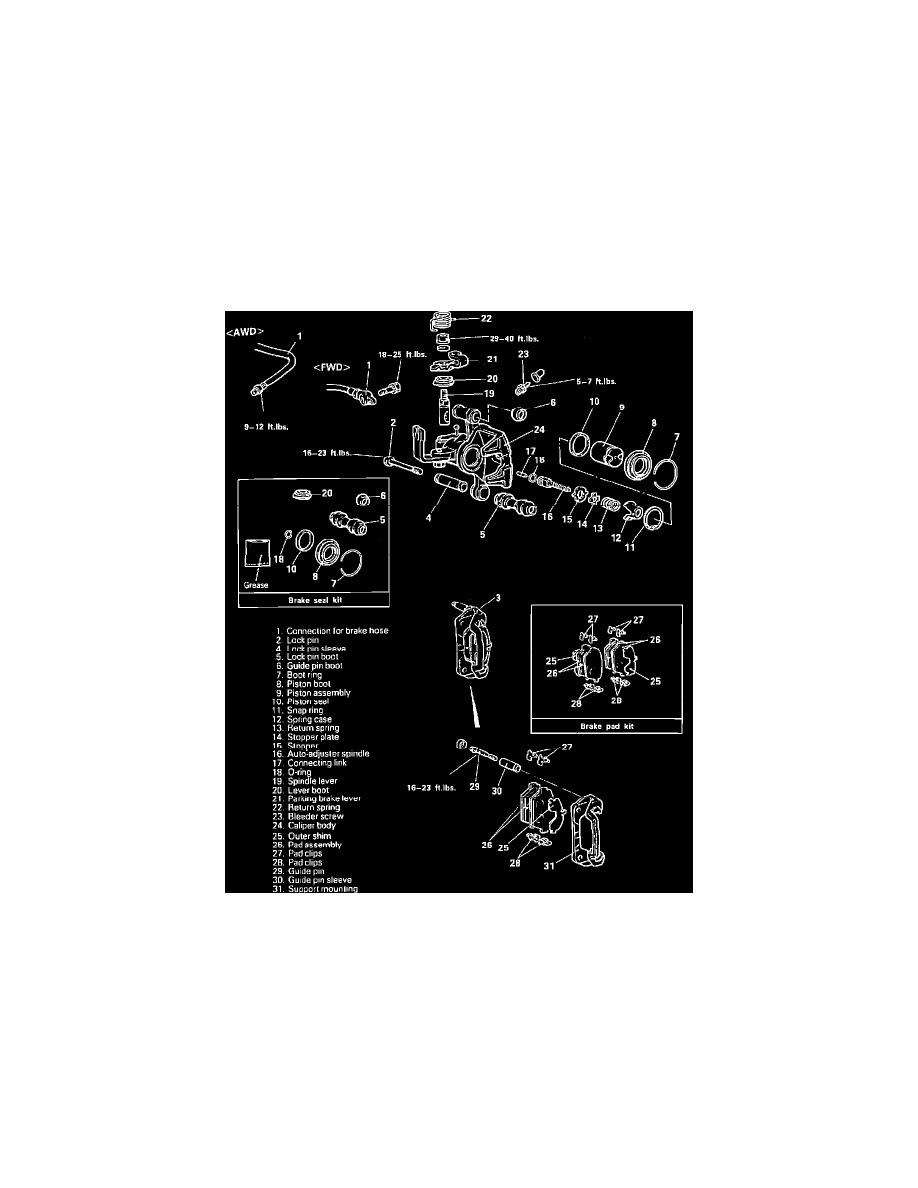
Fig. 2 AD30P & AD35P Dual Pin Floating Caliper Disc Brake Assembly
1.
Remove caliper assembly, refer to Removal/Installation.
2.
Remove lock pin sleeve, lock pin boot, guide pin boot, boot ring and piston boot.
3.
Remove piston assembly using piston driver MB990652 or equivalent to twist piston out of caliper body.
4.
Remove piston seal using finger tips. Do not use flat blade screwdriver or other tool to prevent damage to inner cylinder.