
Talon FWD L4-1997cc 2.0L DOHC (1990)
23.
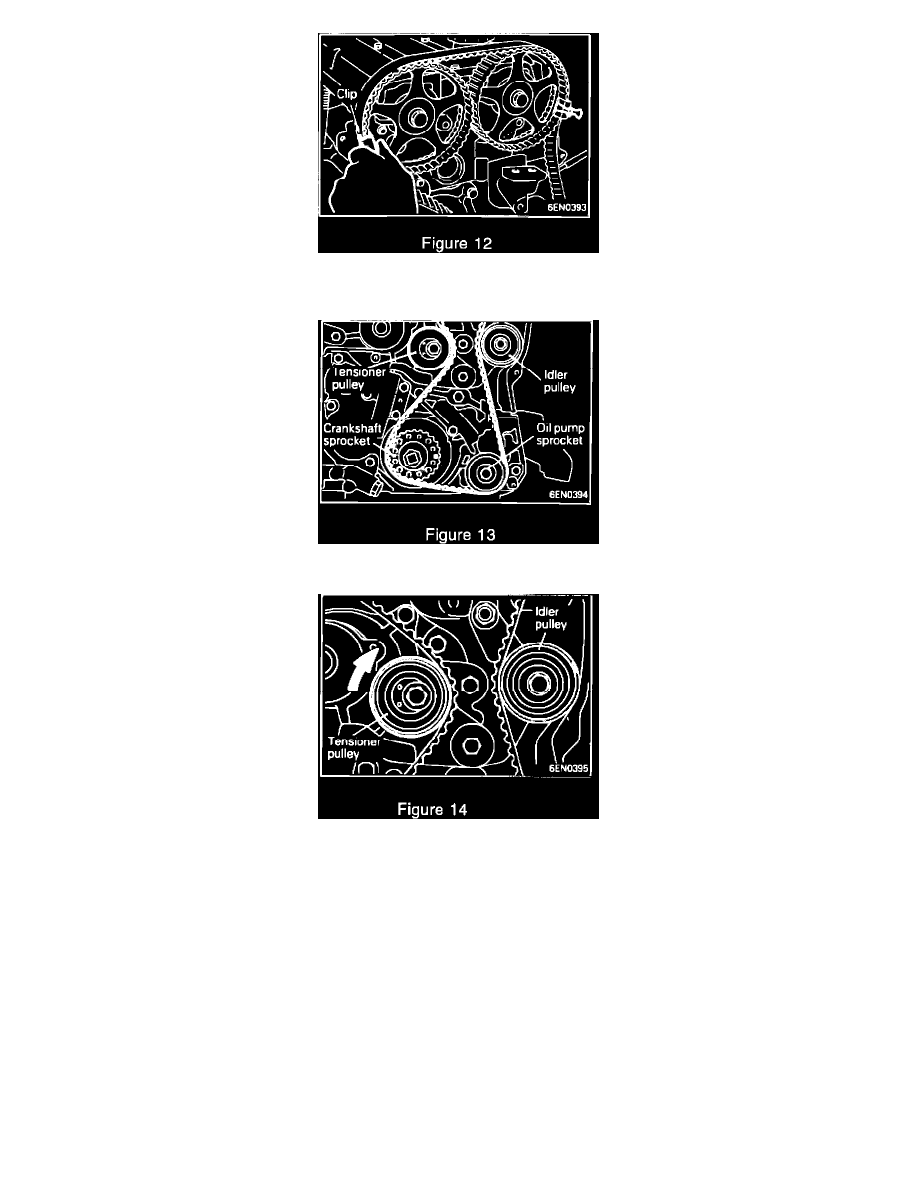
Use a wrench to maintain alignment of the two camshafts and install the timing belt over the exhaust side sprocket, aligning the timing marks as
shown in Figure 2 and clamp the belt in position with a clip (Figures 11 & 12).
24.
Position the timing belt around the idler pulley, oil pump sprocket, crankshaft sprocket and tensioner pulley (in that order) as shown in Figure 13.
25.
Rotate the tensioner pulley in a clockwise direction and tighten the center bolt (Figure 14).
NOTE:
MAKE SURE ALL TIMING BELT TEETH ARE ENGAGED WITH THE TEETH ON THE CAMSHAFTS, OIL PUMP, AND CRANKSHAFT
SPROCKETS AND THAT ALL TIMING MARKS ARE STILL PROPERLY ALIGNED.
**NOTE:
REQUIREMENT TO INSPECT OIL PUMP SPROCKET NUT ON 1990-1991 MODEL YEAR VEHICLES DELETED.**
26.
2.0L ENGINE ONLY: Remove the screwdriver from the balance shaft hole and install the plug.
27.
Remove the two clips holding the belt to the camshaft sprockets.
28.
Rotate the crankshaft a 1/4 turn counterclockwise, then rotate it clockwise until the timing marks are aligned again. Crankshaft position should still
be at the No. 1 cylinder TDC position of the compression stroke.
NOTE:
MAKE SURE THAT ALL OF THE TIMING MARKS ARE STILL ALIGNED.