
Talon FWD L4-1997cc 2.0L DOHC Turbo (1995)
NOTE:
Use care to prevent scratching the fascia.
6.
Disconnect the two headlamp assembly wiring connectors. The hole cover must be removed to disconnect the side marker light connector.
NOTE:
On vehicles equipped with the 2.0L turbocharged engine and automatic transmission, the bottom connector should be disconnected after
headlamp removal.
7.
Slide the headlamp assembly outboard until the tab on the bottom is under the unsupported fascia section. Depress the fascia to clear the tab and
remove the headlamp assembly.
8.
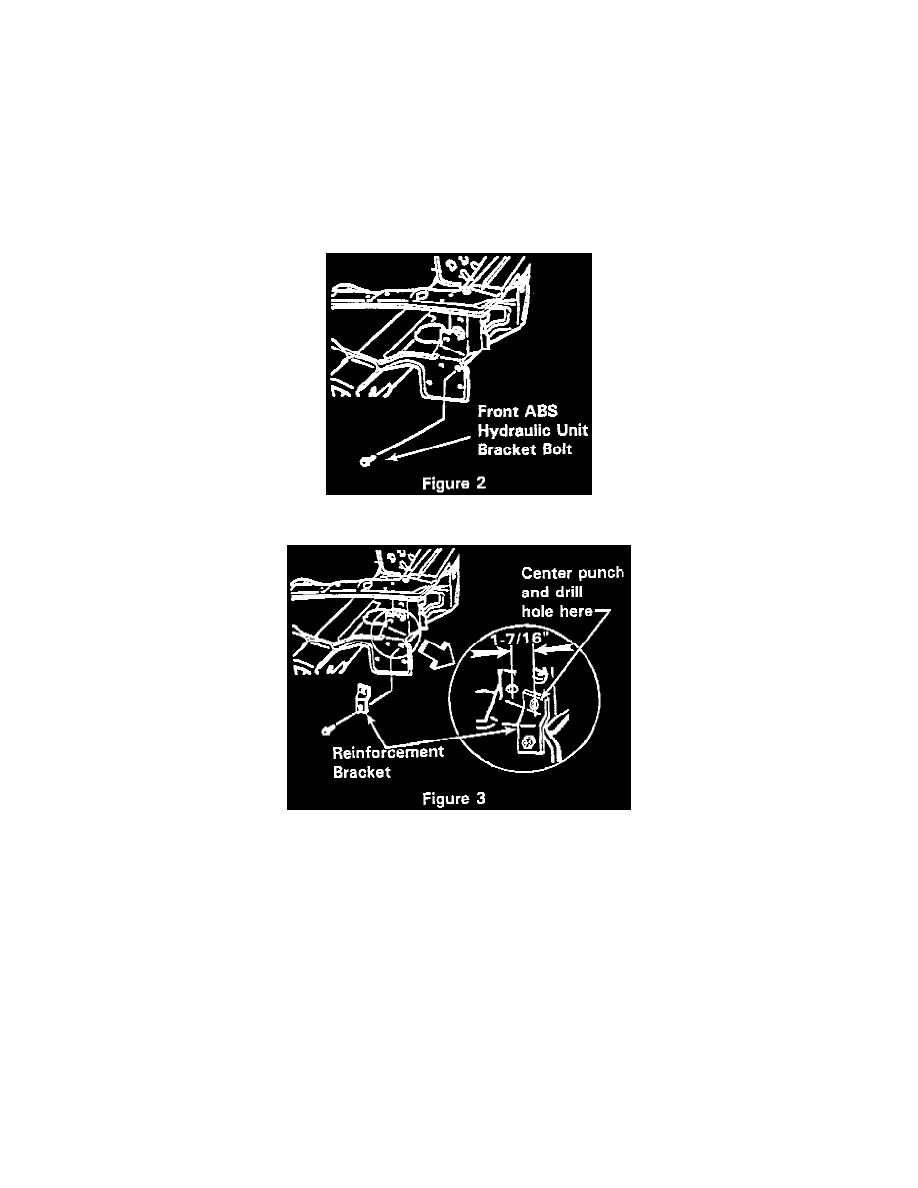
Remove the front ABS hydraulic unit bracket bolt (Figure 2).
9.
Position the upper hole in the provided reinforcement bracket 1-7/16" (36 mm) from the headlamp attaching hole in the headlamp support panel.
Align the lower bracket hole with the front ABS hydraulic unit bolt hole. Insert the provided bolt in the lower bracket hole and tighten to 120
in-lbs (14 N.m) (Figure 3).
10.
Center punch and drill a 5/16" (8 mm) hole through the upper bracket hole and through the headlamp support panel.
NOTE:
Tape the drill bit about 1/2" from the end to prevent contact with the brake lines.
11.
Remove any burrs and use primer, Mopar PN 4443636 or equivalent, to cover the edges of the hole.