
Talon FWD L4-1997cc 2.0L DOHC Turbo (1995)
3.
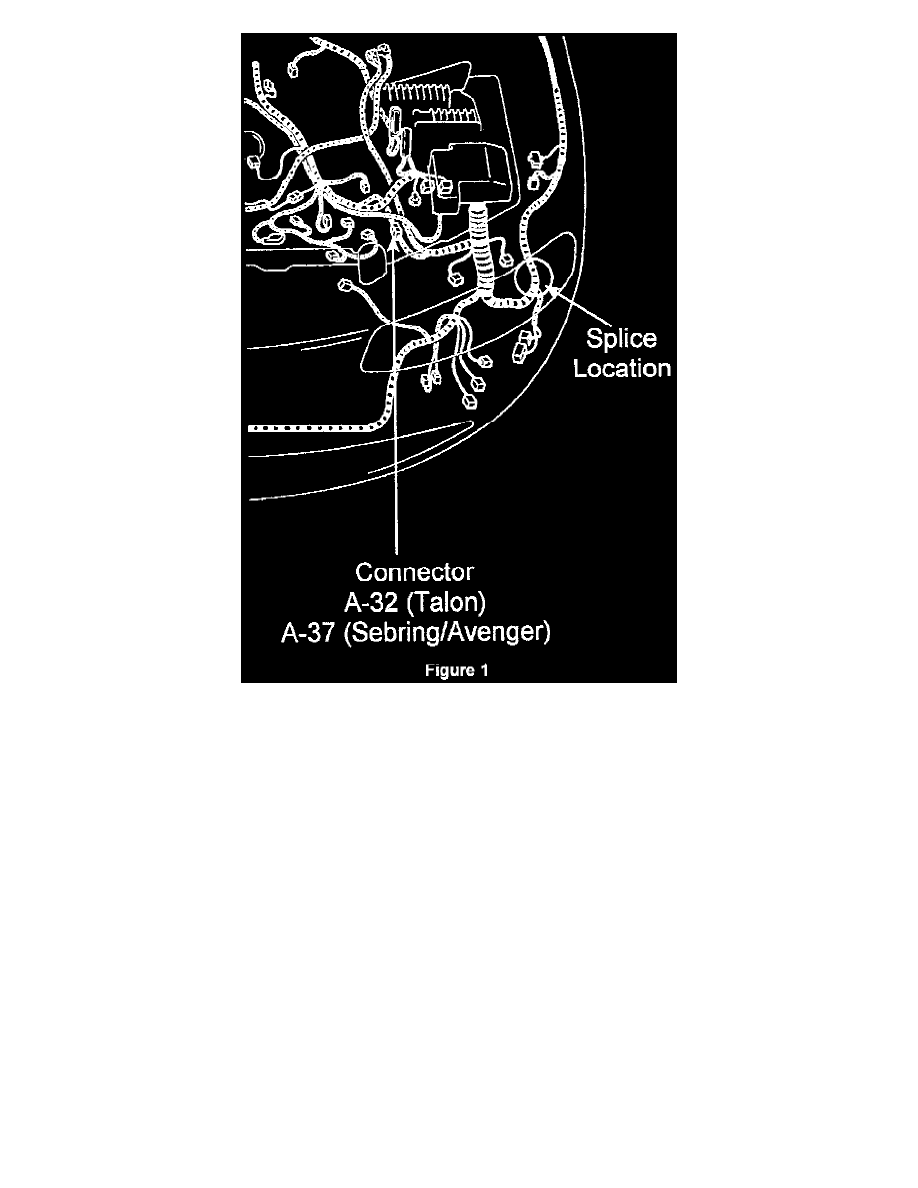
Locate the A-32 connector for Talon models or A-37 connector for Avenger/Sebring models (Figure 1). The connector is a 12 way with a black
insulator.
4.
Disconnect the connector and carefully inspect the male and female terminals for any corrosion.
5.
If corrosion is found, cut the connector from the harness and splice the wires together as listed in step number 6. If no corrosion is found, proceed
to the splice repair in step number 7.
6.
Remove one inch of insulation from each wire end and place a piece of heat shrink tubing, P/N 4778570, over each wire. Twist the same color
wires together and solder each splice with rosin core solder. Center the heat shrink tubing over the repaired area, and heat until the tubing is tightly
sealed and sealant flows from each end.
7.
Remove the two bolts that hold the left corner of the upper fascia to the body. Move the fascia outward to provide better access to the splices.
8.
If the vehicle is ABS equipped, remove the shield from bottom of the control unit.