
Talon FWD L4-1997cc 20L DOHC VIN Y SMFI (1997): MIL ON, DTC #3A Set
1.
Cut the wiring connector from the harness just behind the break.
2.
Remove 1 inch of insulation from the harness wires and connector wires.
3.
Slip a piece of heat shrink tubing p/n 04778570 over one side of each wire. Make sure the tubing is long enough to cover and seal each splice
joint.
4.
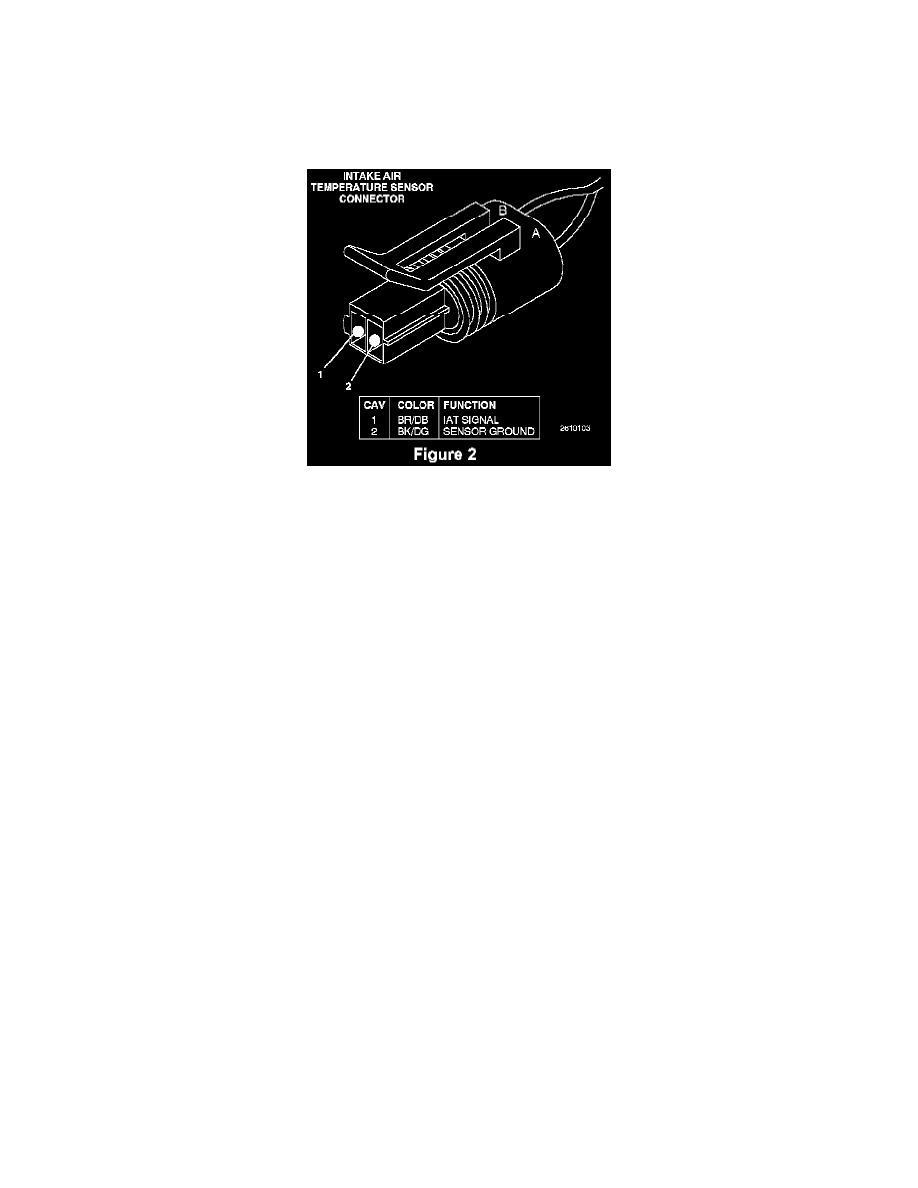
Spread the strands of wire on each end and push the ends together. Make sure to attach the BK/DG wire to terminal 2 (A) and the BR/DB wire to
terminal 1(B) (Figure 2).
5.
Twist the wires together on each splice and solder the connections with rosin core solder.
6.
Center the heat shrink tubing over each splice and heat the joints with a heat gun until the tubing is tightly sealed and sealant flows from each end
of the tubing.
7.
Using electrical tape, wrap the wires from below the splice to the connector.
8.
Route the harness under the vacuum hose and connect it to the intake air temperature sensor.
POLICY: Reimbursable within the provisions of the warranty.
TIME ALLOWANCE:
Labor Operation No:
08-94-TF-90
0.4 Hrs.
FAILURE CODE:
ML - Malfunction Indicator Lamp On