
Talon FWD L4-1997cc 2.0L DOHC VIN Y SMFI (1997)
3.
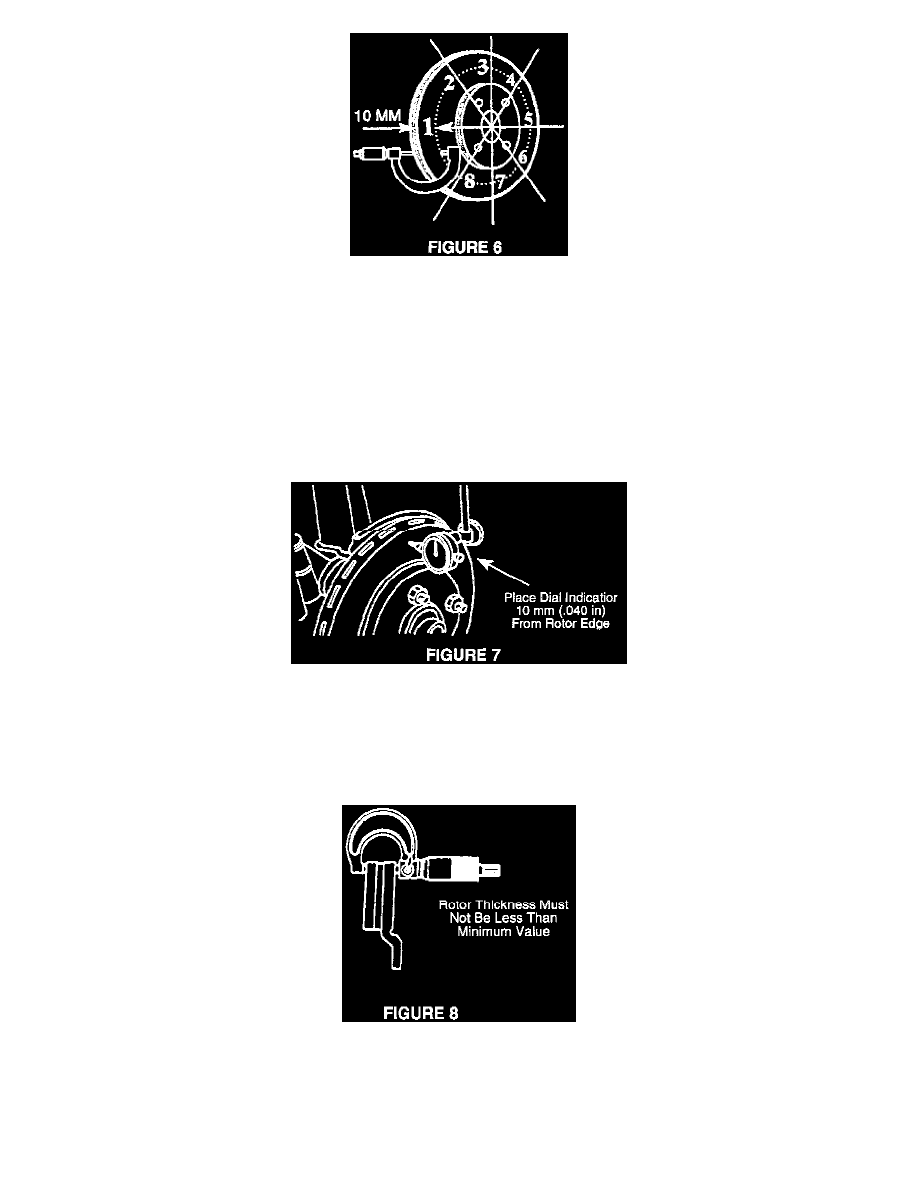
Draw a circle on the rotor that is approximately 10 mm (0.4 in) from the outer circumference with a waterproof marker by bringing the pen in
contact with the rotor and rotating the rotor on the hub. Divide the circle into 8 equal parts (Figure 6).
4.
Using a brake rotor micrometer, measure the disc thickness at each of the eight spots.
5.
Calculate the variation by subtracting the smallest and largest measurement. Thickness variation should not exceed 0.01 mm (0.0004 in). If
thickness variation exceeds this measurement, resurface the rotor with the on-car hub mounted brake lathe.
Measuring Rotor Surface Runout (Front or Rear)
1.
Remove the tire, caliper and brake pads. Install the wheel nuts onto the studs to hold the rotor positively in place. Tighten the nuts uniformly.
2.
Clean the rotor with MOPAR brake parts cleaner p/n 04897150AA.
3.
Using a dial indicator, measure the runout of the rotor approximately 10 mm (0.40 in) from the outer circumference (Figure 7). Rotate rotor while
watching dial indicator readings.
4.
Rotor runout should not exceed 0.03 mm (0.0012 in). If runout exceeds this measurement, resurface the rotor with the on-car hub mounted brake
lathe.
Measuring Rotor Thickness (Front or Rear)
1.
Using a micrometer, measure the rotor thickness. The minimum thickness is stamped on the rotor. Use this measurement to determine if the rotor
can be resurfaced with the on-car hub mounted brake lathe or replaced (Figure 8).
NOTE:
IF ROTORS ARE REPLACED, RECHECK ROTOR THICKNESS VARIATION AND RUNOUT. ON-CAR HUB MOUNTED RESURFACING
MAY BE REQUIRED TO BRING THE NEW ROTORS WITHIN THE SPECIFIED VALUES.