
Vision V6-201 3.3L (1993)
7.
Place revised check strap in fully extended position on vehicle.
8.
Slide the check strap arm onto the door hinge pin and press arm up into place.
9.
Install screws, **p/n K6504837AA**, to hold check strap to door end frame.
10.
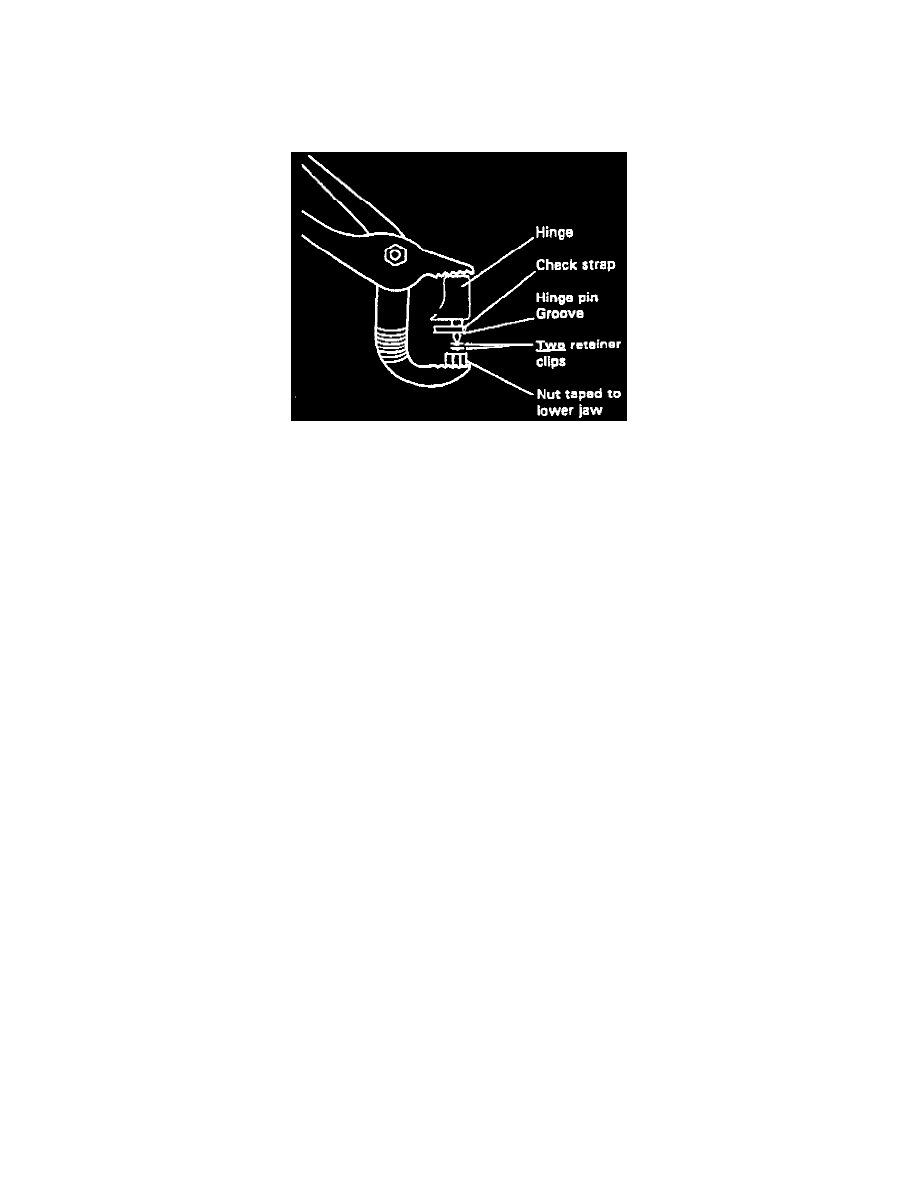
Install two new pin clips, p/n K6031147, onto the hinge pin and seat both clips firmly against the check strap arm using large jaw slip-joint pliers
with a 5/16" nut attached as shown.
NOTE:
THE FRONT DOOR HINGE PIN LENGTH ON EARLY BUILT 1993 VEHICLES IS SLIGHTLY SHORTER (0.5 mm) THAN THOSE ON
LATER BUILT VEHICLES. AS A RESULT, ONE PIN CLIP MUST LOCK INTO THE HINGE PIN GROOVE ON EARLY BUILT VEHICLES
WITH THE SECOND CLIP PRESSED FIRMLY BENEATH. BOTH PIN CLIPS MUST LOCK INTO THE HINGE PIN GROOVE ON LATER
MODELS.
11.
Install door trim panel.
12.
Repeat procedure on other doors as necessary.
POLICY: Reimbursable within the provisions of the warranty.
TIME ALLOWANCE:
Labor Operation No:
23-40-27-90 Replace, Right Front
0.3 Hrs.
23-40-27-91 Replace, Left Front
0.3 Hrs.
23-40-27-92 Replace, Right Rear
0.3 Hrs.
23-40-27-93 Replace, Left Rear
0.3 Hrs.
FAILURE CODE: P8 - New Part
Technical Service Bulletin # 23-76-96
Date: 970110
Door Check Straps - Snapping Noise
NO: 23-76-96
GROUP: Body
EFFECTIVE DATE: Jan. 10, 1997
SUBJECT:
Revised Door Check Straps
THIS BULLETIN SUPERSEDES TECHNICAL SERVICE BULLETIN 23-14-93 REV. B DATED DEC. 17, 1993 WHICH SHOULD BE NOTED IN
THE 1993 TECHNICAL SERVICE BULLETIN MANUAL (PUBLICATION NO. 81-699-94000). THIS BULLETIN CONTAINS REVISED PARTS
THAT ALSO APPLY TO CUSTOMER SATISFACTION NOTIFICATION NO.586 AND REVISED SERVICE PROCEDURE. ALL REVISIONS