
Vision V6-201 3.3L (1993)
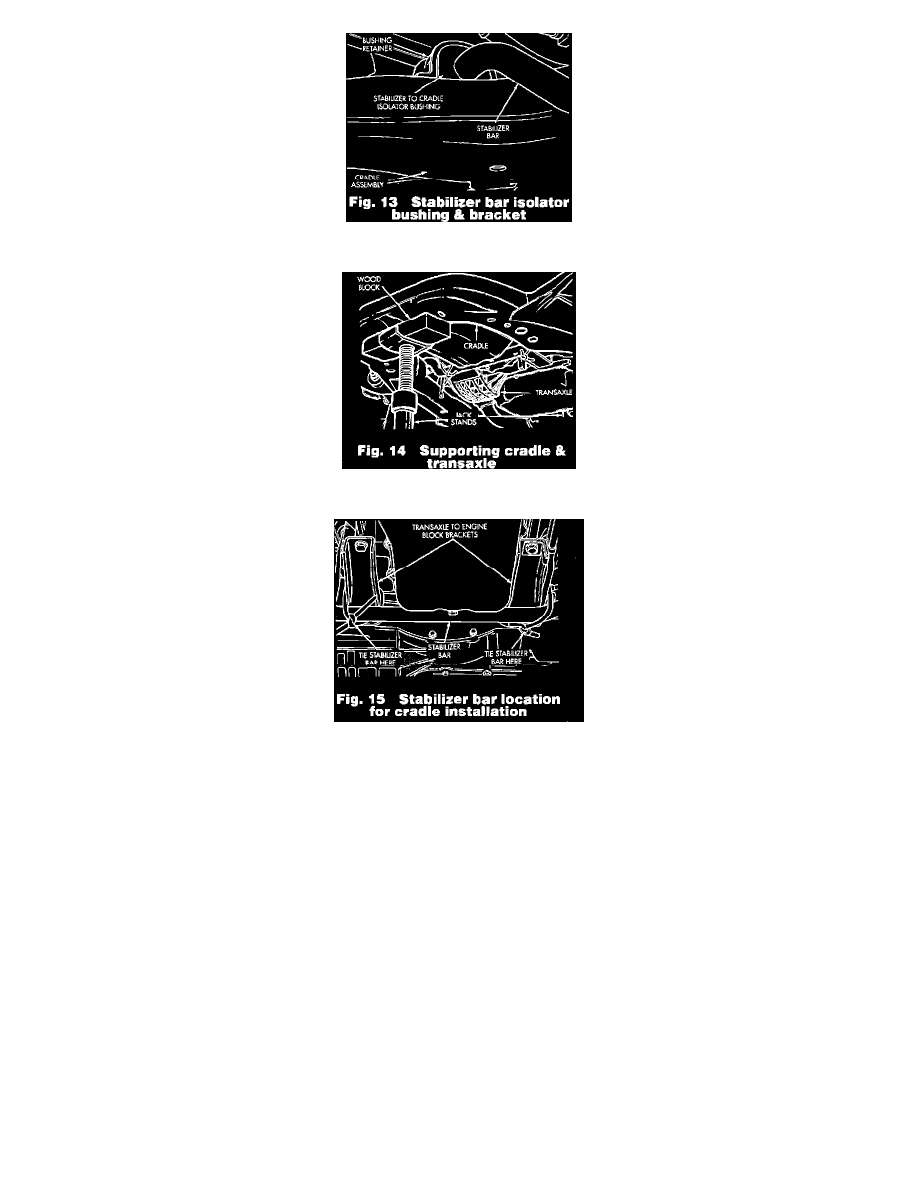
Fig. 13 Stabilizer Bar Isolator Bushing And Bracket
Fig. 14 Supporting Cradle And Transaxle
Fig. 15 Stabilizer Bar Location For Cradle Installation`
Removal
1.
Support engine and transaxle as outlined under "Supporting Engine."
2.
Raise and support vehicle then remove tire and wheel assemblies.
3.
Remove ball joint stud to steering knuckle clamp nut and bolt.
4.
Insert a prybar between lower control arm and steering knuckle to separate ball joint stud from steering knuckle. Pulling steering knuckle out away
from vehicle after releasing from ball joint can separate inner tripod joint.
5.
Remove ground strap from cradle assembly.
6.
Disconnect motor and transmission mounts from cradle assembly.
7.
Disconnect stabilizer bushing retainer from cradle.
8.
Position a jack stand under front of cradle and at center of transaxle cradle assembly mount. Raise jack stand at transaxle mount until transaxle just
lifts off cradle assembly.
9.
Remove cradle assembly as follows:
a. Loosen, do not remove, two rear cradle assembly to body bolts.
b. Loosen and remove two front cradle assembly to body attaching bolts.
Ensure jack stand is properly placed under front of cradle to
support cradle weight.
c. With a helper supporting rear of cradle and jack stand supporting transaxle, remove two rear cradle bolts and slowly lower front jack stand
until weight of engine is supported by engine support fixture and motor bolts are clear of cradle assembly.
d. Lift front of cradle off jack stand and remove cradle from vehicle.
Installation