
Vision V6-3.5L VIN F (1997)
Crankshaft Main Bearing: Service and Repair
Removal and Installation
NOTE: Bearing caps are not interchangeable and should be marked at removal to insure correct assembly. Upper and lower bearing halves are NOT
interchangeable. Lower main bearing halves of 1, 2, 3 and 4 are interchangeable. Upper main bearing halves of 1, 3 and 4 are interchangeable.
REMOVAL
1. Remove oil pan and windage tray. Identify bearing caps before removal.
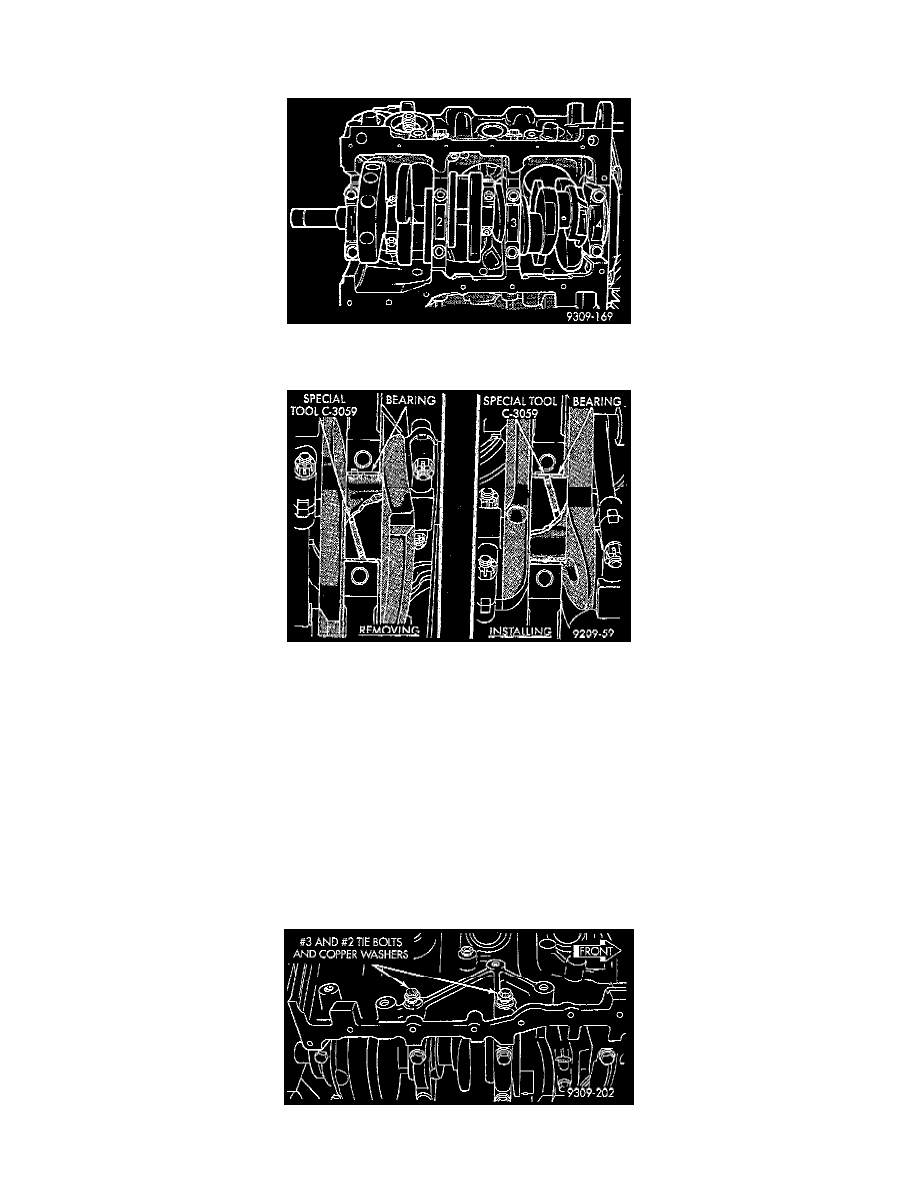
2. Remove bearing caps one at a time. Remove upper half of bearing by inserting Special Main Bearing Tool C-3059, or equivalent into the oil hole
of crankshaft.
3. Slowly rotate crankshaft clockwise, forcing out upper half of bearing shell.
NOTES:
-
Only one main bearing should be selectively fitted while all other main bearing caps are properly tightened.
-
When installing a new upper bearing shell, slightly chamfer the sharp edges from the plain side.
INSTALLATION
1. Start bearing in place, and insert Main Bearing Tool C-3059, or equivalent into oil hole of crankshaft.
2. Slowly rotate crankshaft counter-clockwise sliding the bearing into position. Remove Special Main Bearing Tool C-3059, or equivalent.
3. Install each main cap and tighten bolts finger tight.
4. Tighten number 1, 3 and 4 main cap bolts to 41 Nm + 1/4 Turn (30 ft. lbs + 1/4 Turn). Then tighten the #3 tie bolts to 54 Nm (40 ft. lbs.).