
Vision V6-3.5L VIN F (1997)
Crankshaft Main Bearing Seal: Service and Repair
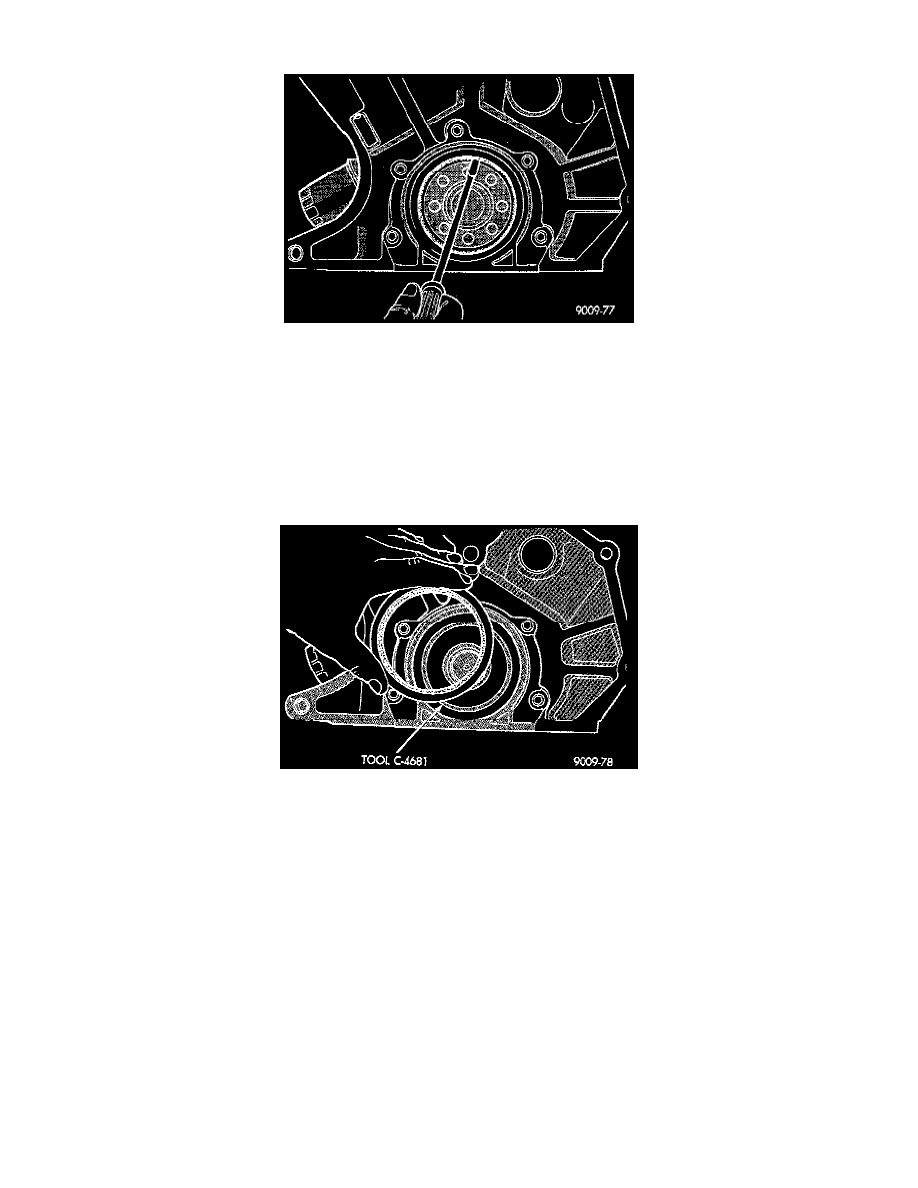
REMOVAL
Insert a 3/16 flat bladed screwdriver between the dust lip and the metal case of the crankshaft seal. Angle the screwdriver through the dust lip
against metal case of the seal. Pry out seal.
CAUTIONS:
-
Do not permit the screwdriver blade to contact crankshaft seal surface. Contact the screw driver blade against crankshaft edge (chamfer) is
permitted.
-
If burr or scratch is present on the crankshaft edge (chamfer), cleanup with 400 grit sand paper to prevent seal damage during installation of new
seal.
INSTALLATION
1. Place Special Seal Pilot Tool C-4681, or equivalent on crankshaft.
2. Lightly coat seal O.D. with Loctite Stud and Bearing Mount or equivalent.
3. Place seal over Special Seal Pilot Tool C-4681, or equivalent and tap in place with a plastic hammer.
NOTE: When retainer removal is required, remove retainer clean engine block and retainer of old gasket. Make sure surfaces are clean and free of oil.
Install new gasket and tighten screws to 12 Nm (105 inch lbs.).