
Vision V6-3.5L VIN F (1997)
Heated Glass Element Switch: Testing and Inspection
Vehicles with ATC heater will have to be tested with scan tool (DRB). The Body Diagnostic Procedures will have to be used.
Vehicles with manual Heater-A/C, the control switch and timer relay may be tested in the vehicle or on the bench.
In-Vehicle Testing
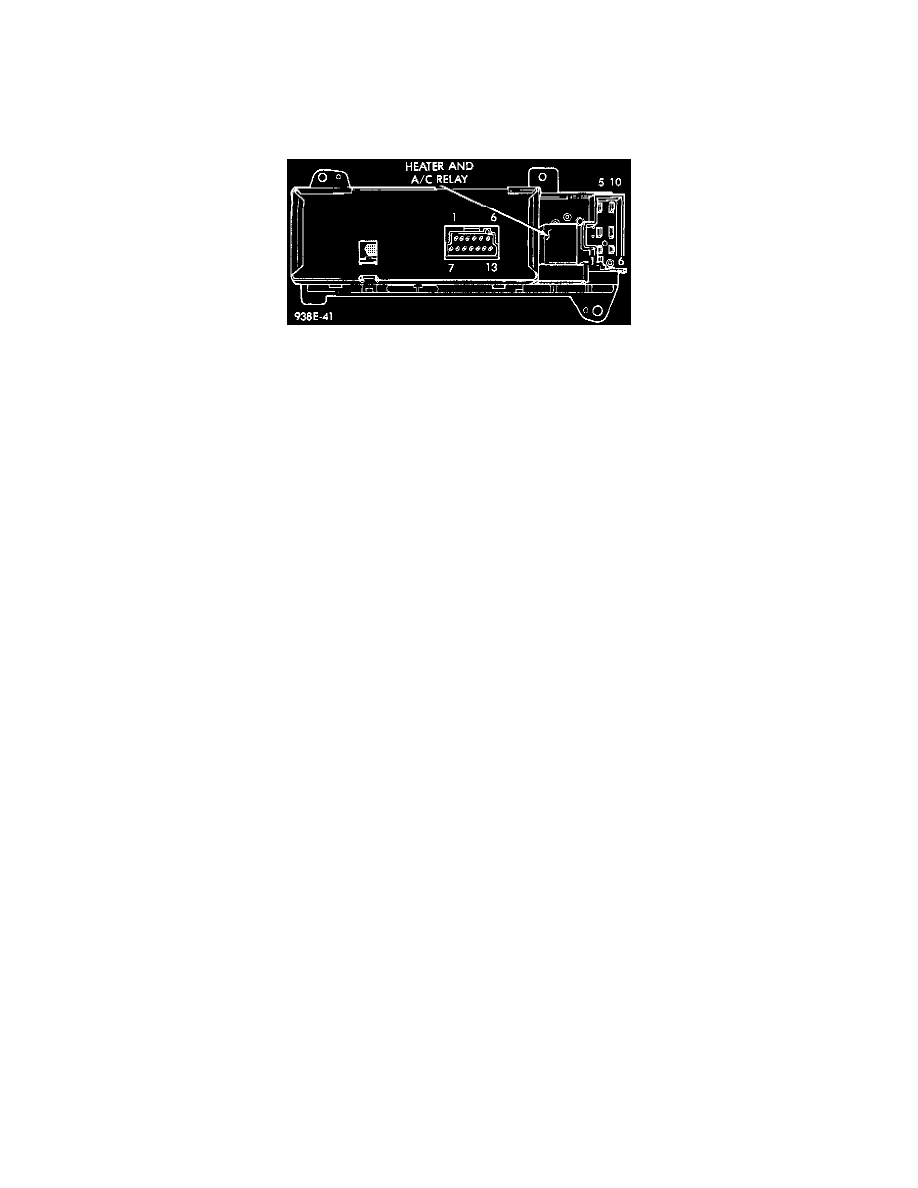
Heater Control Switch Connectors
1. Remove the control switch from console and do not disconnect control switch.
2. Turn ignition ON. Turn defogger ON.
3. Using a voltmeter, check at Pin 5 of the 13 Pin connector, and Pin 8 of the 10 Pin connector should have battery voltage. If OK, go to Step 4.
If no voltage, trace circuit upstream of control panel from problem:
-
Cut wire
-
Blown fusible link
-
Circuit breaker inoperative
-
Bulkhead connector inoperative
4. Check for voltage at Pin 1 of the 10 Pin connector should have battery voltage. If no voltage at Pin 1 of the 10 Pin connector, replace control
switch. If there is voltage turn defogger switch OFF. If voltage is still present, replace relay.
Bench Testing
1. To bench test control switch and relay a 12 Volt battery is needed.
2. Using two jumper wires, connect both to a 12 Volt supply and the other ends to, one to Pin 5 of the 13 Pin connector and the second to Pin 8
of the 10 Pin connector
3. Connect a jump wire from ground to Pin 3 of the 13 Pin connector.
4. Turn defogger switch to the ON position, check for voltage at Pin 1 of the 10 Pin connector should have battery voltage. If no voltage at Pin 1
of the 10 Pin connector, replace control switch. If there is voltage turn defogger switch OFF. If voltage is still present, replace relay.