
Aerostar 2WD V6-182 3.0L (1995)
Fuel Pressure Regulator: Service and Repair
REMOVAL
1. Verify fuel rail assembly is depressurized by removing fuel tank cap and releasing pressure from fuel system at pressure relief valve on fuel rail
assembly.
2. Remove vacuum line from pressure regulator.
3. In order to gain access to pressure regulator screws, loosen or remove fuel rail to intake manifold mounting bolt(s) as required and carefully lift
pressure regulator side of fuel rail.
4. Remove pressure regulator assembly, gasket and O-ring. Discard gasket, screws, and O-ring.
NOTE: If scraping is necessary be careful not to damage fuel pressure regulator or fuel supply line gasket surfaces.
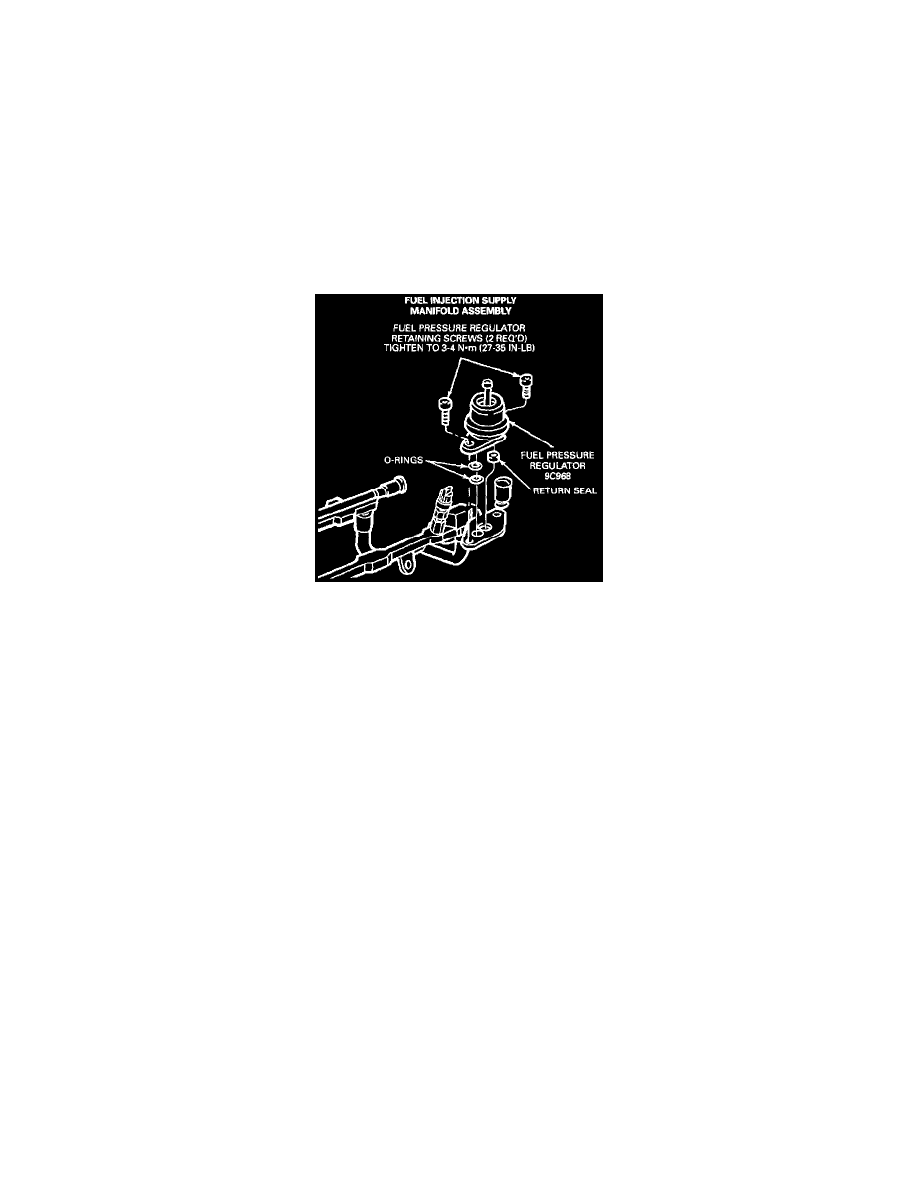
Fuel Pressure Regulator
INSTALLATION
1. Lubricate new fuel pressure regulator O-ring with clean engine oil.
2. Ensure gasket surfaces of fuel pressure regulator and fuel rail assembly are clean.
3. Install new O-ring and new gasket on regulator.
4. Using new screws, install fuel pressure regulator on fuel rail assembly. Tighten the two screws to 3.0-4.0 Nm (27-35 lb in).
5. Carefully install pressure regulator side of fuel rail to injectors and intake manifold. Ensure fuel rail is fully seated on all three injectors and that
the injector O-rings are seated at the top and bottom of each injector. While pushing down on fuel rail, tighten fuel rail to intake manifold bolts to
8.0-12.0 Nm (2.0-8.0 lb ft).
6. Connect vacuum line to pressure regulator.