
Aerostar 2WD V6-182 3.0L (1995)
2. Remove outlet fitting, flow control valve and flow control valve spring from pump, then remove reservoir.
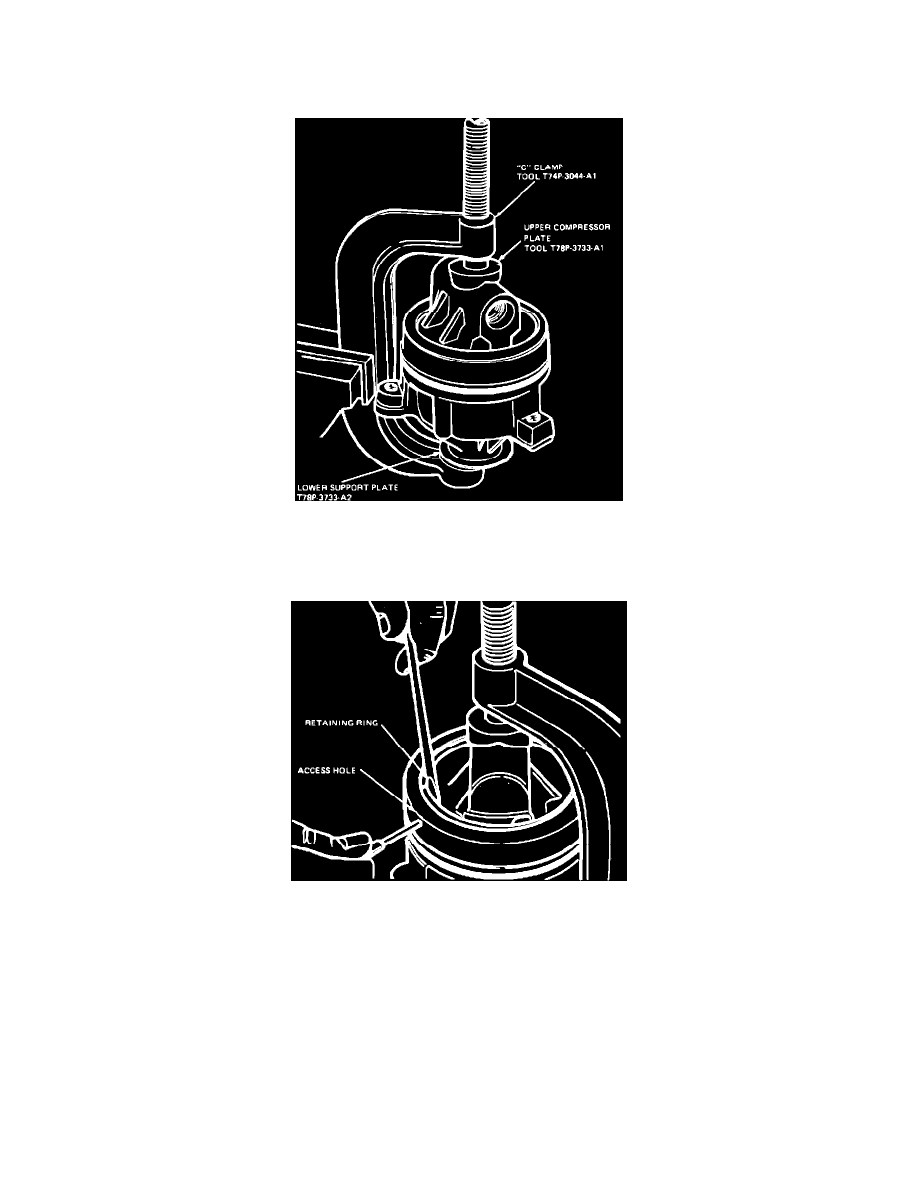
3. Place a suitable C-clamp in a vise.
4. Position lower support plate tool No. T78P-3733-A2, or equivalent, over pump rotor shaft.
5. Install upper compressor plate tool No. T78P-3733-A1, or equivalent, into upper portion of C-clamp.
Fig. 2 Positioning Pump In C-Clamp
6. While holding compressor tool, place pump assembly into C-clamp with rotor shaft facing downward.
7. Tighten C-clamp until a slight bottoming of valve cover is observed.
Fig. 3 Removing Valve Cover Retaining Ring
8. Through small hole located on side of pump housing, insert a suitable drift and push inward on valve cover snap ring. While pushing inward on
snap ring, place a screwdriver under snap ring edge and remove ring from housing.
9. Loosen C-clamp and remove upper compressor plate tool No. T78P-3733-A2, or equivalent, then remove pump assembly.
10. Remove pump valve cover and O-ring.
11. Remove rotor shaft, upper plate, cam and rotor assembly and two dowel pins.
12. Remove lower plate and spring, by tapping housing on a flat surface.
13. Using a suitable screwdriver, remove rotor shaft seal.
ASSEMBLE
1. Position rotor on rotor shaft splines with triangle detent on rotor counterbore facing upward.
2. Install snap ring into groove on end of rotor shaft.
3. Position insert cam over rotor. Ensure recessed notch on insert cam is facing upward.