
Aerostar 2WD V6-182 3.0L (1995)
Installation
NOTE: The larger end of the inner sleeve faces the rear of the vehicle and contacts the front crossmember.
1. If removed install steering gear mounting bracket housing insulators and steering gear insulators into the steering gear housing.
2. Push the steering gear mounting bracket housing insulator and steering gear insulator in until there is no space between the lip on the steering gear
mounting bracket housing insulator or steering gear insulator and edge of steering gear housing.
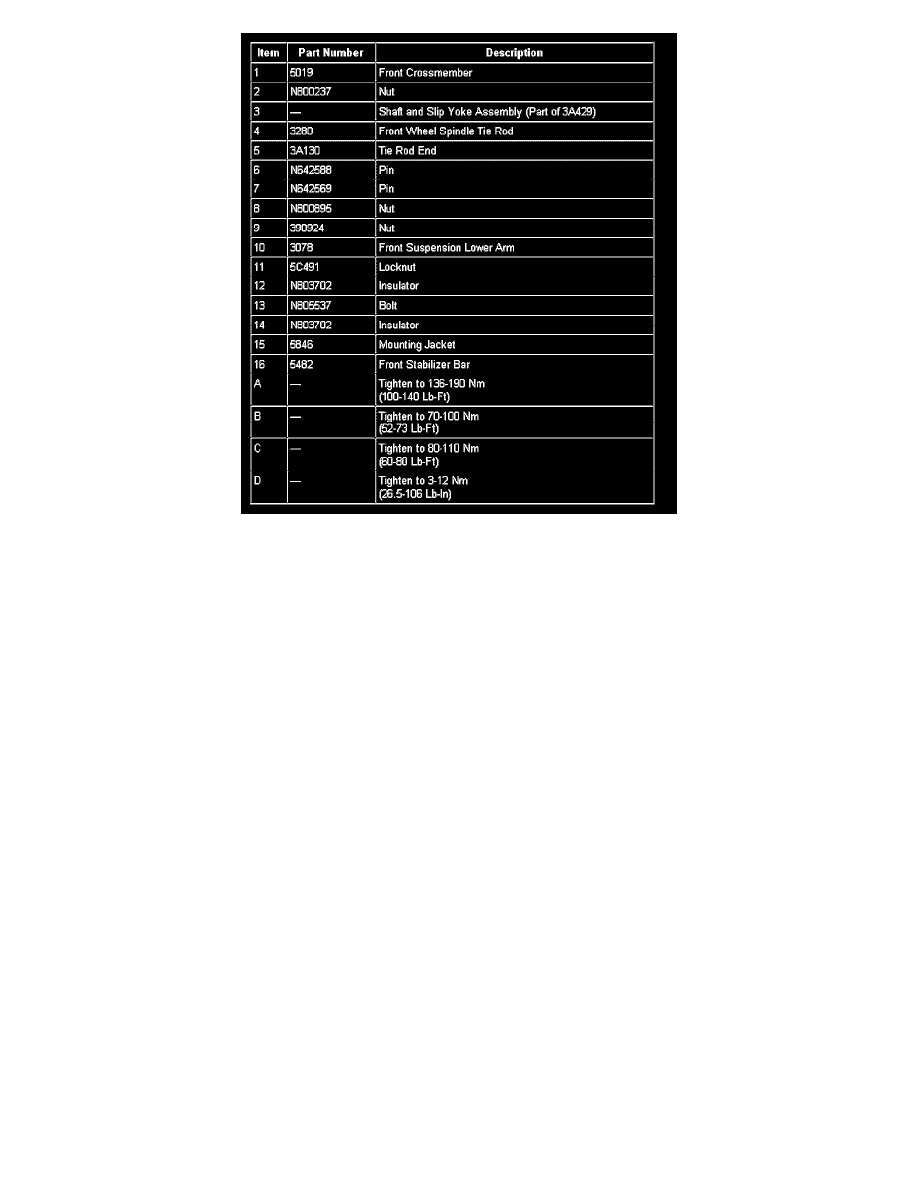
3. Position steering gear on front crossmember. Install nuts, bolts and washers retaining steering gear to front crossmember . Tighten to 108-142 Nm
(80-105 ft-lb).
4. Unplug power steering pressure hose and power steering return hose and steering gear valve ports.
5. If required, replace the plastic washer on the power steering pressure and return line quick connect fitting.
6. NOTE: The fittings design allows the power steering pressure hose and power steering return hose to swivel when properly tightened. Do not
attempt to eliminate looseness by over-tightening, since this can cause damage to fittings.
Connect power steering pressure hose and power steering return hose to appropriate ports on steering gear housing . Tighten fittings to 27-34 Nm
(20-25 ft-lb).
7. NOTE: Make sure the front wheel spindle inner connecting rod or end are seated in the tapered spindle holes to prevent rotation while tightening
nut.
With the steering gear, steering wheel and wheel in the on-center position, attach the front wheel spindle connecting rod or end to front wheel
spindle and tighten to 70-100 Nm (52-73 ft-lb).
8. NOTE: Verify that no rotation from the on-center position has occurred.
If necessary, advance tie rod nuts to the next slot. Install cotter pins.
9. Position steering column lower intermediate shaft over steering gear insulator . Outer input shaft dust shield must be in place. Replace pinch bolt
and tighten to 41-56 Nm (30-42 ft-lb).
10. Replace the front wheel and tire assemblies.