
Aerostar 2WD V6-183 3.0L (1991)
Timing Cover: Service and Repair
REMOVAL
1. Disconnect negative battery terminal and move out of the way.
2. Remove air cleaner fresh air tube.
3. Drain cooling system and crankcase.
4. Remove cooling fan.
5. Loosen water pump hub bolts.
6. Loosen and remove accessory drive belts.
7. Remove water pump pulley.
8. Remove alternator adjusting arm and the brace to throttle body attaching stud. Move alternator assembly out of the way.
9. Remove four air conditioner compressor bolts. Wire tie compressor out of the way. Remove air conditioner bracket.
10. Remove crankshaft pulley and damper.
11. Remove water pump if required.
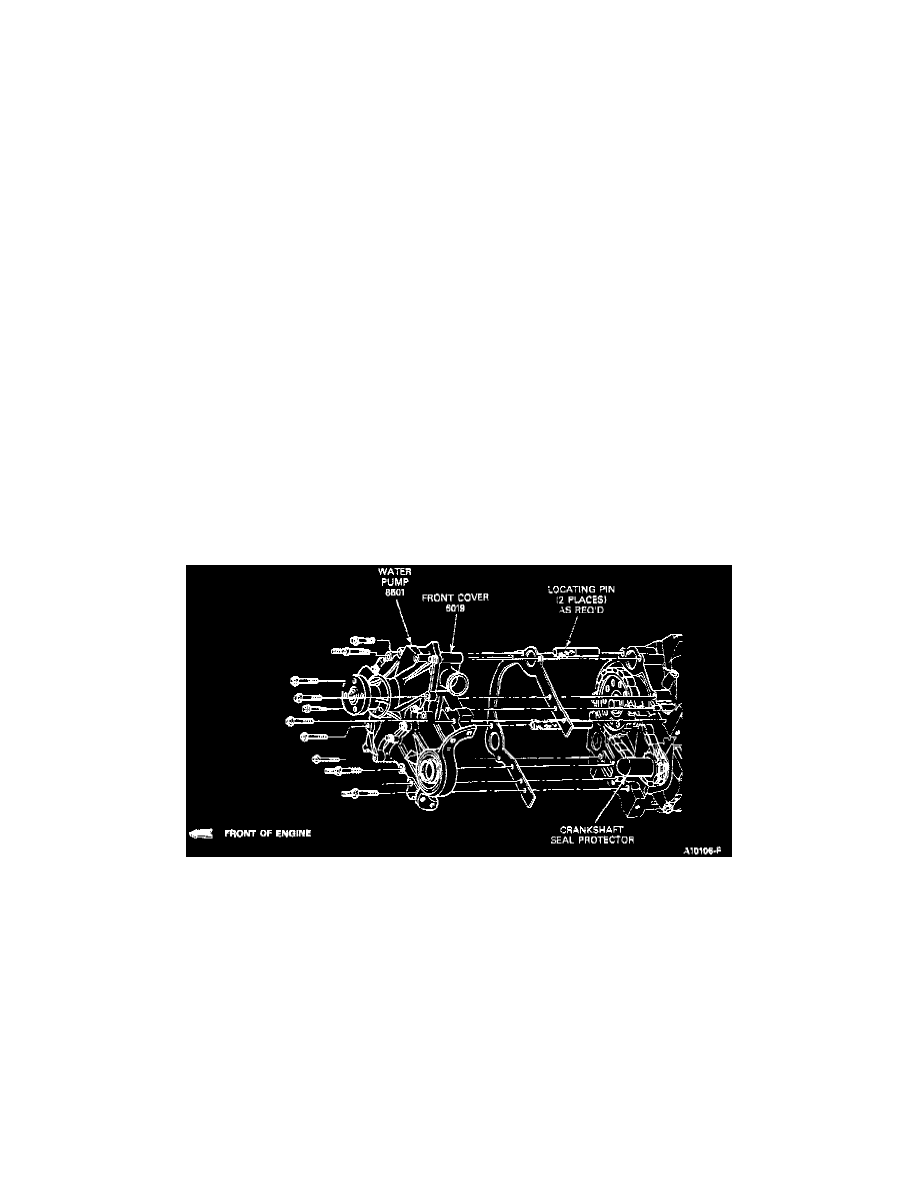
NOTE: Timing cover may be removed with water pump intact. To perform this operation, do not remove bolts numbered 11 through 15 on the
Front Cover, Water Pump Fastener Chart.
12. Disconnect lower radiator hose and heater hose.
13. Remove oil pan assembly and discard old gasket. Disconnect oil level sensor (if equipped) before pan removal.
14. Remove timing cover to cylinder block attaching bolts.
15. Carefully remove timing cover from cylinder block. Discard old gasket.
INSTALLATION
1. Clean cylinder block mating surface.
2. Clean timing cover gasket surface carefully.
CAUTION: Gouges in aluminum timing cover will cause gasket to leak.
3. Replace crankshaft seal.
Front Cover Assembly
4. Align new timing cover gasket to cylinder block dowel pins.