
Aerostar 2WD V6-245 4.0L (1990)
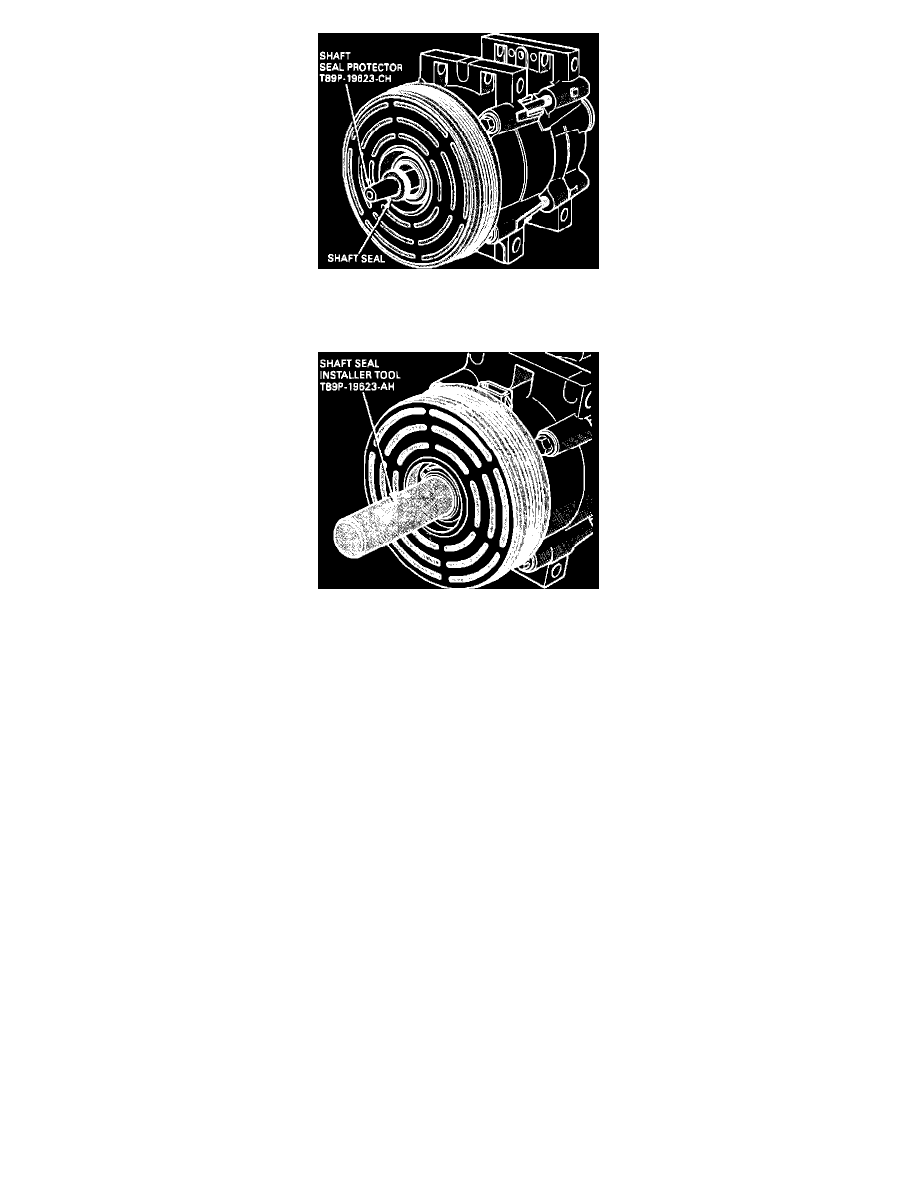
Figure 7
6.
Place the shaft seal protector tool over the end of the compressor shaft, Figure 7.
Figure 8
7.
Using the shaft seal installer tool T89P-19623-AH, slowly push the seal down the shaft protector tool onto the A/C compressor shaft until the seal
is seated, Figure 8.
8.
Remove the shaft seal installer tool and the shaft seal protector tool from the compressor shaft.
9.
Position the seal retaining snap ring into the compressor nose opening.
10.
Push and seat the snap ring against the seal with the snap ring remover tool, T89P-19623-DH.
11.
Leak test the compressor. Refer to the 1988 Taurus/Sable Shop Manual, Section 36 for service details.
12.
Install a new shaft seal felt in the nose of the compressor.
13.
Re-install the clutch hub onto the A/C compressor shaft.
14.
Re-install the A/C compressor into the vehicle.
15.
Recharge the A/C system with refrigerant.
PART NUMBER
PART NAME
CLASS
E9SZ-19D665-A
A/C Shaft Seal Kit
B
OTHER APPLICABLE ARTICLES: none
SUPERSEDES:
88-7-5, 89-2-3, date 3/30/88, 1/25/89
WARRANTY STATUS: Eligible Under Basic Warranty Coverage
OPERATION DESCRIPTION
TIME
892202A
Install New Seal Kit -
1.7 Hrs.
Aerostar
892202A
Install New Seal Kit -
2.0 Hrs.