
Aerostar 2WD V6-245 4.0L (1990)
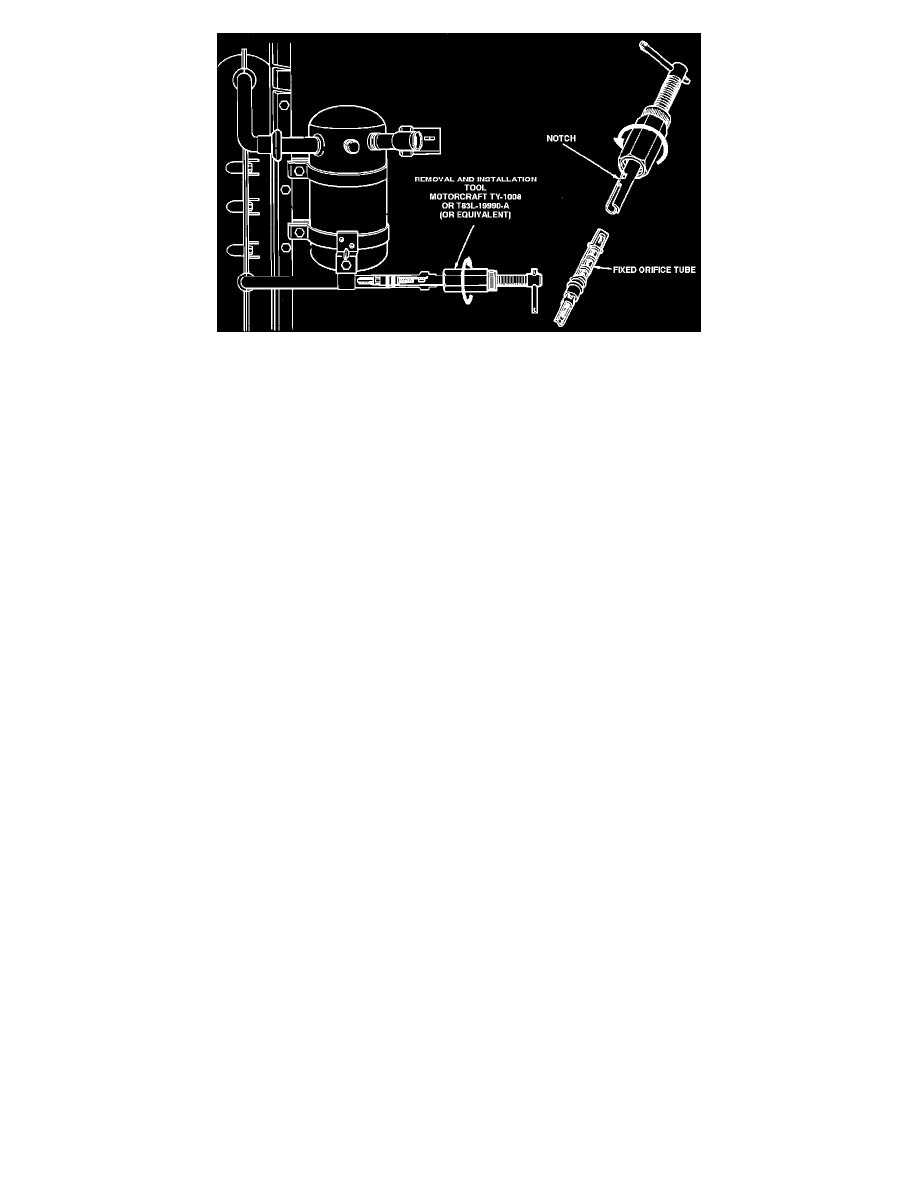
Fig. 5 Fixed orifice tube
4. Using tool T83L-19990-A or equivalent, engage with the two tangs on the orifice tube.
CAUTION: Do not twist or rotate the fixed orifice tube in the evaporator core inlet tube, as it may break off.
5. Hold T-handle of removal tool to prevent it from turning, and run nut down against evaporator core tube until orifice tube is pulled from inlet tube.
6. If the A/C Evaporator Core Orifice breaks in tube, it must be removed from the tube with Broken Orifice Tube Extractor T83L-19990-B.
7. To remove a broken Orifice Tube, insert the screw end of the Extractor Tool into the tube and thread the screw end of the tool into the brass tube
in the center of the orifice body. Then pull the orifice from the tube.
8. If only the brass tube is removed in step 7, insert the screw end of the extractor tool into the orifice body. Then pull the body from the tube.
Installation
1. Lubricate the O-rings on the A/C Evaporator core orifice liberally with clean refrigerant oil.
2. Place the orifice in the remover/replacer tool and insert into the evaporator tube until the orifice is seated at the top.
3. Remove the tool from the orifice.
4. After checking the condenser to evaporator tube coupling end for a missing or damaged spring, install two new O-rings lubricated with clean
refrigerant oil onto the male fitting. Insert the male fitting into the inlet tube until the spring lock coupling is fully engaged.
5. Leak test, evacuate and charge system.
6. Check system for proper operation.