
Aerostar 2WD V6-245 4.0L (1990)
Clutch: Service and Repair
Forward Clutch
DISASSEMBLE
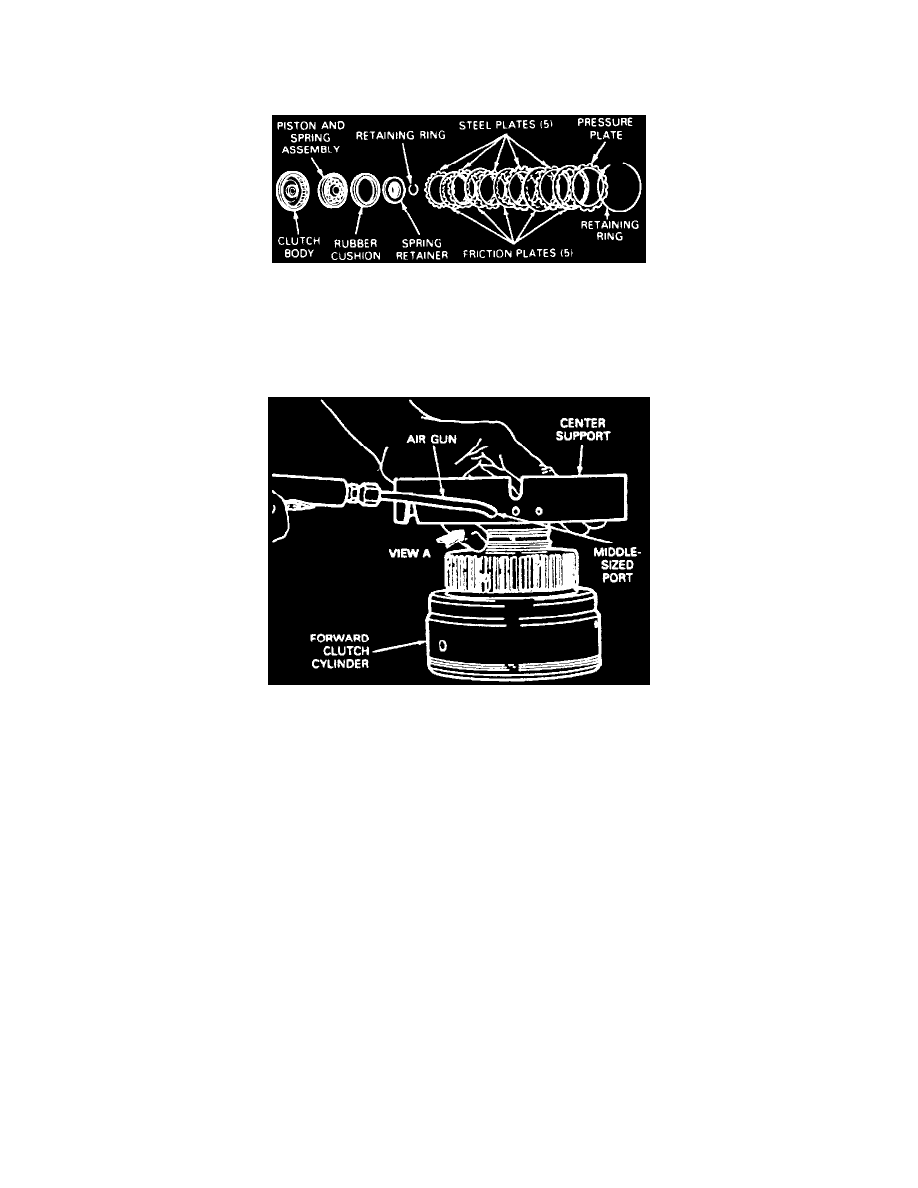
Exploded View Of Forward Clutch
1. Remove pressure plate retainer ring, then the plate pack.
2. Inspect steel clutch plates and clutch lining plates for wear, damage, or effects of overheating, replacing entire set if necessary.
NOTE: If new plates are to be used, immerse them in transmission fluid for 30 minutes before assembly.
Removing Forward Clutch Piston Or Air Testing Assembled Forward Clutch
3. Install center support on forward clutch cylinder, then apply no more than 20 psi air pressure to left port in center support to force piston assembly
from clutch cylinder.
Assemble
1. Install new seal rings on clutch piston.
2. Carefully install clutch piston into clutch body, a rubber cushion spring is used between the piston and steel plate.
3. Install compression spring and spring retainer, compress springs using clutch spring compressor and install retaining ring.
4. Install clutch plates beginning with a steel plate, then alternate friction and steel plates, there are five steel and five friction plates used.
5. Using feeler gauge, check clearance between retaining ring and pressure plate, pushing downward on plates while checking clearance.
6. If clearance is not 0.055-0.083 inch install corrective selective retaining ring. Retaining rings are available in thicknesses of 0.0539, 0.0681,
0.0819, and 0.0961 inch.
7. Install center support on forward clutch cylinder, then apply no more than 20 psi air pressure to left port in center support to check piston
application. Piston must apply when pressurized and release when air is removed.