
Aerostar 2WD V6-245 4.0L (1990)
c.
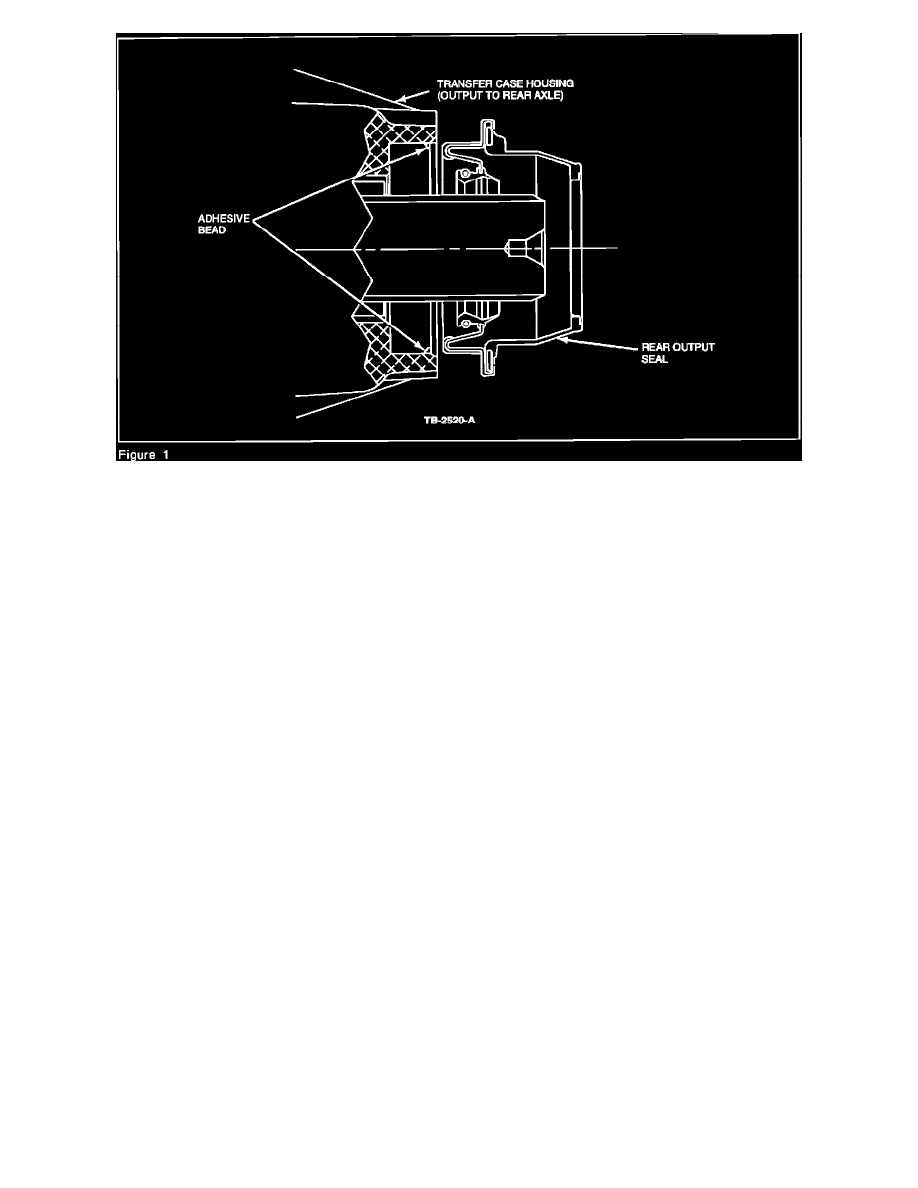
Apply a small bead (1/16" or less in diameter of instant adhesive (E8AZ-19554-A) or equivalent inside the transfer case housing seal bore,
just below the chamfer. The bead should go all the way around the diameter 360~, Figure 1.
CAUTION:
DO NOT ALLOW THE ADHESIVE TO CONTACT THE SEAL LIPS OR OTHER TRANSFER CASE SURFACES.
d.
Install the new transfer case rear output seal (FO9Z-7B215-C), using seal installer T61L 7657A.
NOTE:
SEAL MUST BE INSTALLED SO THE HOLE IN SEAL IS AT 6 O'CLOCK POSITION.
CAUTION:
LET THE ADHESIVE DRY FOR ONE HOUR BEFORE FILLING WITH LUBE.
e.
Reinstall the rear drive shaft.
f.
Fill the transfer case to the proper lube level with new MERCON.
NOTE:
MAKE SURE THE VEHICLE IS LEVEL WHEN FILLING THE TRANSFER CASE.
PART NUMBER
PART NAME
CLASS
FO9Z-78215-C
Transfer Case Rear Output
B
Seal
E8AZ-19554-A
Ford Instant Adhesive
B
OTHER APPLICABLE ARTICLES: NONE
SUPERSEDES:
92-9-14
WARRANTY STATUS:
Eligible Under Basic Warranty Coverage, Powertrain Warranty Coverage
OPERATION DESCRIPTION
TIME
921114A
Inspect - Install New Seal
1.1 Hrs.
921114B
Inspect - Replace Transfer
1.9 Hrs.
Case Assembly
DEALER CODING
BASIC PART NO.
CONDITION CODE
T7B215
33
OASIS CODES:
508000, 510000