
Aerostar AWD V6-183 3.0L (1991)
Evaporator Core: Service and Repair
Standard Evaporator
1.
Disconnect battery ground cable.
2.
Discharge refrigerant from system.
3.
Remove air cleaner and air inlet duct.
4.
Disconnect electrical connectors from blower motor, blower motor resistor, pressure switch and recirculation door vacuum motor solenoid.
5.
Disconnect suction line(s) from accumulator/dryer and liquid line from inlet tube. Cap all open lines to prevent contamination.
6.
Disconnect vacuum harness check valve from engine source line and the vacuum line from vacuum motor solenoid.
7.
Remove two accumulator/dryer-to-evaporator core mounting bands and the clamp from around evaporator inlet tube.
8.
Disconnect accumulator/dryer assembly from evaporator core outlet tube and remove the assembly.
9.
Remove evaporator case blower housing attaching screws and the blower housing.
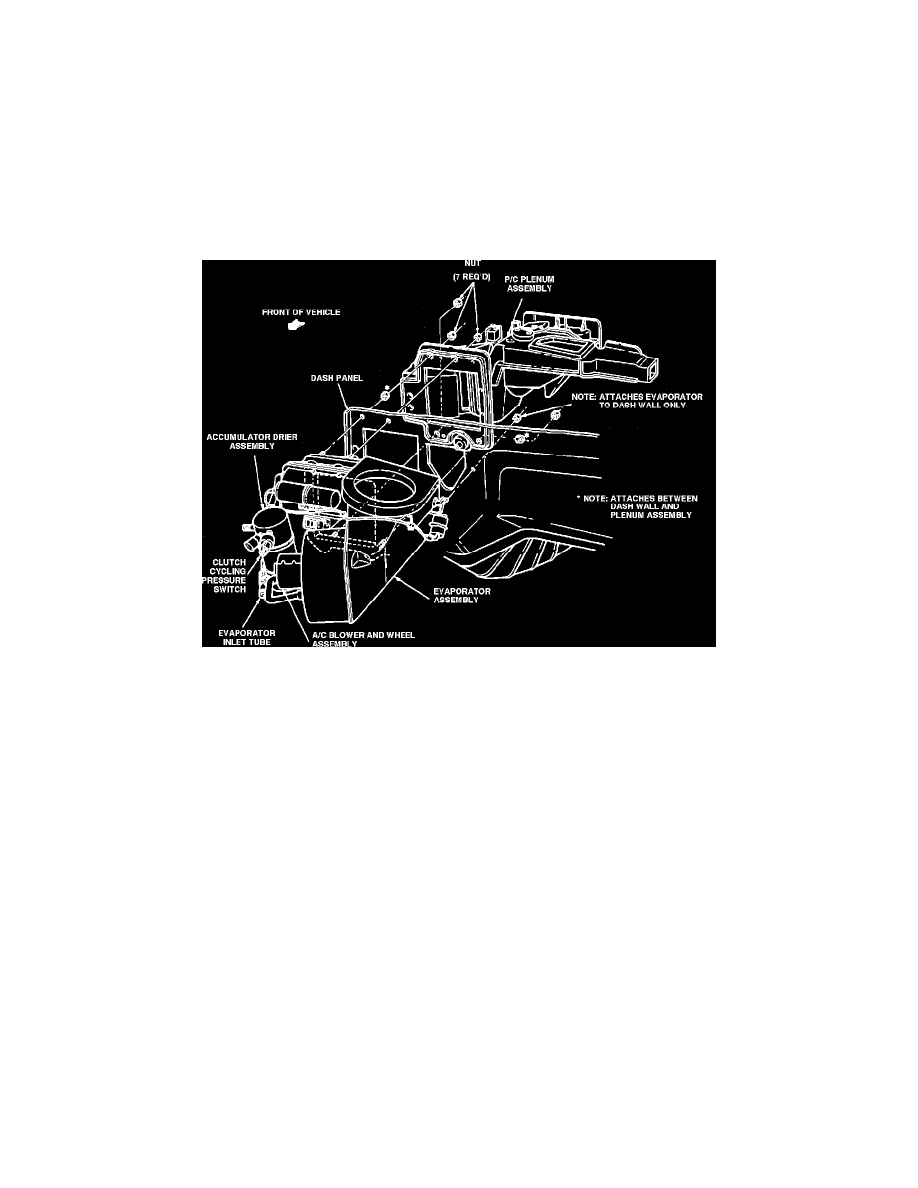
Fig. 16 Disassembled view of evaporator assembly
10.
Remove evaporator core from vehicle, Fig. 16.
11.
Reverse procedure to install. Use new O-rings lubricated with clean refrigerant oil.
12.
Leak test, evacuate and charge system.
Auxiliary Evaporator
1.
Remove first seat behind driver, if equipped.