
Aerostar AWD V6-183 3.0L (1991)
1. Clean and inspect the valve body prior to installation as detailed in this section.
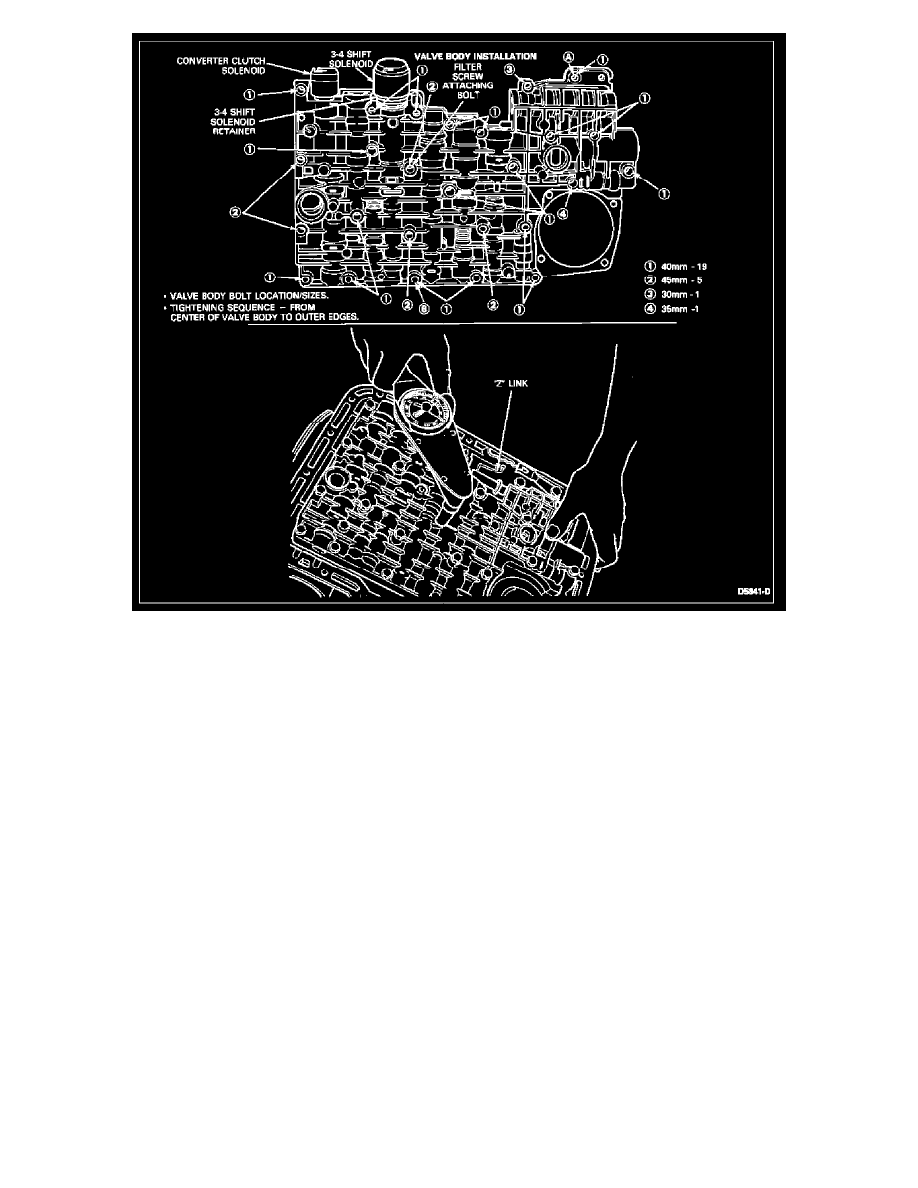
2. Attach and lock the selector lever connecting rod (Z-Link) to the manual valve and ease control body into the case.
CAUTION: Use care not to bend selector lever connecting rod (Z-Link).
3. Insert correct length bolts, finger-tight, in holes A and B to position control body to case.
4. Insert all remaining bolts and 3-4 shift solenoid retainer (correct length) except filter screen bolt and tighten to 8-11 N-m (71-97 in-lb).
NOTE: 3-4 shift solenoid retainer must be on outside of metal inner retainer.
5. Remove the bolt from hole A and install detent spring to bolt, then reassemble and tighten A and B locations to 8-11 N-m (71-97 in-lb).
6. Install low-reverse servo cover, piston, spring and gasket.
7. Connect the converter clutch solenoid wires.
8. Clean filter screen with solvent. Then install filter screen O-ring and filter screen.
9. Using a new gasket, install fluid pan. Tighten retaining bolts to 11-13 N-m (97-115 in-lb).
10. Remove safety stands and lower vehicle. Fill transmission with proper grade and quantity of fluid.
Pour in 2.8L (3 quarts) of fluid. Run engine and add fluid as required.
11. Operate vehicle and check for leaks.