
Aerostar AWD V6-183 3.0L (1991)
Universal Joint: Service and Repair
Assembly
Inboard Universal Joint
1. Start a new bearing cup into the yoke at the inboard end of the halfshaft.
2. Position the new spider in the inboard end yoke and PRESS the bearing cup 6.35 mm (1/4 inch) below the end yoke surface using a spacer.
3. Remove the tool and install a new snap ring.
4. Start a new bearing cup into the opposite end of the yoke.
5. Position the Universal-joint Tool and PRESS on the bearing cup until the opposite bearing cup contacts the snap ring.
6. Remove the tool and install a new snap ring. It may be necessary to grind the surface of the snap ring to permit easier entry.
7. Position the circular flange on the U-joint and install the bearing cups and snap rings.
8. Check the universal joints for freedom of movement. If binding has resulted from misalignment during assembly, a sharp rap on the yokes with a
brass hammer will seat the bearing needles. Take care to support the shaft end during this procedure and do not strike the bearings themselves. Be
sure the universal joints are free to rotate easily without binding before installing halfshafts.
9. Lubricate the universal joint assemblies (service kit) with Long-Life Lubricant grease.
Outboard Constant Velocity Joint
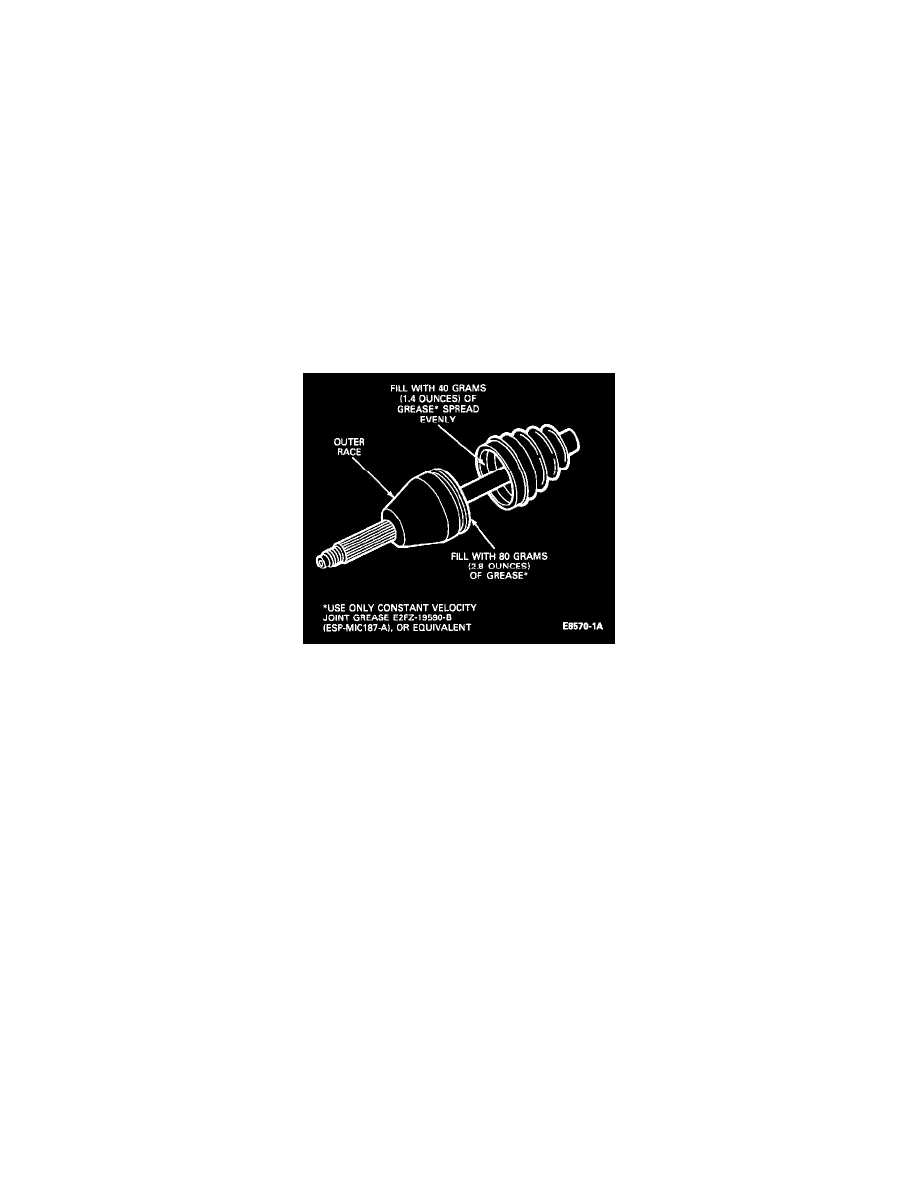
1. Fill the Constant Velocity (CV) Joint area around the balls with 80 grams (2.8 oz) of grease. Then spread 40 grams (1.4 oz) of grease evenly
inside large boot for a total combined fill of 120 grams (4.2 oz). Constant Velocity Joint Grease.
2. Assemble large outboard boot onto outboard shaft and joint assembly, making sure boot is seated in boot grooves. Tighten clamps using crimping
pliers.
CAUTION: Do not overtighten. It may damage clamp and/or boot.
3. Assemble small boot and clamps onto outboard shaft and joint assembly. DO NOT CRIMP CLAMPS AT THIS TIME.
4. Coat the spline end of outboard shaft and joint assembly with Long-Life Lubricant and assemble into inner slip yoke assembly.
5. Slip boot into place making sure boot is seated in boot grooves. Tighten clamps using special low profile (Octiker) tool.
CAUTION: Do not overtighten. It may damage clamp and/or boot.
6. Assemble complete axle shaft assembly into vehicle.