
Aerostar AWD V6-245 4.0L (1990)
Timing Cover: Service and Repair
REMOVAL
1. Remove oil pan.
2. Drain the coolant. Remove the radiator.
3. Remove air conditioner compressor and power steering bracket, if so equipped.
4. Remove alternator and drive belt(s).
5. Remove fan.
6. Remove water pump, heater and radiator hoses.
7. Remove the drive pulley/damper assembly from the crankshaft.
8. Remove the crankshaft position sensor assembly.
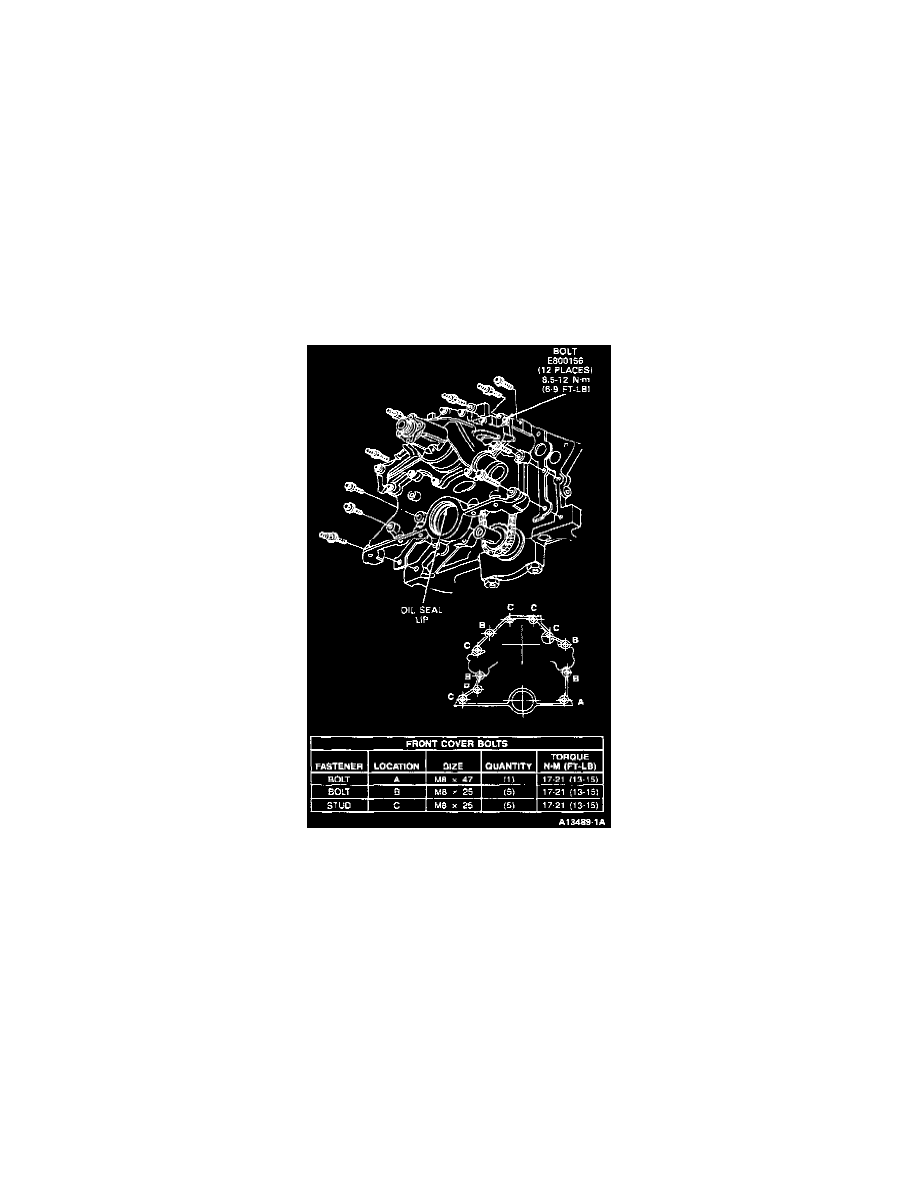
9. Remove front cover retaining bolts. If necessary, tap cover lightly with a plastic hammer to break gasket seal. Remove front cover.
INSTALLATION
1. Clean the front cover mating surfaces of gasket material. Apply sealing compound to the gasket surfaces on the cylinder block and back side of the
front cover plate. Install guide sleeves.
2. Apply sealing compound to front cover gasket surface. Place gasket in position on front cover.
Engine Front Cover
3. Place front cover on engine and start all retaining bolts two or three turns. Note the different bolt lengths.
4. Tighten front cover attaching bolts to 17-21 Nm (13-15 ft lb).
5. Install the crankshaft position sensor.
6. Install belt drive pulley/damper assembly. Tighten attaching bolt to 40-50 Nm (30-37 ft lb), then turn an additional 80-90° tighter.
7. Install oil pan.
8. Install water pump, heater hose, air conditioner compressor, alternator, and drive belt(s). Adjust drive belt tension.
9. Fill and bleed the cooling system.
10. Operate the engine at fast idle speed and check for coolant and oil leaks.