
Aerostar AWD V6-245 4.0L (1990)
Control Arm: Service and Repair
Front
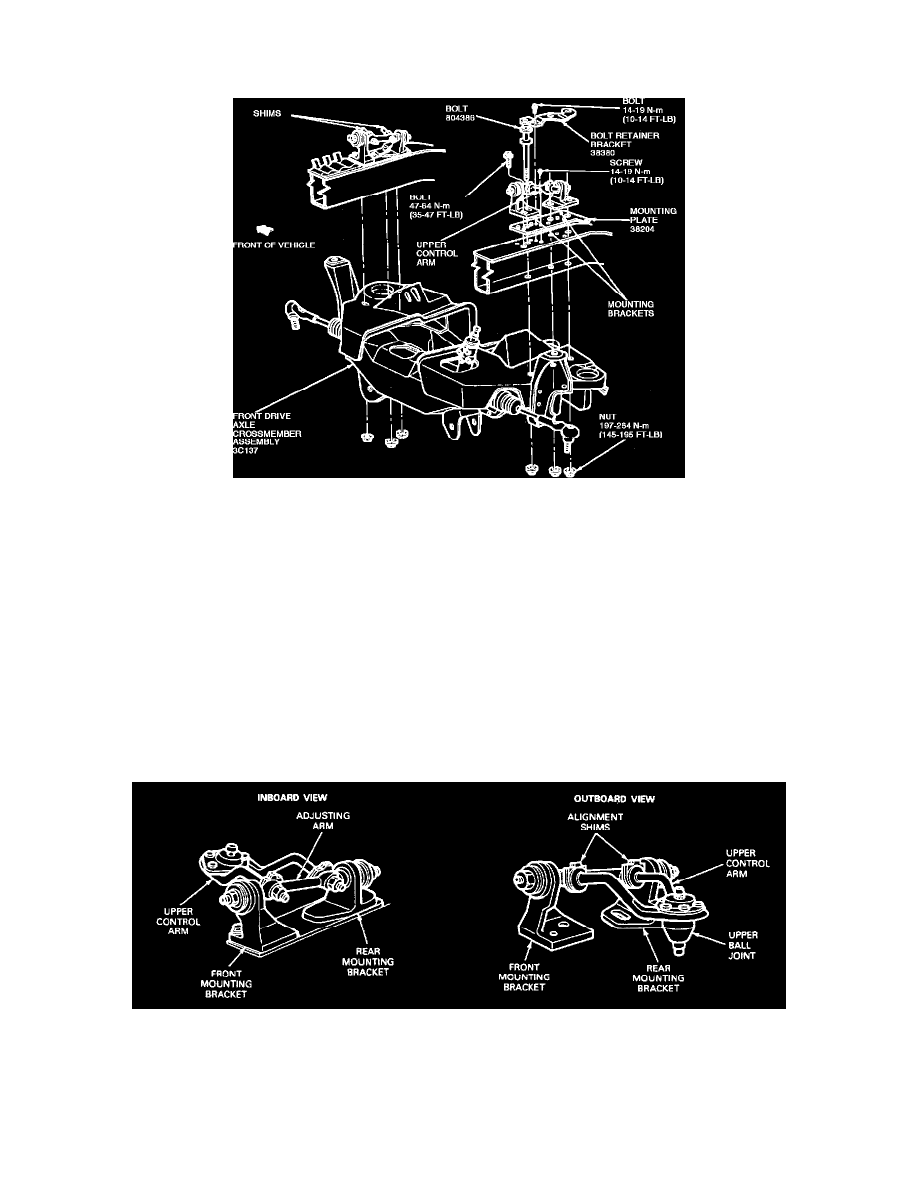
Fig. 6 Upper Control Arm Assembly And Mounting Bracket Replacement, 4WD
REMOVAL
1. Place the steering wheel and steering system in the "on-center" position.
NOTE: Any time the steering linkage is disconnected from the steering knuckle, the steering system must be placed in the "on-center" position.
2. Raise the vehicle on a twin post hoist. Place safety stands under the body rail to support the vehicle. During service procedures, the front hoist post
is used to maintain coil spring compression.
WARNING: MAKE SURE THE VEHICLE IS SECURELY SUPPORTED ON SAFETY STANDS.
WARNING: WHEN SERVICING ANY COMPONENT IN THE UPPER CONTROL ARM AND BALL JOINT SYSTEM, ONLY ONE SIDE
OF THE VEHICLE IS SERVICED AT A TIME. NEVER SERVICE BOTH SIDES AT THE SAME TIME.
3. Remove the steering knuckle. See: Front Steering Knuckle/Service and Repair
4. Remove the bolt retaining the bolt retainer plate and remove the plate.
5. Mark the position of the control arm mounting brackets on the flat plate.
6. Remove the bolt and washer retaining the front mounting bracket to the flat plate.
7. From beneath the rail, remove the three nuts from the bolts retaining the two upper control arm mounting brackets to the body rail.
8. Remove the three long bolts retaining the mounting brackets to the body rail by rotating the upper control arm out of position in order to remove
the bolts. Remove the upper control arm, upper ball joint and mounting bracket assembly and flat plate from the vehicle.
9. If required, remove and replace the upper and or lower ball joint boot seal.