
Bronco II 2WD V6-177 2.9L (1986)
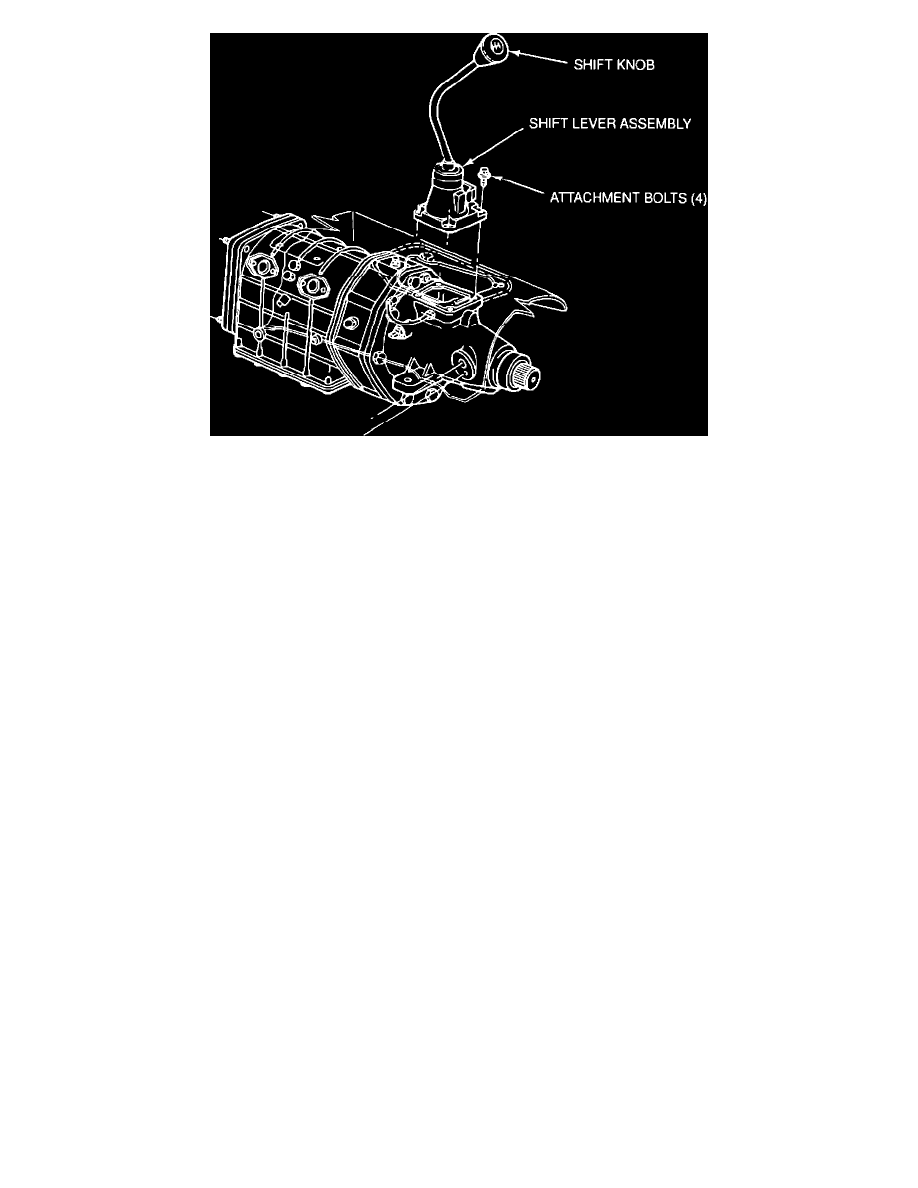
FIGURE 2
9.
Remove the four bolts securing the shift lever assembly to the transmission. (See Figure 2). Discard the bolts.
10.
Lift the shift lever (with knob and boot) straight up out of the transmission.
11.
Cover the transmission opening with a rag to prevent lubricant contamination.
12.
Secure the shift lever in a vice. Place an open-end wrench at the base of the shift knob and strike with a rubber mallet to remove the knob. Slide
the shift boot off the end of the lever.
13.
Save the boot and knob for re-installation. Discard the shift lever assembly.
INSTALLATION
1.
Clean the shift lever mounting surface on the transmission.
2.
Remove the rag from the transmission opening.
3.
Be sure the shift rail socket is positioned vertically and place the functional end of the new shift lever into the transmission shift rail socket.
4.
Install four new shift lever attaching bolts and tighten to 7-10 ft.lbs. (10-14 N-m).
5.
Depress the clutch pedal and slowly shift the transmission into all gears. If lever is not free to move, or moves without engaging the transmission
gears, remove the shift lever attachment bolts and pull the shift lever assembly straight up out of the transmission. Repeat step # 3.
6.
Place the shift lever boot over the shift lever and secure to floor pan with the four screws previously removed.
7.
Reposition the carpet or mat.
8.
Install the cowl side trim panels and scuff plates.
9.
Install the seats.
10.
Install the seat belt attachment bolts. Tighten the bolts to 22-32 ft.lbs. (29-43 N-m).
11.
Place the shift lever knob in the proper position on the end of the lever. With a rubber mallet, strike the top of the knob lightly until securely seated
on the shift lever.