Bronco II 4WD V6-171 2.8L (1985)

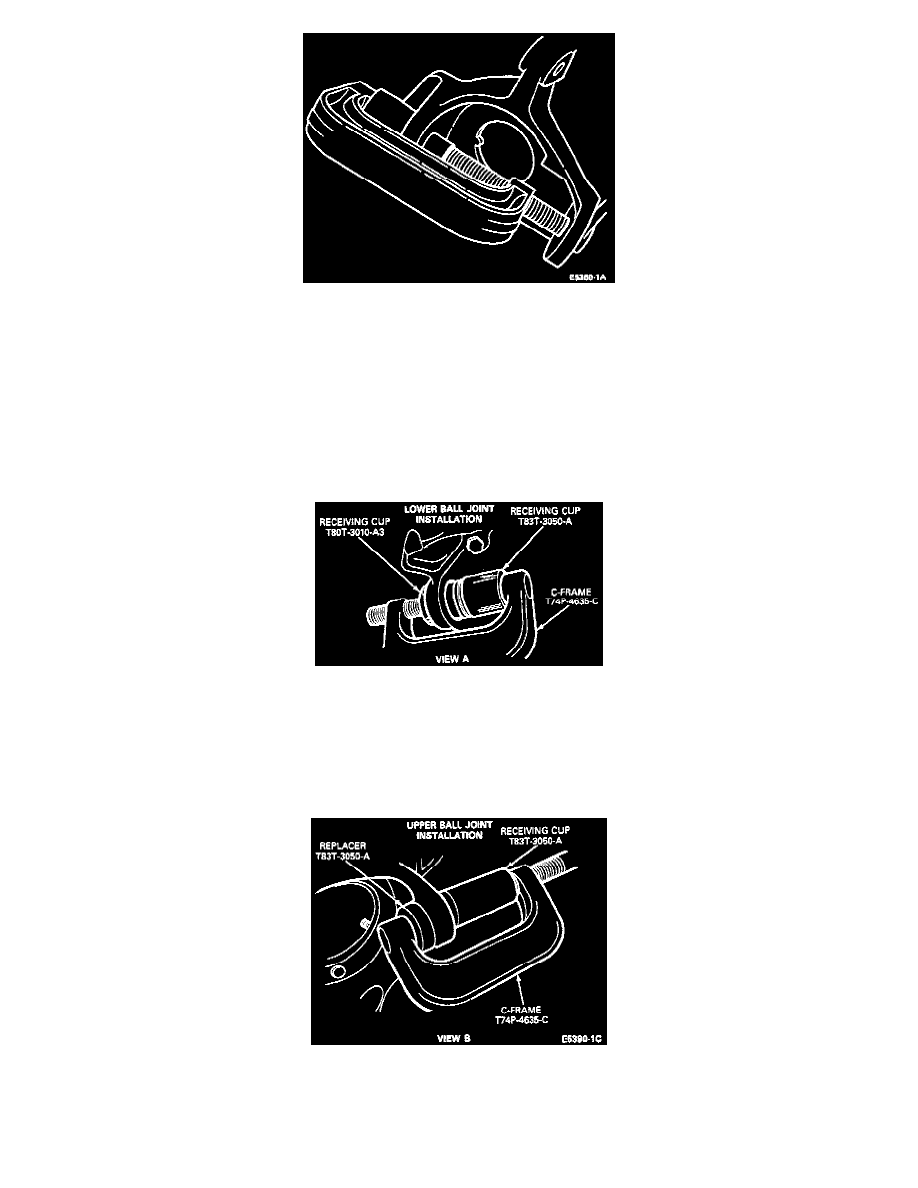
Ball Joint Removal
12. Turn forcing screw clockwise until the upper ball joint is removed from the knuckle.
NOTE: Always remove lower ball joint first.
INSTALLATION
NOTE: The lower ball joint must always be installed first.
1. Clean the steering knuckle bore and insert lower ball joint in knuckle as straight as possible.
Ball Joint Installation
2. Assemble C-Frame, T74P-4635-C, Ball Joint Installer, T83T-3050-A and Receiver Cup T80T-3010-A3 or equivalents to install the lower ball
joint.
3. Turn the forcing screw clockwise until the lower ball joint is firmly seated. Install the snap ring on the lower ball joint.
NOTE: If the ball joint cannot be installed to the proper depth, realignment of the receiver cup and C-Frame tool will be necessary.
Ball Joint Installation
4. To install the upper ball joint, install the C-Frame, T74P-4635-C, Ball Joint Installer, T83T-3050-A and Replacer, T8OT-3010-A3 (or
equivalents) in the knuckle. Turn the forcing screw clockwise until the ball joint is firmly seated.
5. Install the camber adjuster into the support arm. Position the slot in the original position.
