
Bronco II 4WD V6-171 2.8L (1985)
Clutch Master Cylinder: Service and Repair
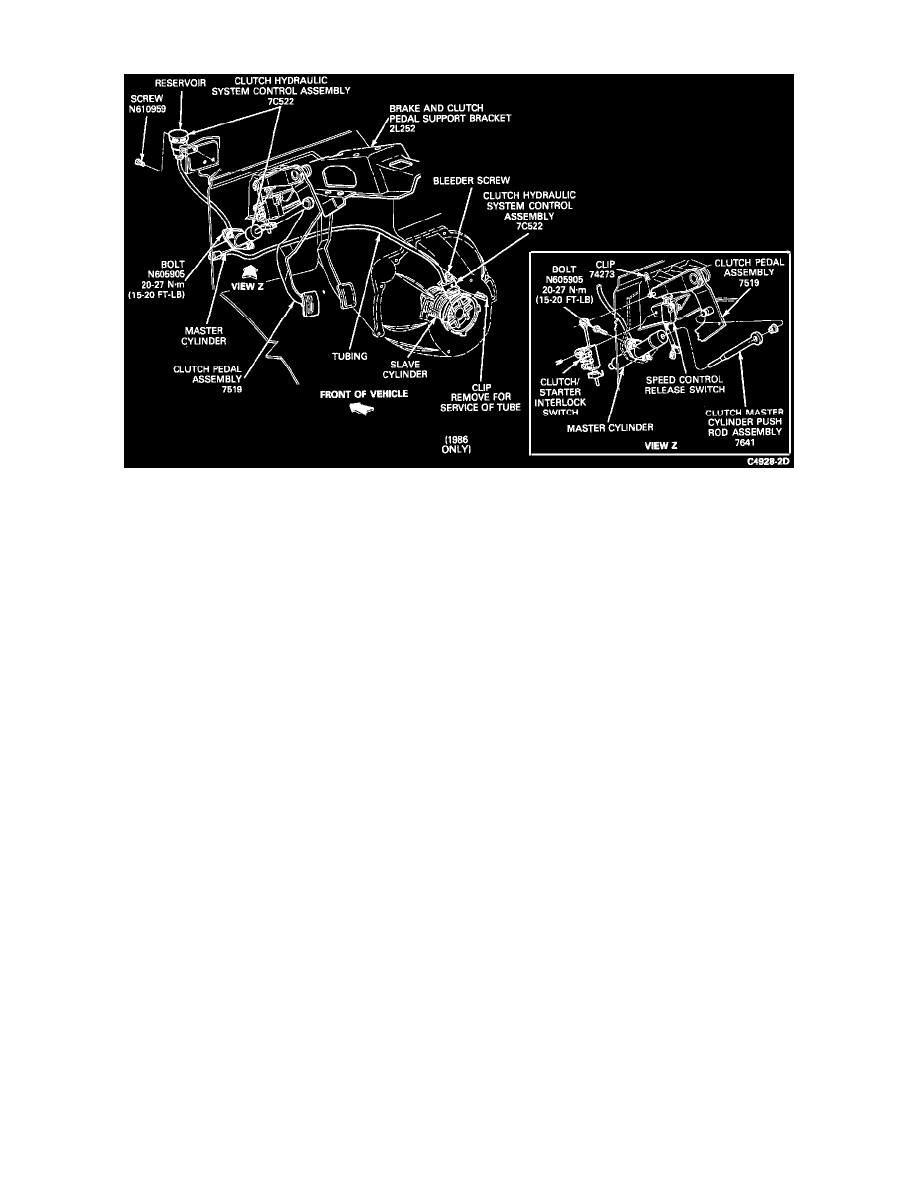
Hydraulic Clutch System
NOTE: The clutch hydraulic system is serviced as a complete unit; it has been bled of air and filled with fluid. Individual components of the system are
not available separately. Bleeding the system should not be attempted and is not recommended.
REMOVAL
1. Remove the lock pin and disconnect the master cylinder push rod from the clutch pedal.
2. Remove the two bolts attaching the master cylinder to the firewall.
3. Remove the two bolts attaching the fluid reservoir to the cowl access cover.
4. Remove the master cylinder from the opening in the firewall and remove the hydraulic system assembly upward from the engine compartment.
5. Remove the clutch housing.
INSTALLATION
1. Install the clutch housing.
2. Position the hydraulic system downward into the engine compartment. The slave to master cylinder tube routing is to be above the brake tubes and
below the steering column shaft.
NOTE: The tube must lay on top of the clutch housing.
3. Insert the master cylinder push rod through the opening in the firewall, position the master cylinder on the firewall, and install the attaching bolts.
Tighten to 21-27 Nm (15-20 ft lbs).
4. Clean and apply a light film of SAE 30 oil to the master cylinder push rod bushing. Install the bushing and push rod to the clutch pedal. Retain
with the lock pin.
5. Check the clutch reservoir and add fluid, if required. Depress the clutch pedal at least 10 times to verify smooth operation and proper clutch
release.
NOTE: The proper fluid level is indicated by a step on the reservoir. DO NOT OVERFILL. The upper portion of the reservoir must accept fluid
that is displaced from the slave cylinder as the clutch wears.