
Contour L4-122 2.0L DOHC VIN 3 SFI (1995)
Suspension Strut / Shock Absorber: Service and Repair
Front
REMOVAL
1. Raise vehicle on hoist.
2. Remove wheel and tire assembly.
3. Hold piston rod with 8 mm Allen wrench. Remove top nut.
4. Disconnect stabilizer bar link from front shock absorber. Remove front brake hose and anti-lock brake sensor wiring from front shock absorber
brackets.
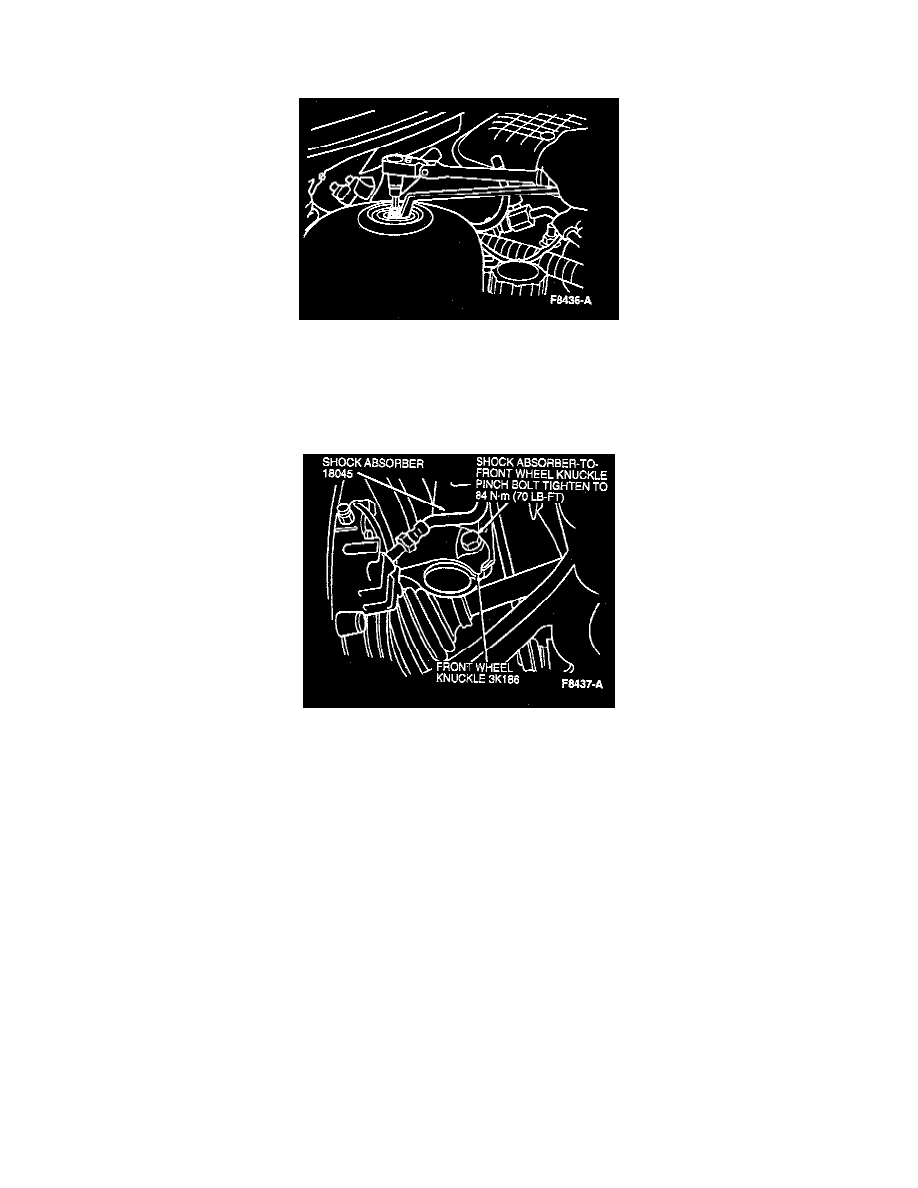
5. Remove knuckle to shock absorber pinch bolt.
6. Remove rear shock absorber service kit.
INSTALLATION
1. Position front shock absorber into strut tower and front wheel knuckle.
2. Install knuckle to shock absorber pinch bolt. Do not tighten bolt at this time.
3. Install top mounting nut. Use an 8 mm Allen wrench to prevent piston rod from turning. Tighten nut to 46 Nm (34 ft. lbs.).
4. Tighten knuckle to shock absorber pinch bolt to 54 Nm (40 ft. lbs.).
CAUTION: Use extreme care to avoid damage to the ball joint seal. If seal is damaged replace the stabilizer bar link assembly.
5. Install stabilizer bar link. Tighten nut to 50 Nm (37 ft. lbs.).
6. Position front brake hose and anti-lock brake sensor wire on front shock absorber.
7. Install wheel and tire assembly. Tighten lug nut to 85 Nm (63 ft. lbs.).
8. Check vehicle alignment.