Contour V6-153 2.5L DOHC (1996)

7. Use a 10 mm wrench to initially tighten nut on ball, then rotate shifter shaft alignment tool until socket can be placed over nut and tighten.
8. Remove pin and shifter shaft alignment tool, then install manual control lever assembly and bolt and tighten.
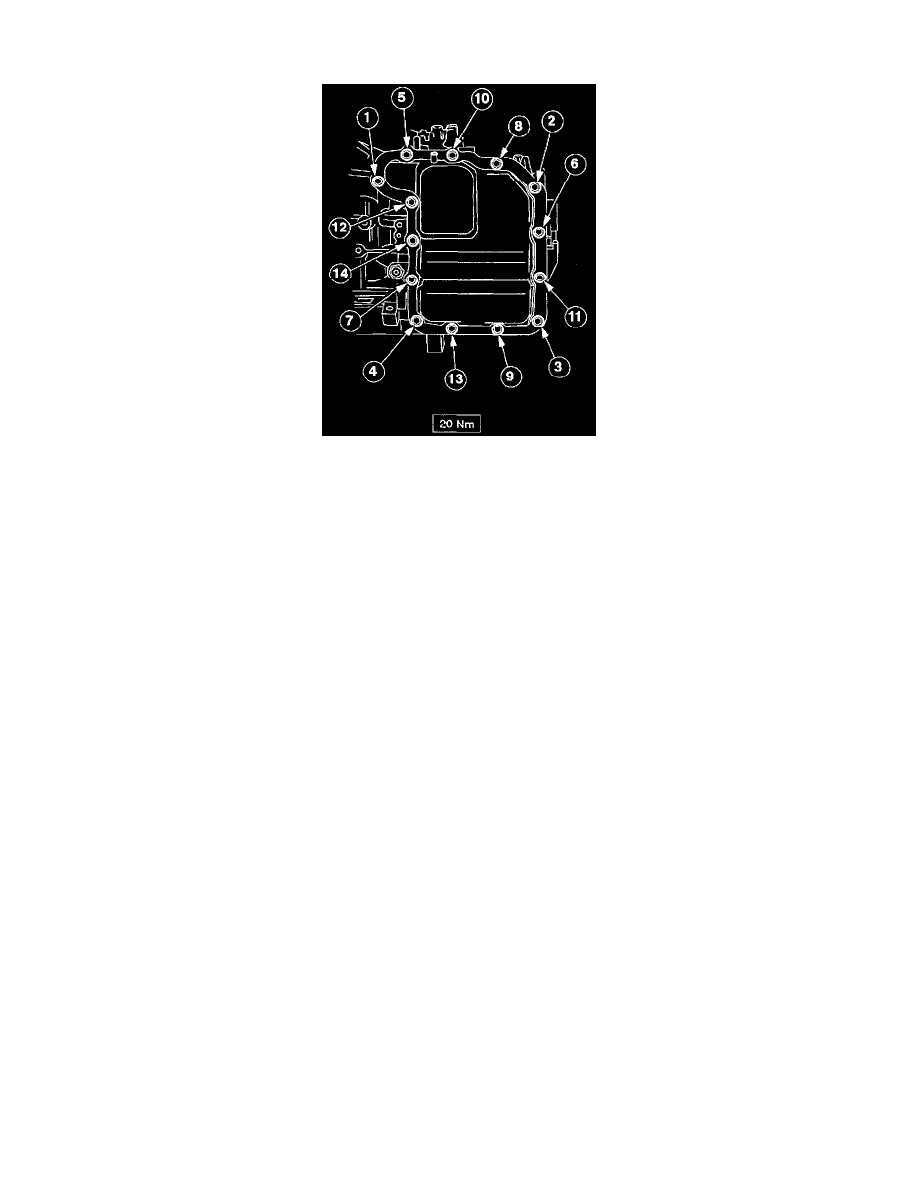
9. Position gasket on main control cover assembly, then install cover assembly on transaxle case. Tighten bolts in sequence shown in the Main
Control Cover Bolt Loosening/tightening Sequence image.
10. Install lefthand front fender splash shield and transaxle drain plug. Tighten plug, then lower vehicle.
11. Connect transaxle electrical connector and battery ground cable, then fill transaxle with suitable ATF.
12. Start vehicle and shift transaxle through all gear ranges, then check and add fluid as required.
