
Crown Victoria V8-281 4.6L SFI (1998)
Fan Shroud: Service and Repair
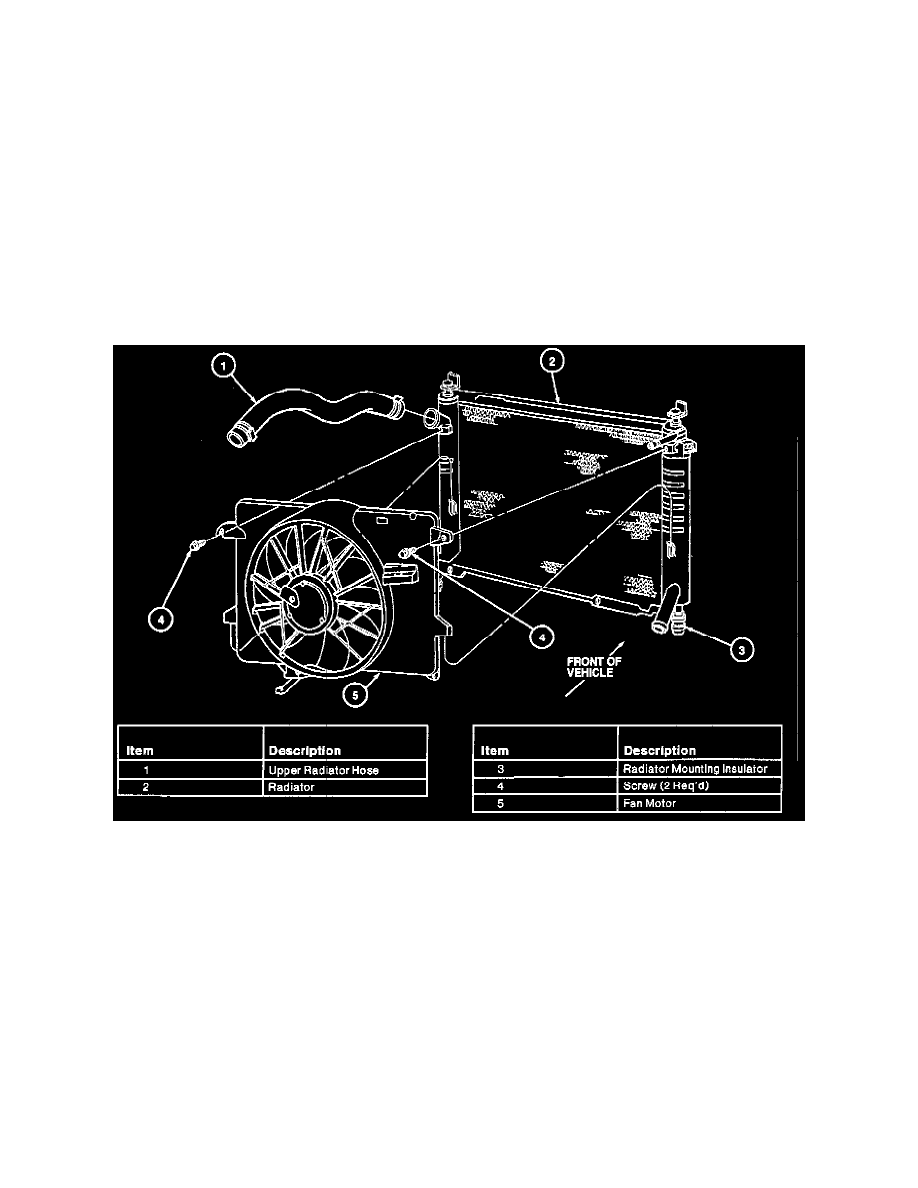
REMOVAL
CAUTION: Do not mix Standard (green) Coolant with Extended Life Coolant (orange). If this contamination occurs the service change interval on
Extended Life Coolant will be reduced from 6 years/150,000 miles to 3 years/30,000 miles.
1. Turn the lower fan shroud in the upper fan shroud to allow clearance for removal of fan shroud.
WARNING: TO AVOID THE POSSIBILITY OF PERSONAL INJURY OR DAMAGE TO THE VEHICLE, DO NOT OPERATE THE
ENGINE WITH THE HOOD OPEN UNTIL THE FAN BLADE HAS BEEN FIRST EXAMINED FOR POSSIBLE CRACKS AND
SEPARATION.
2. Disconnect (pull apart) the electric cooling fan motor wiring connector at the RH side of the fan shroud.
3. Remove the radiator upper sight shield.
4. Loosen the fan shroud from its radiator mounting and remove the lower radiator hose from the supports on the fan shroud.
5. Lift the fan shroud out of the vehicle.
6. Remove electric cooling fan motor and fan blade from fan shroud (if required).
Fan Shroud
INSTALLATION
1. If removed, install electric cooling fan motor and fan blade onto fan shroud. Tighten retaining screws to 3-6 Nm (27-53 inch lbs.).
2. Install the fan shroud into the vehicle.
3. Install the fan shroud into the radiator's lower mounting clips. Install and tighten the fan shroud retaining screws to 3-5 Nm (27-44 inch lbs.).
4. Position the lower radiator hose onto the supports on the fan shroud.
5. Connect the electric cooling fan motor wiring connectors together and secure the wiring to the fan shroud.
6. Turn the lower fan shroud in the upper fan shroud to the closed position.
7. Install the radiator upper sight shield.