
Crown Victoria V8-281 4.6L SFI (1998)
12. Remove bolts and stud bolts retaining valve cover to cylinder head. Remove valve cover.
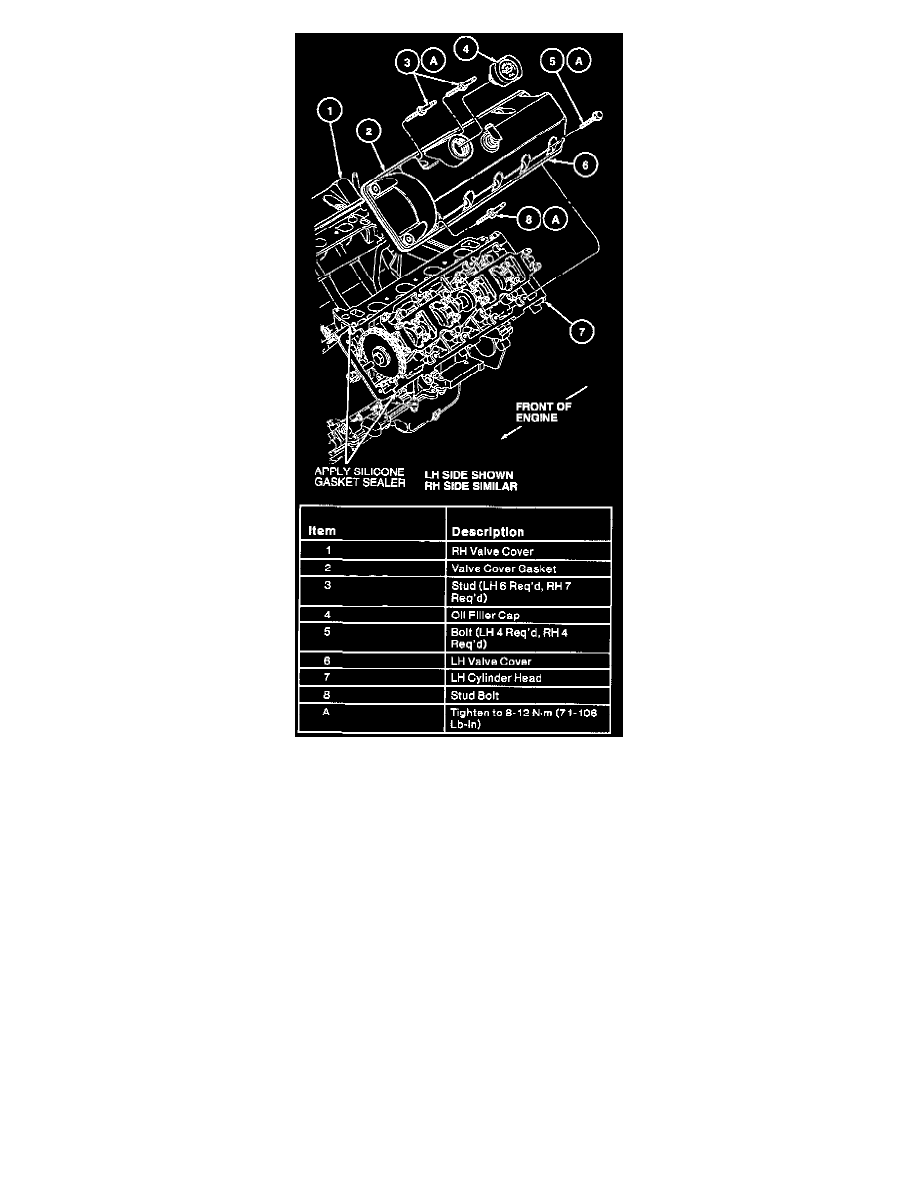
INSTALLATION
1. Clean sealing surfaces of cylinder head, engine front cover and valve cover with metal surface cleaner F4AZ- 19A536-RA or equivalent meeting
Ford specification WSE-M5B392-A in both places where engine front cover meets cylinder head.
NOTE: Valve cover must be installed and tightened to specification within five minutes of applying sealer.
2. Position and, using Gasket and Trim Adhesive F3AZ-19B508-B or equivalent meeting Ford specification ESR-M11P17-A and ESE-M2G52-A,
glue new valve cover gasket onto valve cover. Install valve cover onto cylinder head.
3. Install bolts and studs bolts into valve cover. Tighten studs and bolts to 8-12 Nm (71-106 inch lbs.).
4. Connect fuel charging wiring at 42-pin connector and eight-pin transmission harness connector.
5. Install windshield wiper governor.
6. Connect fuel charging wiring to camshaft position sensor, ignition coils and fuel injectors. Position fuel charging wiring on valve cover studs.
7. Raise vehicle.
8. Position and connect fuel charging wiring to power steering pump and oil pressure sensor. Secure fuel charging wiring to oil filter adapter bracket.
9. Install oil bypass filter.
10. Lower vehicle.
11. Connect fuel lines.
12. Connect battery ground cable.
13. Check oil level. Start engine and check for leaks.