
Crown Victoria V8-281 4.6L SFI (1998)
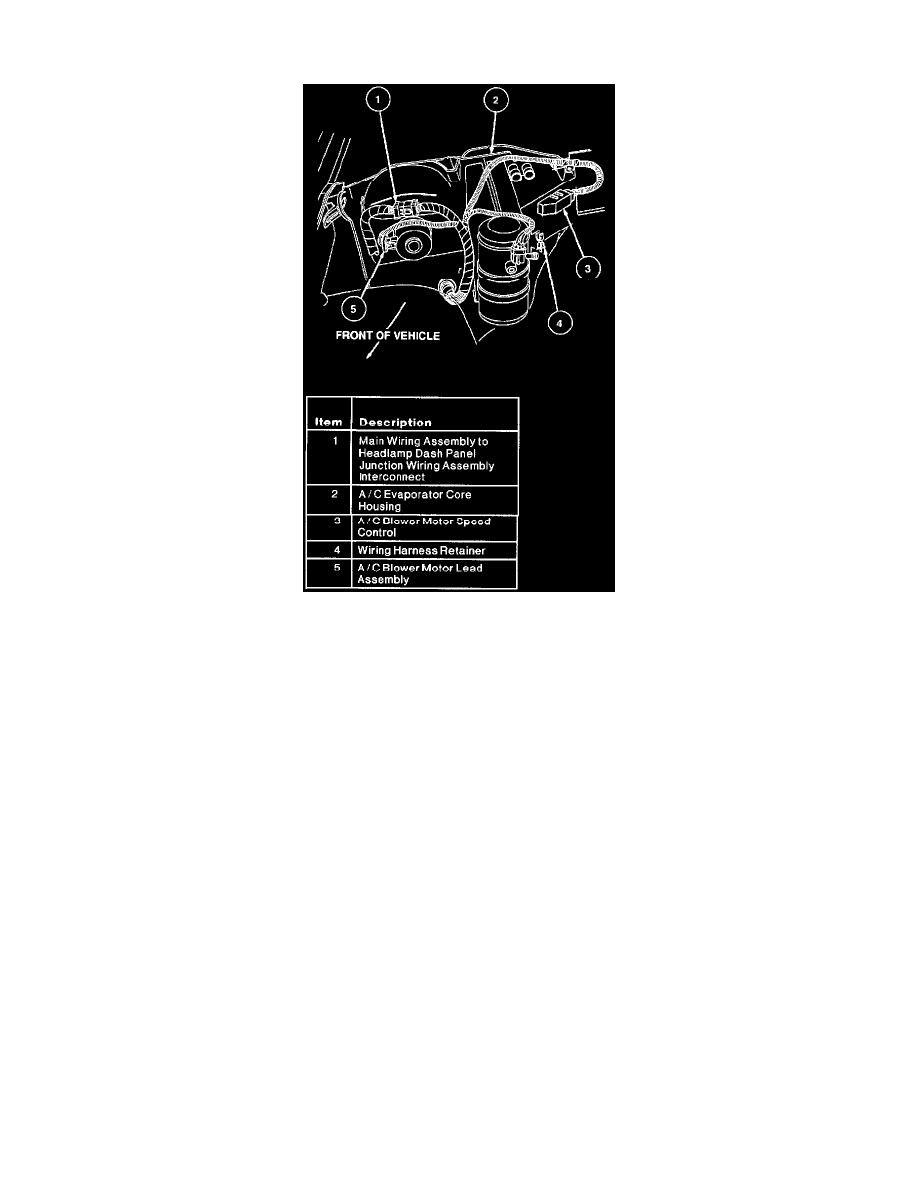
10. Disconnect A/C blower motor lead assembly from the main wiring harness and remove the hard-shell connector from the A/C blower motor speed
control and the A/C cycling switch.
11. Disconnect the main wire harness (which crosses the A/C evaporator core housing) at the hard shell connecting point and position it away from the
A/C evaporator core housing.
12. Remove instrument panel lower insulator from bottom of instrument panel on passenger side by disengaging four push pins and disconnecting
power point electrical connector.
13. Fold carpeting back on the RH side of the floor. Remove the bottom LH screw that supports the A/C recirculating air duct.
14. Remove RH front wheel and tire.
15. Remove retaining bolts from rear of RH fender apron. Position apron down in rear to improve access to A/C evaporator core housing.
16. From the engine side of the dash panel, remove the three nuts (one upper and two lower) from the three evaporator assembly mounting studs. Also
remove the two screws (one drill point and one sheet metal) from the top of the A/C evaporator core housing.