
Crown Victoria V8-4.6L Flex Fuel (2008)
4. CAUTION: Do not use metal scrapers, wire brushes, power abrasive discs or other abrasive means to clean the sealing surface. These
tools cause scratches and gouges that make leak paths. Use a plastic scraping tool to remove all traces of the gasket material.
Loosen the 11 fasteners and remove the LH valve cover and gasket.
^
Clean the valve cover mating surface of the cylinder head with silicone gasket remover and metal surface prep. Follow the directions on the
packaging.
^
Discard the valve cover gasket. Clean the valve cover gasket groove with soap and water or a suitable solvent.
Installation
1. CAUTION: If not secured within 4 minutes, the sealant must be removed and the sealing area cleaned with metal surface cleaner. Allow
to dry until there is no sign of wetness, or 4 minutes, whichever is longer. Failure to follow this procedure may cause future oil leakage.
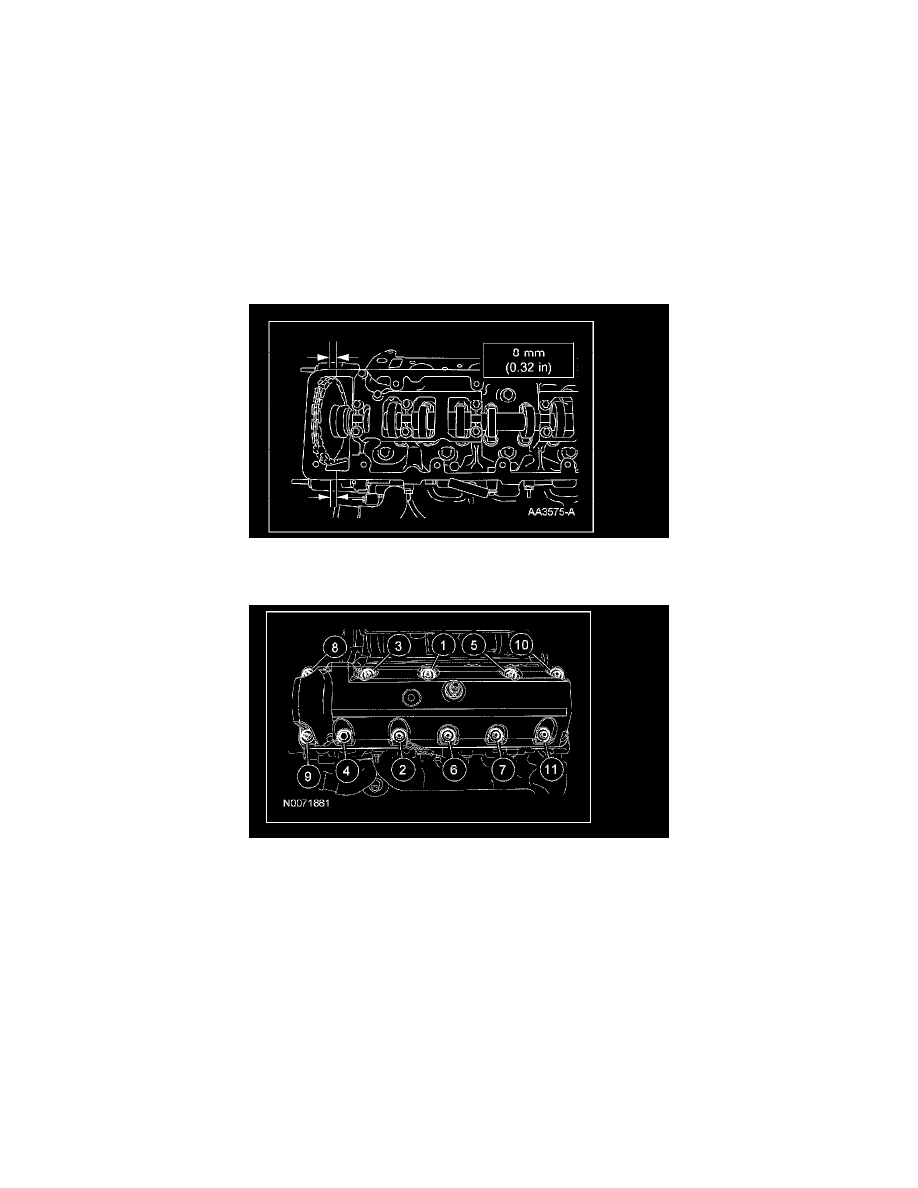
Apply a bead of silicone gasket and sealant in 2 locations shown where the engine front cover meets the cylinder head.
2. Position the LH valve cover and new gasket on the cylinder head.
^
Tighten the fasteners in the sequence shown to 10 Nm (89 inch lbs.).
3. Connect the crankcase ventilation tube quick connect coupling to the valve cover.
4. Position the wire harness and connect the 4 wiring harness retainers to the valve cover.
5. Install the air cleaner and outlet pipe.