
Crown Victoria V8-4.6L Flex Fuel (2008)
7. Remove the nut and position aside the transmission cooler tube assembly.
8. Remove the 3 bolts and position aside the A/C compressor.
9. Remove the catalytic converter-to-exhaust manifold nuts and position aside the catalytic converter flange.
^
Discard the nuts.
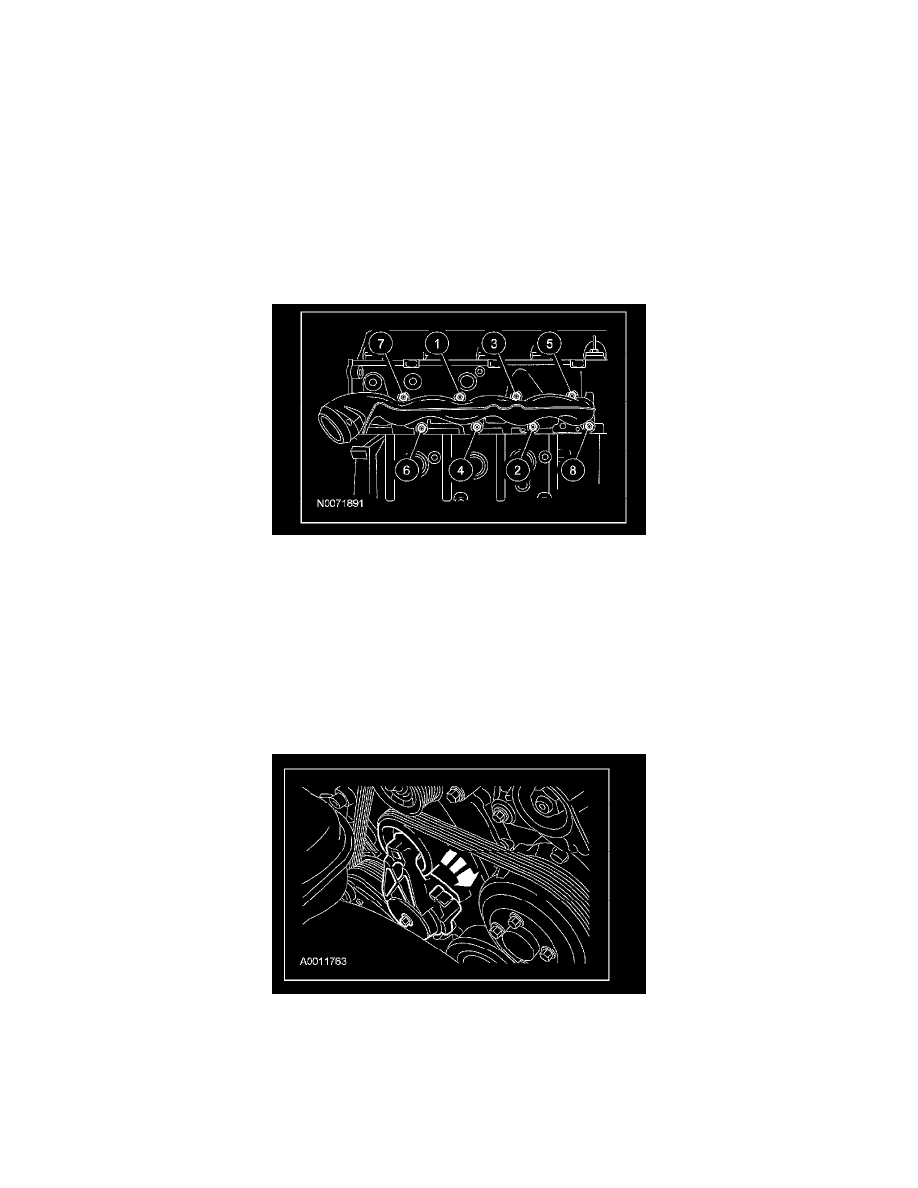
10. Remove the 8 nuts, the exhaust manifold and the gasket.
^
Discard the nuts and gasket.
11. Remove and discard the 8 exhaust manifold studs.
12. Inspect the exhaust manifold for flatness.
Installation
1. Install the 8 new exhaust manifold studs.
^
Tighten to 12 Nm (9 ft. lbs.).
2. Install a new exhaust manifold gasket, the exhaust manifold and 8 new nuts.
^
Tighten in sequence shown to 20 Nm (15 ft. lbs.).
3. Position the catalytic converter flange and install the new catalytic converter-to-exhaust manifold nuts.
^
Tighten to 48 Nm (35 ft. lbs.).
4. Position the A/C compressor and install the 3 bolts.
^
Tighten to 25 Nm (18 ft. lbs.).
5. Position the transmission cooler tube assembly and install the nut.
^
To install, tighten to 9 Nm (80 inch lbs.).
6. Install the transmission cooler tube bracket bolt.
^
To install, tighten to 15 Nm (11 ft. lbs.).
7. Connect the A/C compressor electrical connector.
8. Connect the CKP sensor electrical connector.
9. Rotate the drive belt tensioner clockwise and install the drive belt.
10. Connect the battery ground cable. For additional information, refer to Battery.
11. WARNING: If the vehicle is equipped with a fire suppression system, repower the system. For important safety warnings and
procedures, refer to Fire Suppression System. Failure to follow these instructions may result in serious personal injury.
If equipped with fire suppression system, repower the system.