
Crown Victoria V8-4.6L VIN W (2000)
Evaporative Check Valve: Service and Repair
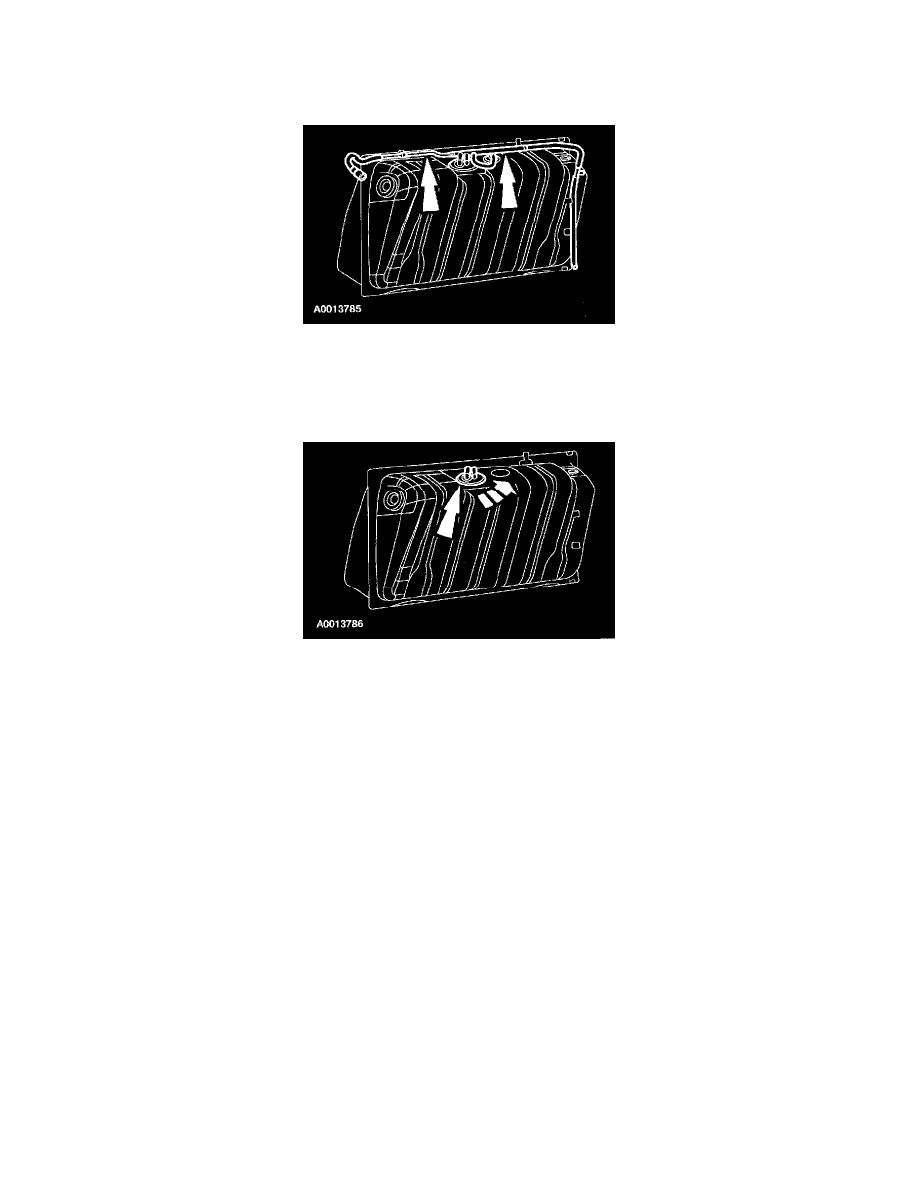
REMOVAL
1. Remove the fuel tank. For additional information, refer to Fuel Delivery and Air Induction. Fuel Tank/Service and Repair. See: Fuel Delivery and
Air Induction/Fuel Tank/Service and Repair
2. Remove the fuel vapor control valve tube assembly.
^
Apply upward pressure on the fuel vapor vent valve.
^
Remove the fuel vapor control valve tube assembly.
CAUTION: The fuel vapor control valve tube assembly and the fuel vapor vent valve are removed as one piece. Do not attempt to separate.
3. Remove the fuel vapor control valve.
^
Push down and rotate counterclockwise.
^
Remove the fuel vapor control valve.
INSTALLATION
1. To install, reverse the removal procedure.
^
Leak test the system. For additional information, refer to Evaporative Emission System Leak Test. See: Testing and Inspection/Component
Tests and General Diagnostics/Component Tests/Evaporative Emission System Leak Test
^
Carry out the evaporative emission repair verification drive cycle. See: Testing and Inspection/Component Tests and General
Diagnostics/Component Tests/Evaporative Emission Repair Verification Drive Cycle
NOTE: Lubricate all O-ring seals with MERPOL(R) O-Ring Seal Lubricant or equivalent meeting Ford specification ESE-M99B144-B.