
E 150 V8-4.6L VIN W (2006)
Transmission Cooler: Testing and Inspection
Torqshift - Automatic Transmission
Transmission Fluid Cooler
Transmission Fluid Cooler
Special Tool(s)
NOTE: Cleaning and backflushing the transmission fluid cooling system along with following all the normal cleaning and inspection procedures
during disassembly and reassembly will keep contamination from entering the transmission, causing a repeat repair.
When internal wear or damage has occurred in the transmission, metal particles or clutch plate material may have been carried into the torque
converter and transmission fluid cooler. These contaminants are a major cause of recurring transmission troubles and must be removed from the
system before the transmission is put back into use.
Transmission Fluid Cooler Flow Test
NOTE: The transmission linkage/cable adjustment, fluid level and line pressure must be within specification before carrying out this test. Refer to
Fluid Level Check under Verification of Condition. Refer to Line Pressure Test under Special Testing Procedures. For shift linkage/cable adjustment
procedures, refer to Automatic Transaxle/Transmission External Controls. See: Transmission Control Systems/Testing and Inspection/Component
Tests and General Diagnostics/Torqshift - Automatic Transmission/Fluid Level Check See: Transmission Control Systems/Testing and
Inspection/Component Tests and General Diagnostics/Torqshift - Automatic Transmission/Non-Trouble Code Procedures/Line Pressure Test See:
Specifications/Mechanical Specifications/External Controls
1. Remove the fluid level indicator from the fluid filler tube.
2. Place a funnel in the fluid filler tube.
3. Raise and support the vehicle.
4. Disconnect the cooler return tube (rear fitting) from the transmission case.
5. Connect one end of a hose to the cooler return tube and route the other end of the hose up to a point where it can be inserted into the funnel at the
fluid filler tube.
6. Remove the supports and lower the vehicle.
7. Insert the end of a hose into the funnel.
8. Start the engine and run at idle with the transmission in the NEUTRAL range.
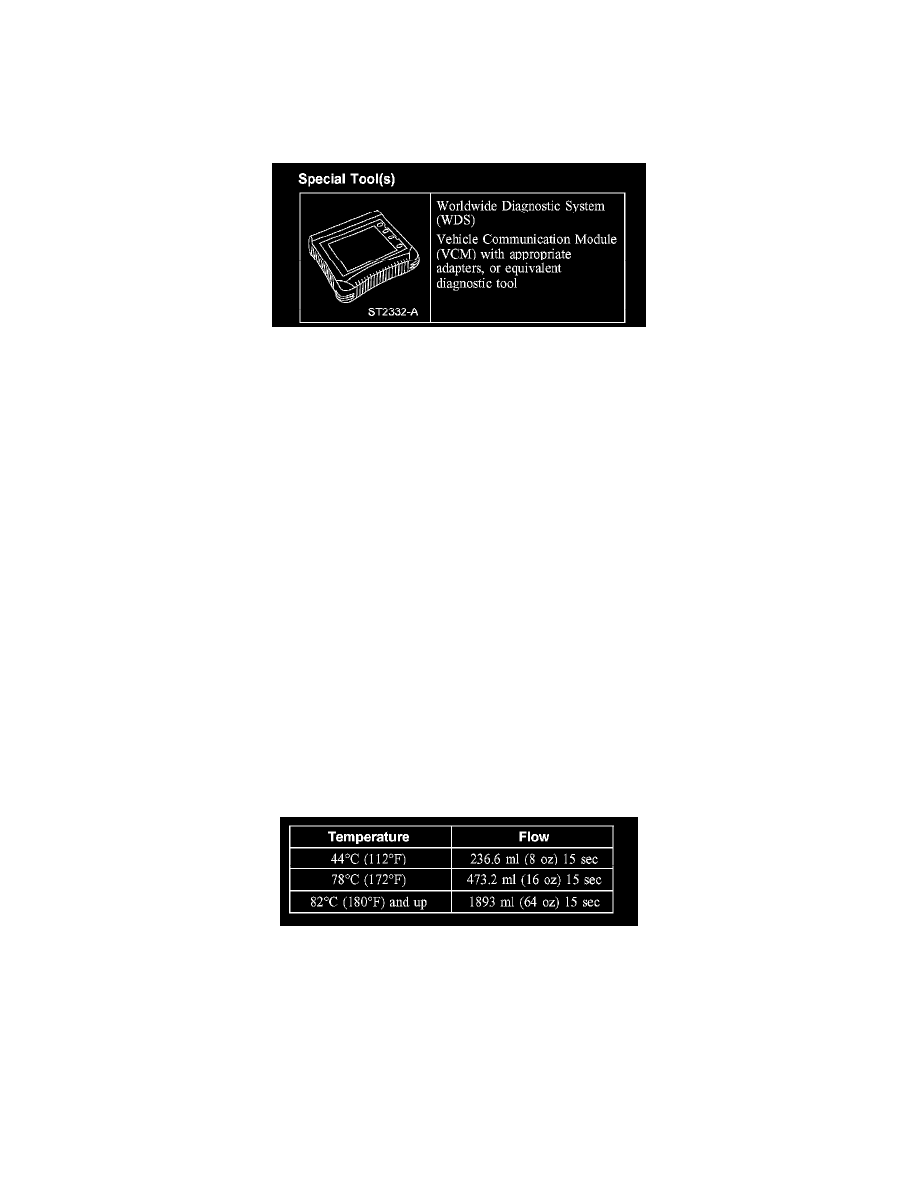
9. Once a steady flow of fluid (without air bubbles) is observed, remove the hose from the funnel and place the hose in a measuring container for 15
seconds. After 15 seconds, place the hose back into the funnel and turn the engine off. Measure the amount of fluid in the container.
There is a temperature valve in the pump. Cooler flow rates will vary according to automatic transmission fluid temperature. The use of a
diagnostic tool will determine the actual fluid temperature. If adequate flow is observed into the container, the test is now complete.
10. If adequate flow is not observed, turn off the engine. Disconnect the hose from the cooler return line (transmission inlet).
11. Disconnect the fluid cooler line from the front case fitting and connect the hose to the case fitting (converter out) and repeat Steps 7, 8 and 9.
12. If adequate flow is not observed from the transmission, look for a plugged or crushed cooler line, plugged remote filter manifold orifice, and/or
fluid cooler. Refer to Transaxle/Transmission Cooling for diagnosis of the transmission fluid cooler.
13. If adequate flow is still not observed, repair and/or installation of a new pump and/or torque converter may be required.
For the installation of new transmission fluid cooler tubes, refer to Transaxle/Transmission Cooling.
Transmission Fluid Cooler Backflushing and Cleaning