
E 150 1/2 Ton Van V6-4.2L VIN 2 (1997)
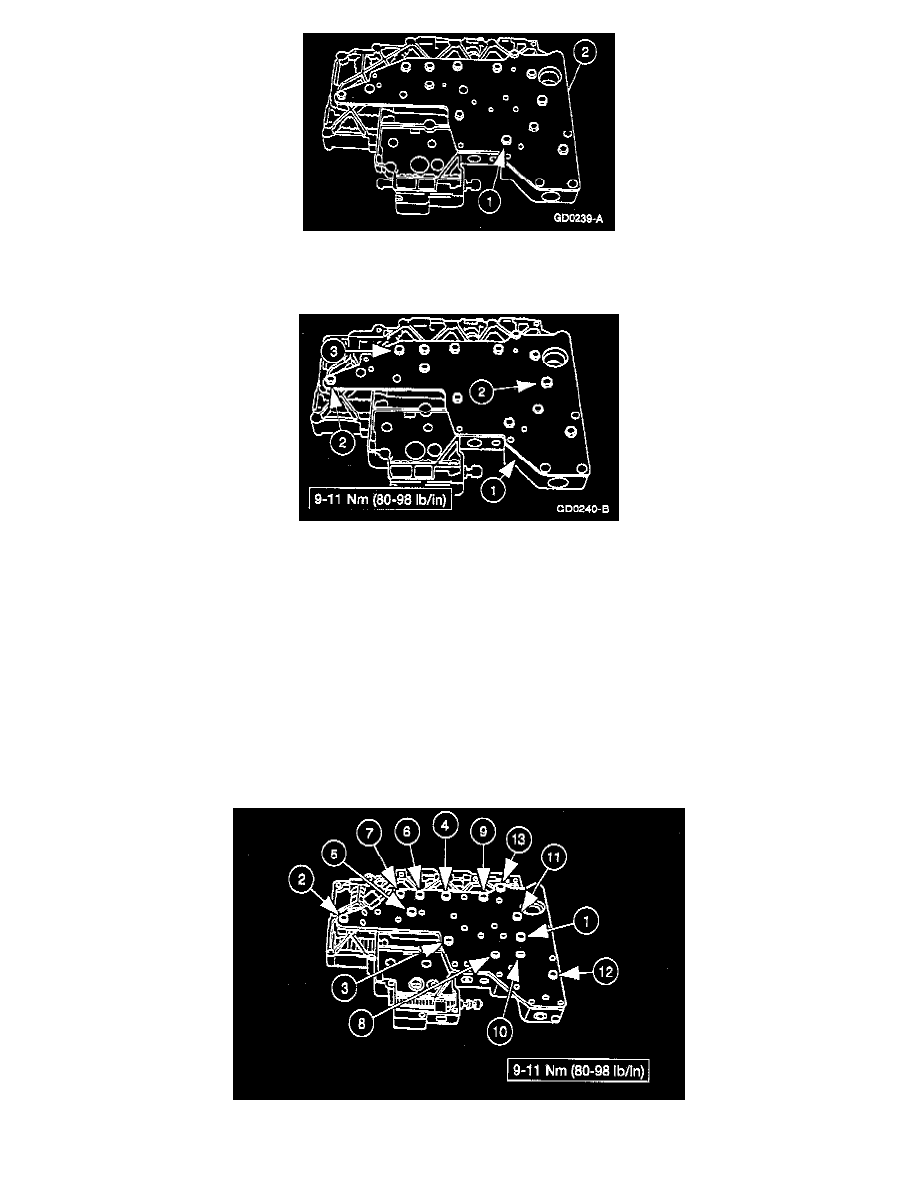
6. Remove the main control valve body cover plate.
(1) Remove the thirteen bolts.
(2) Remove the valve body cover plate and gasket.
ASSEMBLY
1. Install the valve body cover plate.
(1) Position the valve body cover plate gasket and cover plate.
(2) Install the two guide pin bolts.
(3) Install the valve body cover plate bolts.
NOTE: Before beginning assembly, perform/inspect the following:
-
When building up subassemblies and assembling the transmission, ALWAYS use new gaskets and seals.
-
All fasteners must be tightened to the torque specification indicated.
-
When building up subassemblies, each component part should be lubricated with clean transmission fluid. It is also good practice to
lubricate the subassemblies as they are installed in the case.
-
Needle bearings, thrust washers and seals should be lightly coated with petroleum jelly during subassembly buildup or transmission
assembly.
-
Many components and surfaces in the transmission are precision machined. Careful handling during disassembly, cleaning, inspection and
assembly can prevent unnecessary damage to machined surfaces.
2. Tighten the valve body cover plate bolts.