
E 250 3/4 Ton Van V8-5.4L CNG VIN M (1997)
e.
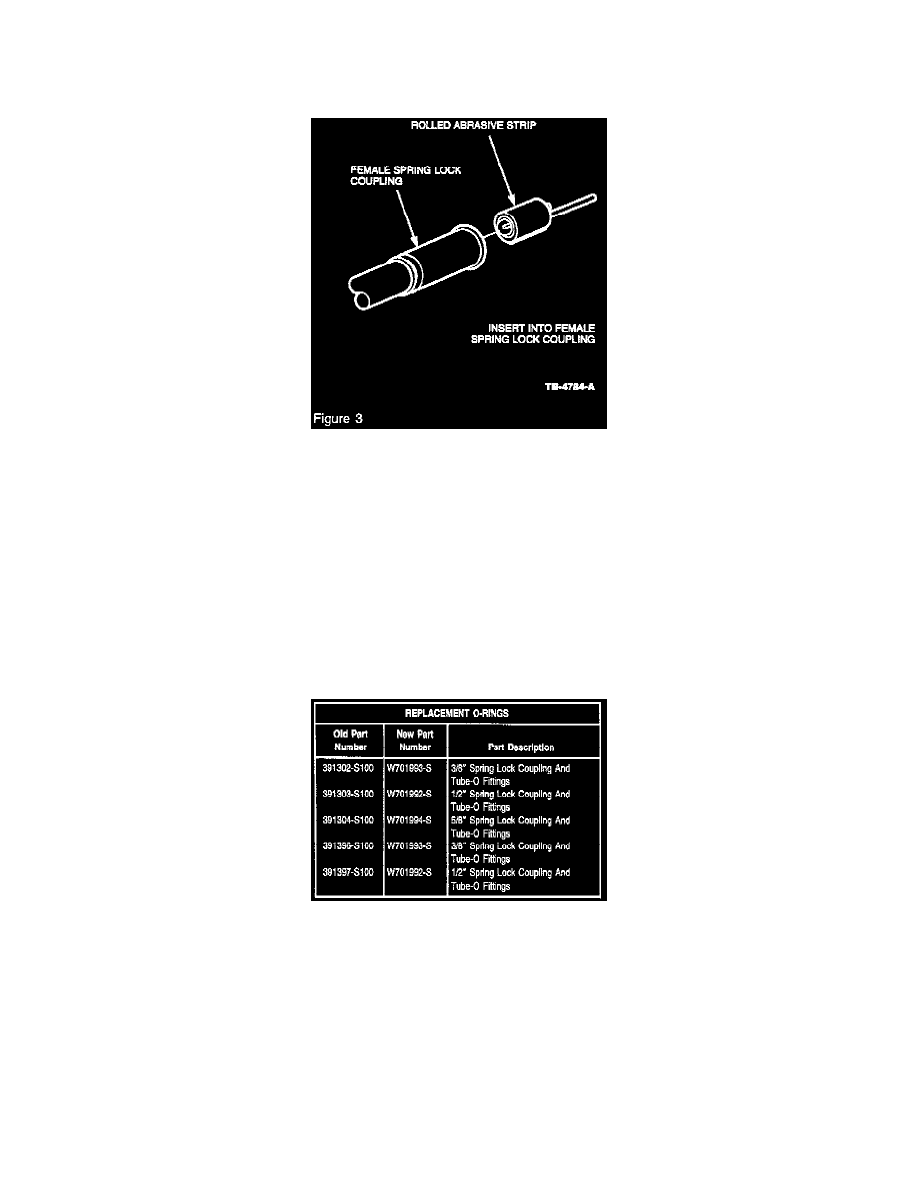
Insert completed assembly into drill and tighten chuck securely.
f.
Coat the abrasive strip in appropriate refrigerant oil.
g.
Roll abrasive strip around cleaning tool (Figure 3).
NOTE:
DO NOT ALLOW THE DRILL SPEED TO EXCEED 1500 RPM AS TOOL SEPARATION MAY OCCUR.
h.
Using a variable speed drill set at a low speed, slowly insert cleaning assembly into the female coupling. Clean using a moderate speed for
approximately 1 minute or until surface is clean. Maintain low speed drill rotation while removing the cleaning assembly to prevent axial
scratches, which may cause future leaks.
NOTE:
IT IS IMPORTANT TO USE A LINT FREE CLOTH TO PREVENT MATERIAL FIBERS FROM REMAINING ON THE 0-RING SEALING
SURFACE AND CAUSING FUTURE LEAKS.
i.
Remove all cleaning residue from the coupling using a lint free cloth.
j.
Inspect O-ring sealing surface for grooves. If grooves or scratches cannot be removed, replace the component.
5.
Inspect the male SLC O-ring grooves for scratches, corrosion, or debris from O-ring deterioration. Remove any surface residue from the O-ring
grooves by cleaning using the following procedure (Steps 5a-5b):