
E 250 3/4 Ton Van V8-5.4L CNG VIN M (1997)
(3) Rotate the driveshaft slip yoke.
(4) Press on the spider to remove the remaining bearing cup.
(5) Remove the driveshaft slip yoke.
NOTE: If necessary, use a pair of pliers to remove a bearing cup if it cannot be pressed out all the way.
6. Repeat Step 5 to remove the remaining bearing cups, spiders and driveshaft flange yoke from the driveshaft.
7. Clean the yoke area at each end of the driveshaft.
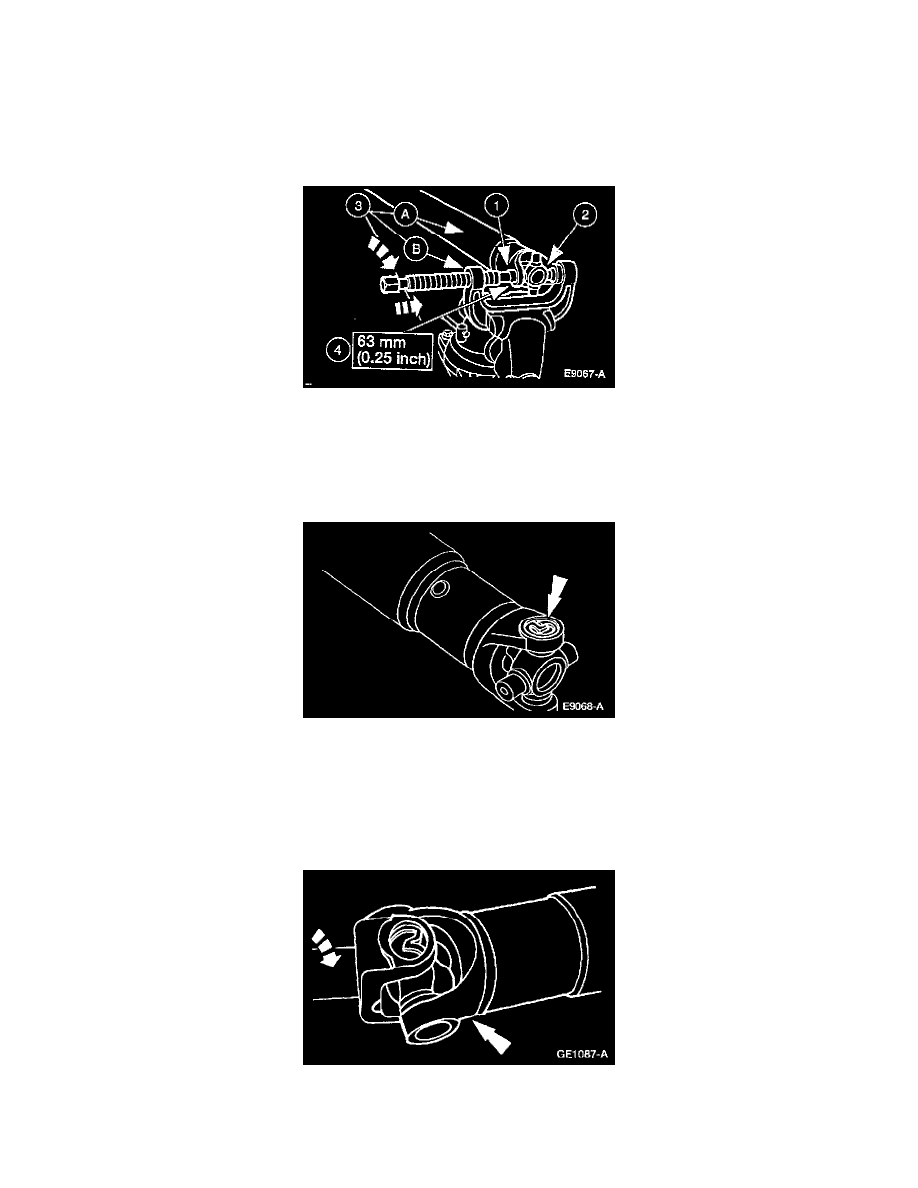
ASSEMBLY
1. Install the bearing cup.
(1) Start a new bearing cup yoke.
(2) Position the new spider in the driveshaft yoke.
(3) Position the (A) driveshaft in (B) U-Joint Tool.
(4) Press the bearing cup below the yoke surface. into the driveshaft
2. Remove the driveshaft from the U-Joint Tool and install the snap ring.
NOTE: Use the yellow snap rings supplied in the kit to assemble the rear axle shaft universal joint (U joint). If difficulty is encountered with the
yellow snap rings, install the black snap rings.
3. Repeat Steps 1 and 2 for the opposite side of the driveshaft yoke.
4. Repeat Steps 1 through 3 to install the remaining new bearing cups, spider, driveshaft slip yoke, driveshaft flange yoke and snap rings.
5. Check the U-joints for freedom of movement.
-
If binding, strike the yoke with a brass or plastic hammer.
CAUTION: Do not strike the bearings.