
E 250 Van V8-7.3L DSL (1988)
Evaporator Core: Service and Repair
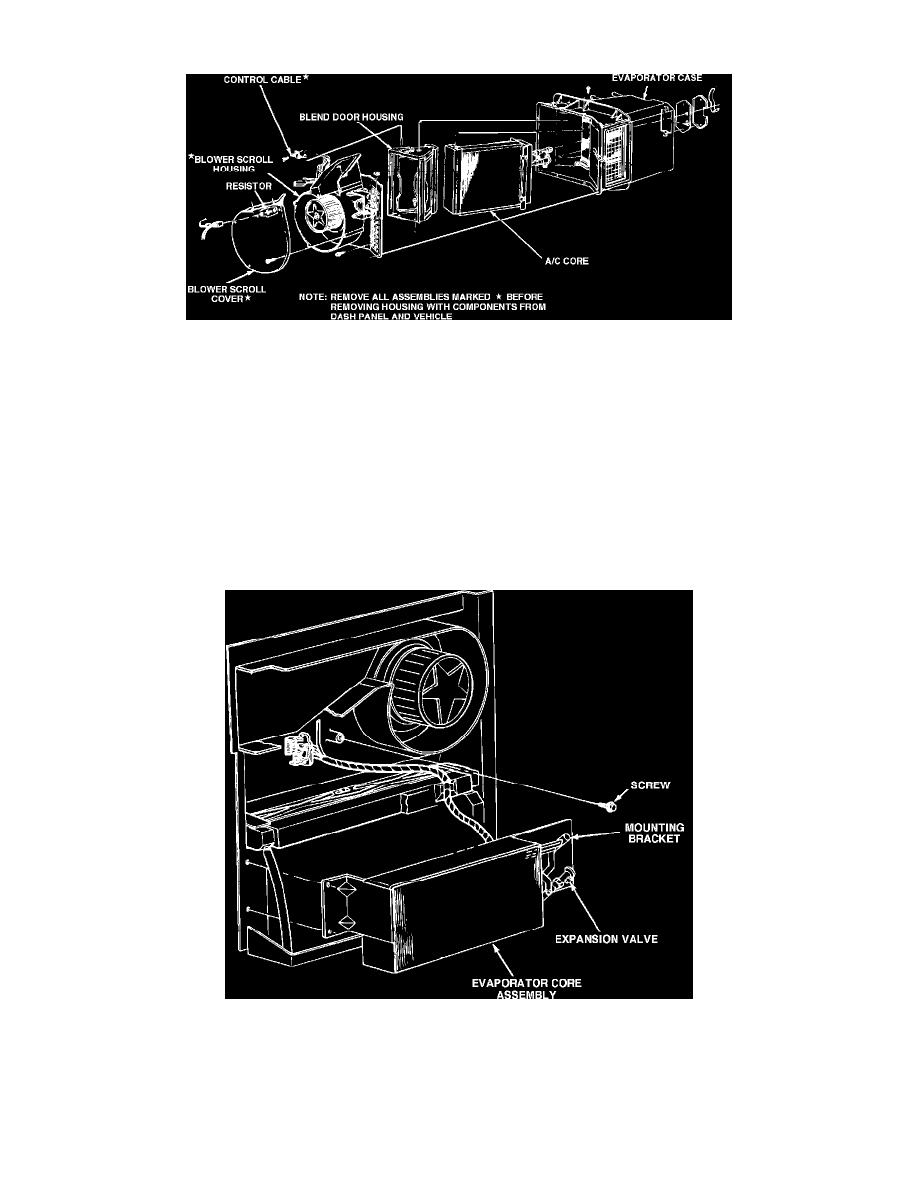
Fig. 14 Standard evaporator core removal
Standard Evaporator
1.
Disconnect blower resistor wiring and vacuum line from outside recirculated door vacuum motor, Fig. 14.
2.
Remove A/C blower cover. Then remove push nut from outside recirculated door shaft.
3.
Disconnect control cable from evaporator housing. Remove A/C blower housing.
4.
Partially drain engine coolant and disconnect heater hoses from heater core.
5.
Remove battery from vehicle. Discharge refrigerant from system.
6.
Disconnect refrigerant lines from evaporator core. Plug all open connections to prevent entry of dirt and moisture into system.
7.
Remove drain tube from bottom of evaporator case assembly. Then remove evaporator assembly from dash, Fig. 14.
8.
Remove blend door and housing. Then remove insulation tape from expansion valve bulb.
9.
Remove evaporator tube retainer and seal, then the de-icing switch and evaporator core.
10.
Reverse procedure to install. Use new O-rings lubricated with refrigerant oil.
11.
Evacuate, charge and leak test system. Check for proper operation.
Fig. 15 Auxiliary evaporator core removal
Auxiliary Evaporator
1.
Remove first bench seat, if equipped.
2.
Remove cover assembly, Fig. 15.
3.
Discharge refrigerant from system.
4.
Disconnect refrigerant lines from evaporator core. Plug all open connections to prevent entry of dirt and moisture into system.
5.
On models equipped with an auxiliary heater, disconnect and plug heater hoses from auxiliary heater core.